Installing and using Forklift 2.10
- About the Forklift
- Cold migration and warm migration in Forklift
- Warm migration precopy stage
- Preparing the cutover stage for a warm migration
- Migration speed comparison
- About cold and warm migration
- Cold migration
- Warm migration
- Precopy stage
- Cutover stage
- Advantages and disadvantages of cold and warm migrations
- Conclusions
- Power status of virtual machines during cold migrations
- Power status of virtual machines during warm migrations
- Advantages and disadvantages of cold and warm migrations
- Conclusions
- About live migration
- Prerequisites and software requirements for all providers
- Specific software requirements for each provider
- Installing and configuring the Forklift Operator
- Migrating virtual machines by using the OKD web console
- Migrating virtual machines from VMware vSphere
- Adding a VMware vSphere source provider
- Selecting a migration network for a VMware source provider
- Adding a KubeVirt destination provider
- Selecting a migration network for a KubeVirt provider
- Creating a VMware vSphere migration plan by using the MTV wizard
- Running a migration plan in the MTV UI
- Migration plan options
- About network maps in migration plans
- About storage maps in migration plans
- Canceling a migration
- Migrating virtual machines from oVirt
- Adding an oVirt source provider
- Adding a KubeVirt destination provider
- Selecting a migration network for a KubeVirt provider
- Creating a Red Hat Virtualization migration plan by using the MTV wizard
- Running a migration plan in the MTV UI
- Migration plan options
- About network maps in migration plans
- About storage maps in migration plans
- Canceling a migration
- Migrating virtual machines from OpenStack
- Adding an OpenStack source provider
- Adding a KubeVirt destination provider
- Selecting a migration network for a KubeVirt provider
- Creating an OpenStack migration plan by using the MTV wizard
- Running a migration plan in the MTV UI
- Migration plan options
- About network maps in migration plans
- About storage maps in migration plans
- Canceling a migration
- Migrating virtual machines from OVA
- Adding an Open Virtual Appliance (OVA) source provider
- Adding a KubeVirt destination provider
- Selecting a migration network for a KubeVirt provider
- Creating an Open Virtualization Appliance (OVA) migration plan by using the MTV wizard
- Running a migration plan in the MTV UI
- Migration plan options
- About network maps in migration plans
- About storage maps in migration plans
- Canceling a migration
- Migrating virtual machines from KubeVirt
- Adding a Red Hat KubeVirt source provider
- Adding a KubeVirt destination provider
- Selecting a migration network for a KubeVirt provider
- Creating an KubeVirt migration plan by using the MTV wizard
- Running a migration plan in the MTV UI
- Migration plan options
- About network maps in migration plans
- About storage maps in migration plans
- Canceling a migration
- Migrating virtual machines from the command line
- Permissions needed by non-administrators to work with migration plan components
- Running a VMware vSphere migration from the command-line
- Running a oVirt migration from the command-line
- Running an OpenStack migration from the command-line
- Running an Open Virtual Appliance (OVA) migration from the command-line
- Advanced migration options
- Upgrading Forklift
- Uninstalling Forklift
- Forklift performance recommendations
- Ensure fast storage and network speeds
- Ensure fast datastore read speeds to ensure efficient and performant migrations
- Endpoint types
- Set ESXi hosts BIOS profile and ESXi Host Power Management for High Performance
- Avoid additional network load on VMware networks
- Control maximum concurrent disk migrations per ESXi host
- Migrations are completed faster when migrating multiple VMs concurrently
- Migrations complete faster using multiple hosts
- Multiple migration plans compared to a single large migration plan
- Maximum values tested for cold migrations
- Warm migration recommendations
- Maximum values tested for warm migrations
- Recommendations for migrating VMs with large disks
- Increasing AIO sizes and buffer counts for NBD transport mode
- Troubleshooting
- Architecture
- Logs and custom resources
- Telemetry
- Additional information
About the Forklift
You can use the Forklift to migrate virtual machines (VMs) from the following source providers to KubeVirt destination providers:
-
VMware vSphere
-
oVirt
-
OpenStack
-
Open Virtual Appliances (OVAs) that were created by VMware vSphere
-
Remote KubeVirt clusters
Types of migration
Forklift supports three types of migration: cold, warm, and live.
Cold migration is available for all of the source providers listed above. This type of migration migrates VMs that are powered off and does not require common stored storage.
Warm migration is available only for VMware vSphere and oVirt. This type of migration migrates VMs that are powered on and does require common stored storage.
These two types of migration are discussed in detail in About cold and warm migration.
Live migration is available only for migrations between KubeVirt clusters or between namespaces on the same KubeVirt cluster. It requires Forklift version 2.10 or later and KubeVirt version 4.20 or later.
Live migration is discussed in detail in About live migration.
|
Live migration is a Technology Preview feature only. Technology Preview features are not supported with Red Hat production service level agreements (SLAs) and might not be functionally complete. Red Hat does not recommend using them in production. These features provide early access to upcoming product features, enabling customers to test functionality and provide feedback during the development process. For more information about the support scope of Red Hat Technology Preview features, see https://access.redhat.com/support/offerings/techpreview/. |
Cold migration and warm migration in Forklift
Cold migration is when a powered off virtual machine (VM) is migrated to a separate host. The VM is powered off, and there is no need for common shared storage.
Warm migration is when a powered on VM is migrated to a separate host. A source host state is cloned to the destination host.
Warm migration precopy stage
-
Create an initial snapshot of running VM disks.
-
Copy first snapshot to target: full-disk transfer, the largest amount of data copied. It takes more time to complete.
-
Copy deltas: changed data, copying only data that has changed since the last snapshot was taken. It takes less time to complete.
-
Create a new snapshot.
-
Copy the delta between the previous snapshot and the new snapshot.
-
Schedule the next snapshot, configurable by default, one hour after the last snapshot finished.
-
-
An arbitrary number of deltas can be copied.
Preparing the cutover stage for a warm migration
-
Scheduled time to finalize warm migration.
-
Shut down the source VM.
-
Copy the final snapshot delta to the target.
-
Continue in the same way as cold migration.
-
Guest conversion.
-
Starting target VM (optional).
-
Migration speed comparison
If you compare the migration speeds of cold and warm migrations, you can observe that:
-
The observed speeds for the warm migration single disk transfer and disk conversion are approximately the same as for the cold migration.
-
The benefit of warm migration is that the transfer of the snapshot happens in the background while the VM is powered on.
-
The default snapshot time is taken every 60 minutes. If VMs change substantially, more data needs to be transferred than in cold migration when the VM is powered off.
-
The cutover time, meaning the shutdown of the VM and last snapshot transfer, depends on how much the VM has changed since the last snapshot.
|
Live migration reduces downtime even further than warm migration, but live migration is available only for migration between KubeVirt clusters or between namespaces on the same KubeVirt cluster. Therefore it is not included in the comparison above. |
About cold and warm migration
Forklift supports cold and warm migration as follows:
Forklift supports cold migration from the following source providers:
-
VMware vSphere
-
oVirt
-
OpenStack
-
Open Virtual Appliances (OVAs) that were created by VMware vSphere
-
Remote KubeVirt clusters
Forklift supports warm migration from the following source providers:
-
VMware vSphere
-
oVirt
Cold migration
Cold migration is the default migration type. The source virtual machines are shut down while the data is copied.
|
VMware only: In cold migrations, in situations in which a package manager cannot be used during the migration, Forklift does not install the To enable Forklift to automatically install If that is not possible, use your preferred automated or manual procedure to install |
Warm migration
Most of the data is copied during the precopy stage while the source virtual machines (VMs) are running.
Then the VMs are shut down and the remaining data is copied during the cutover stage.
Precopy stage
The VMs are not shut down during the precopy stage.
The VM disks are copied incrementally by using changed block tracking (CBT) snapshots. The snapshots are created at one-hour intervals by default. You can change the snapshot interval by updating the forklift-controller deployment.
|
You must enable CBT for each source VM and each VM disk. A VM can support up to 28 CBT snapshots. If the source VM has too many CBT snapshots and the |
The precopy stage runs until the cutover stage is started manually or is scheduled to start.
Cutover stage
The VMs are shut down during the cutover stage and the remaining data is migrated. Data stored in RAM is not migrated.
You can start the cutover stage manually by using the Forklift console or you can schedule a cutover time in the Migration manifest.
Advantages and disadvantages of cold and warm migrations
The table that follows offers a more detailed description of the advantages and disadvantages of cold migration and warm migration. It assumes that you have installed Red Hat Enterprise Linux (RHEL) 9 on the OKD platform on which you installed Forklift:
| Cold migration | Warm migration | |
|---|---|---|
Duration |
Correlates to the amount of data on the disks. Each block is copied once. |
Correlates to the amount of data on the disks and VM utilization. Blocks may be copied multiple times. |
Fail fast |
Convert and then transfer. Each VM is converted to be compatible with OKD and, if the conversion is successful, the VM is transferred. If a VM cannot be converted, the migration fails immediately. |
Transfer and then convert. For each VM, Forklift creates a snapshot and transfers it to OKD. When you start the cutover, Forklift creates the last snapshot, transfers it, and then converts the VM. |
Tools |
|
Containerized Data Importer (CDI), a persistent storage management add-on, and |
Data transferred |
Approximate sum of all disks |
Approximate sum of all disks and VM utilization |
VM downtime |
High: The VMs are shut down, and the disks are transferred. |
Low: Disks are transferred in the background. The VMs are shut down during the cutover stage, and the remaining data is migrated. Data stored in RAM is not migrated. |
Parallelism |
Disks are transferred sequentially for each VM. For remote migration to a destination that does not have Forklift installed, disks are transferred in parallel using CDI. |
Disks are transferred in parallel by different pods. |
Connection use |
Keeps the connection to the Source only during the disk transfer. |
Keeps the connection to the Source during the disk transfer, but the connection is released between snapshots. |
Tools |
Forklift only. |
Forklift and CDI from KubeVirt. |
|
The preceding table describes the situation for VMs that are running because the main benefit of warm migration is the reduced downtime, and there is no reason to initiate warm migration for VMs that are down. However, performing warm migration for VMs that are down is not the same as cold migration, even when Forklift uses |
|
When importing from VMware, there are additional factors which impact the migration speed such as limits related to ESXi, vSphere. or VDDK. |
Conclusions
Based on the preceding information, we can draw the following conclusions about cold migration vs. warm migration:
-
The shortest downtime of VMs can be achieved by using warm migration.
-
The shortest duration for VMs with a large amount of data on a single disk can be achieved by using cold migration.
-
The shortest duration for VMs with a large amount of data that is spread evenly across multiple disks can be achieved by using warm migration.
Power status of virtual machines during cold migrations
Cold migration is the default migration type. During cold migrations, the source virtual machines are shut down while the data is copied.
|
VMware only: In cold migrations, in situations in which a package manager cannot be used during the migration, Forklift does not install the To enable Forklift to automatically install If that is not possible, use your preferred automated or manual procedure to install |
Power status of virtual machines during warm migrations
During warm migrations, most of the data is copied during the precopy stage while the source virtual machines (VMs) are running.
Then the VMs are shut down, and the remaining data is copied during the cutover stage.
Precopy stage
The VMs are not shut down during the precopy stage.
The VM disks are copied incrementally by using changed block tracking (CBT) snapshots. The snapshots are created at one-hour intervals by default. You can change the snapshot interval by updating the forklift-controller deployment.
|
You must enable CBT for each source VM and each VM disk. A VM can support up to 28 CBT snapshots. If the source VM has too many CBT snapshots and the |
The precopy stage runs until the cutover stage is started manually or is scheduled to start.
Cutover stage
The VMs are shut down during the cutover stage, and the remaining data is migrated. Data stored in RAM is not migrated.
You can start the cutover stage manually by using the Forklift console, or you can schedule a cutover time in the Migration manifest.
Advantages and disadvantages of cold and warm migrations
The table that follows offers a more detailed description of the advantages and disadvantages of cold migration and warm migration. It assumes that you have installed Red Hat Enterprise Linux (RHEL) 9 on the OKD platform on which you installed Forklift:
| Cold migration | Warm migration | |
|---|---|---|
Duration |
Correlates to the amount of data on the disks. Each block is copied once. |
Correlates to the amount of data on the disks and VM utilization. Blocks may be copied multiple times. |
Fail fast |
Convert and then transfer. Each VM is converted to be compatible with OKD and, if the conversion is successful, the VM is transferred. If a VM cannot be converted, the migration fails immediately. |
Transfer and then convert. For each VM, Forklift creates a snapshot and transfers it to OKD. When you start the cutover, Forklift creates the last snapshot, transfers it, and then converts the VM. |
Tools |
|
Containerized Data Importer (CDI), a persistent storage management add-on, and |
Data transferred |
Approximate sum of all disks |
Approximate sum of all disks and VM utilization |
VM downtime |
High: The VMs are shut down, and the disks are transferred. |
Low: Disks are transferred in the background. The VMs are shut down during the cutover stage, and the remaining data is migrated. Data stored in RAM is not migrated. |
Parallelism |
Disks are transferred sequentially for each VM. For remote migration to a destination that does not have Forklift installed, disks are transferred in parallel using CDI. |
Disks are transferred in parallel by different pods. |
Connection use |
Keeps the connection to the Source only during the disk transfer. |
Keeps the connection to the Source during the disk transfer, but the connection is released between snapshots. |
Tools |
Forklift only. |
Forklift and CDI from KubeVirt. |
|
The preceding table describes the situation for VMs that are running because the main benefit of warm migration is the reduced downtime, and there is no reason to initiate warm migration for VMs that are down. However, performing warm migration for VMs that are down is not the same as cold migration, even when Forklift uses |
|
When importing from VMware, there are additional factors which impact the migration speed such as limits related to ESXi, vSphere, or VDDK. |
Conclusions
Based on the preceding information, the following conclusions can be drawn about cold migration vs. warm migration:
-
The shortest downtime of VMs can be achieved by using warm migration.
-
The shortest duration for VMs with a large amount of data on a single disk can be achieved by using cold migration.
-
The shortest duration for VMs with a large amount of data that is spread evenly across multiple disks can be achieved by using warm migration.
About live migration
You can use live migration to migrate virtual machines (VMs) between KubeVirt clusters, or between namespaces on the same KubeVirt cluster, with extremely limited downtime.
Live migration is supported by Forklift version 2.10.0 and later. It requires KubeVirt 4.20 or later on both your source and target clusters.
Live migration makes it easier for you to perform Day 2 tasks, such as seamless maintenance and workload balancing after you have migrated your VMs to KubeVirt.
Benefits of live migration
The major advantage of live migration is that it significantly reduces the amount of downtime needed to perform migrations. As a result, you can perform migrations with minimal service interruption. This allows your end-users to continue using critical applications during migrations.
Live migration also gives you the following benefits:
-
Additional migration functionality: Live migration supports migrating virtual machines (VMs) between KubeVirt clusters and between namespaces on the same KubeVirt clusters, making Day 2 operations easier and safer to perform.
-
Improved service continuity: Live migration lets you quickly migrate VMs from one cluster to another, allowing you to eliminate the need for scheduled downtime during cluster maintenance or upgrades. This allows you to provide more consistent and reliable services.
-
Greater operational flexibility: Live migration allows your IT team to manage your infrastructure dynamically without harming business operations. Your team can respond to changing demands or perform necessary maintenance without complex, disruptive procedures.
-
Enhanced performance and scalability: Live migration gives you the ability to balance workloads across clusters. This helps ensure that applications have the resources they need, leading to better overall system performance and scalability.
Live migration, Forklift, and KubeVirt
Live migration is a joint operation between Forklift and KubeVirt that allows you to leverage the strengths of Forklift when you migrate virtual machines (VMs) from one KubeVirt cluster to another. Tasks and responsibilities are divided between the two as follows:
-
Forklift handles the high-level orchestration that is needed to perform a live migration of KubeVirt Kubevirt VMs from one cluster to another.
-
KubeVirt is responsible for the low-level migration mechanics, such as the actual state and storage transfer between the clusters.
Orchestration is done by the ForkliftController component of Forklift, rather than by KubeVirt, because ForkliftController is already designed to manage the migration pipeline, which includes the following responsibilities:
-
Build an inventory of source resources and map them to the destination cluster.
-
Create and run the migration plan.
-
Ensure that all necessary shared resources, such as instance types, SSH keys, secrets, and config maps, are available and accessible on the destination cluster.
Limitations of live migration
Live migration lets you migrate virtual machines (VMs) between KubeVirt clusters or between namespaces on the same KubeVirt cluster with a minimum of downtime, but the feature does have the following limitations:
-
Live migration is available only for migrations between KubeVirt clusters or between namespaces on the same KubeVirt cluster. It is not available for any other source provider, whether the provider is supported by Forklift or not.
-
Live migration does not establish connectivity between KubeVirt clusters. Establishing such connectivity is the responsibility of the cluster administrator.
-
Live migration does not migrate resources unrelated to VMs, such as services, routes, or other application components, that may be necessary for application availability after a migration.
Live migration workflow
Live migration uses a different workflow than other types of migration. You can use the following workflow to understand how Forklift orchestrates a live migration with KubeVirt handling the low-level mechanics of the migration. This workflow is also designed to help you troubleshoot problems that might occur during a live migration.
-
Start: When you click Start plan, Forklift initiates the migration plan.
-
PreHook: If you added a pre-migration hook, Forklift runs it now.
-
Create empty
DataVolumes: Forklift creates empty targetDataVolumesin the target KubeVirt cluster. KubeVirt usesKubeVirtto handle the actual storage migration. -
Ensure resources: Forklift copies all secrets or config maps that are mounted by a source VM to the target namespace.
-
Create target VMs: Forklift creates target VMs in a running state and creates a
VirtualMachineInstanceMigrationresource on each cluster. The VMs have a specialKubeVirtannotation indicating to start them in migration target mode. -
Wait for state transfer: Forklift waits for
KubeVirtto handle the state transfer and for the destination VMs to report as ready.KubeVirtalso handles the shutdown of the source VMs after the state transfer. -
PostHook: If you added a post-migration hook, Forklift runs it now.
-
Completed: Forklift indicates that the migration is finished.
Prerequisites and software requirements for all providers
Review the following prerequisites and software requirements to ensure that your environment is prepared for migration.
You must install compatible versions of OKD and KubeVirt.
Storage support and default modes
Forklift uses the following default volume and access modes for supported storage.
| Provisioner | Volume mode | Access mode |
|---|---|---|
kubernetes.io/aws-ebs |
Block |
ReadWriteOnce |
kubernetes.io/azure-disk |
Block |
ReadWriteOnce |
kubernetes.io/azure-file |
Filesystem |
ReadWriteMany |
kubernetes.io/cinder |
Block |
ReadWriteOnce |
kubernetes.io/gce-pd |
Block |
ReadWriteOnce |
kubernetes.io/hostpath-provisioner |
Filesystem |
ReadWriteOnce |
manila.csi.openstack.org |
Filesystem |
ReadWriteMany |
openshift-storage.cephfs.csi.ceph.com |
Filesystem |
ReadWriteMany |
openshift-storage.rbd.csi.ceph.com |
Block |
ReadWriteOnce |
kubernetes.io/rbd |
Block |
ReadWriteOnce |
kubernetes.io/vsphere-volume |
Block |
ReadWriteOnce |
|
If the KubeVirt storage does not support dynamic provisioning, you must apply the following settings:
See Enabling a statically-provisioned storage class for details on editing the storage profile. |
|
If your migration uses block storage and persistent volumes created with an EXT4 file system, increase the file system overhead in the Containerized Data Importer (CDI) to be more than 10%. The default overhead that is assumed by CDI does not completely include the reserved place for the root partition. If you do not increase the file system overhead in CDI by this amount, your migration might fail. |
|
When you migrate from OpenStack, or when you run a cold migration from oVirt to the OKD cluster that Forklift is deployed on, the migration allocates persistent volumes without CDI. In these cases, you might need to adjust the file system overhead. If the configured file system overhead, which has a default value of 10%, is too low, the disk transfer will fail due to lack of space. In such a case, you would want to increase the file system overhead. In some cases, however, you might want to decrease the file system overhead to reduce storage consumption. You can change the file system overhead by changing the value of the |
Network prerequisites
The following network prerequisites apply to all migrations:
-
Do not change IP addresses, VLANs, and other network configuration settings during a migration. The MAC addresses of the virtual machines (VMs) are preserved during migration.
-
The network connections between the source environment, the KubeVirt cluster, and the replication repository must be reliable and uninterrupted.
-
If you are mapping more than one source and destination network, you must create a network attachment definition for each additional destination network.
Ports
The firewalls must enable traffic over the following ports:
| Port | Protocol | Source | Destination | Purpose |
|---|---|---|---|---|
443 |
TCP |
OKD nodes |
VMware vCenter |
VMware provider inventory Disk transfer authentication |
443 |
TCP |
OKD nodes |
VMware ESXi hosts |
Disk transfer authentication |
902 |
TCP |
OKD nodes |
VMware ESXi hosts |
Disk transfer data copy |
| Port | Protocol | Source | Destination | Purpose |
|---|---|---|---|---|
443 |
TCP |
OKD nodes |
oVirt Engine |
oVirt provider inventory Disk transfer authentication |
54322 |
TCP |
OKD nodes |
oVirt hosts |
Disk transfer data copy |
| Port | Protocol | Source | Destination | Purpose |
|---|---|---|---|---|
8776 |
Cinder |
OKD nodes |
OpenStack hosts |
Block storage API |
8774 |
Nova |
OKD nodes |
OpenStack hosts |
Virtualization API |
5000 |
Keystone |
OKD nodes |
OpenStack hosts |
Authentication API |
9696 |
Neutron |
OKD nodes |
OpenStack hosts |
Network API |
9292 |
Glance |
OKD nodes |
OpenStack hosts |
Image service API |
| Port | Protocol | Source | Destination | Purpose |
|---|---|---|---|---|
2049 |
TCP |
OKD nodes |
Server containing the OVA files |
NFS service |
111 |
TCP or UCP |
OKD nodes |
Server containing the OVA files |
RPC Portmapper, only needed for NFSv4.0 |
| Port | Protocol | Source | Destination | Purpose |
|---|---|---|---|---|
6443 |
API |
OKD nodes |
KubeVirt host |
Access API to get information from a VM’s manifest |
443 |
TCP |
OKD nodes |
KubeVirt host |
Download VM data using the |
Source virtual machine prerequisites
The following prerequisites for source virtual machines (VMs) apply to all migrations:
-
ISO images and CD-ROMs are unmounted.
-
Each NIC contains either an IPv4 address or an IPv6 address, although a NIC may use both.
-
The operating system of each VM is certified and supported as a guest operating system for conversions.
|
You can check that the operating system is supported by referring to the table in Converting virtual machines from other hypervisors to KVM with virt-v2v. See the columns of the table that refer to RHEL 8 hosts and RHEL 9 hosts. |
-
VMs that you want to migrate with MTV 2.6.z run on RHEL 8.
-
VMs that you want to migrate with MTV 2.7.z run on RHEL 9.
-
The name of a VM must not contain a period (
.). Forklift changes any period in a VM name to a dash (-). -
The name of a VM must not be the same as any other VM in the KubeVirt environment.
Forklift has limited support for the migration of dual-boot operating system VMs.
In the case of a dual-boot operating system VM, Forklift will try to convert the first boot disk it finds. Alternatively the root device can be specified in the Forklift UI.
For virtual machines (VMs) running Microsoft Windows, Volume Shadow Copy Service (VSS) inside the guest VM is used to quiesce the file system and applications.
When performing a warm migration of a Microsoft Windows virtual machine from VMware, you must start VSS on the Windows guest operating system in order for the snapshot and
Quiesce guest file systemto succeed.If you do not start VSS on the Windows guest operating system, the snapshot creation during the Warm migration fails with the following error:
An error occurred while taking a snapshot: Failed to restart the virtual machineIf you set the VSS service to
Manualand start a snapshot creation withQuiesce guest file system = yes. In the background, the VMware Snapshot provider service requests VSS to start the shadow copy.Forklift automatically assigns a new name to a VM that does not comply with the rules.
Forklift makes the following changes when it automatically generates a new VM name:
-
Excluded characters are removed.
-
Uppercase letters are switched to lowercase letters.
-
Any underscore (
_) is changed to a dash (-).
This feature allows a migration to proceed smoothly even if someone enters a VM name that does not follow the rules.
Microsoft Windows VMs, which use the Measured Boot feature, cannot be migrated. Measured Boot is a mechanism to prevent any kind of device changes by checking each start-up component, including the firmware, all the way to the boot driver.
The alternative to migration is to re-create the Windows VM directly on KubeVirt.
Virtual machines (VMs) with Secure Boot enabled currently might not be migrated automatically. This is because Secure Boot would prevent the VMs from booting on the destination provider. Secure boot is a security standard developed by members of the PC industry to ensure that a device boots using only software that is trusted by the Original Equipment Manufacturer (OEM).
Workaround: The current workaround is to disable Secure Boot on the destination. For more details, see Disabling Secure Boot. (MTV-1548)
-
Forklift encryption support
Forklift supports the following types of encryption for virtual machines (VMs):
-
For VMs that run on Linux: Linux Unified Key Setup (LUKS)
-
For VMs that run on Windows: BitLocker
Specific software requirements for each provider
In addition to the prerequisites and software requirements that apply to all providers, there are specific requirements for each provider.
VMware prerequisites
It is strongly recommended to create a VDDK image to accelerate migrations. For more information, see Creating a VDDK image.
|
Virtual machine (VM) migrations do not work without VDDK when a VM is backed by VMware vSAN. |
The following prerequisites apply to VMware migrations:
-
You must use a compatible version of VMware vSphere.
-
You must be logged in as a user with at least the minimal set of VMware privileges.
-
To access the virtual machine using a pre-migration hook, VMware Tools must be installed on the source virtual machine.
-
The VM operating system must be certified and supported for use as a guest operating system with KubeVirt and for conversion to KVM with
virt-v2v. -
If you are running a warm migration, you must enable changed block tracking (CBT) on the VMs and on the VM disks.
-
If you are migrating more than 10 VMs from an ESXi host in the same migration plan, you must increase the Network File Copy (NFC) service memory of the host.
-
It is strongly recommended to disable hibernation because Forklift does not support migrating hibernated VMs.
|
For virtual machines (VMs) running Microsoft Windows, Volume Shadow Copy Service (VSS) inside the guest VM is used to quiesce the file system and applications. When performing a warm migration of a Microsoft Windows virtual machine from VMware, you must start VSS on the Windows guest operating system in order for the snapshot and If you do not start VSS on the Windows guest operating system, the snapshot creation during the Warm migration fails with the following error: If you set the VSS service to |
|
In case of a power outage, data might be lost for a VM with disabled hibernation. However, if hibernation is not disabled, migration will fail. |
|
Neither Forklift nor OpenShift Virtualization support conversion of Btrfs for migrating VMs from VMware. |
VMware privileges
The following minimal set of VMware privileges is required to migrate virtual machines to KubeVirt with the Forklift.
| Privilege | Description | ||
|---|---|---|---|
|
|||
|
Allows powering off a powered-on virtual machine. This operation powers down the guest operating system. |
||
|
Allows powering on a powered-off virtual machine and resuming a suspended virtual machine. |
||
|
Allows managing a virtual machine by the VMware Virtual Infrastructure eXtension (VIX) API. |
||
|
|||
|
Allows opening a disk on a virtual machine for random read and write access. Used mostly for remote disk mounting. |
||
|
Allows operations on files associated with a virtual machine, including VMX, disks, logs, and NVRAM. |
||
|
Allows opening a disk on a virtual machine for random read access. Used mostly for remote disk mounting. |
||
|
Allows read operations on files associated with a virtual machine, including VMX, disks, logs, and NVRAM. |
||
|
Allows write operations on files associated with a virtual machine, including VMX, disks, logs, and NVRAM. |
||
|
Allows cloning of a template. |
||
|
Allows cloning of an existing virtual machine and allocation of resources. |
||
|
Allows creation of a new template from a virtual machine. |
||
|
Allows customization of a virtual machine’s guest operating system without moving the virtual machine. |
||
|
Allows deployment of a virtual machine from a template. |
||
|
Allows marking an existing powered-off virtual machine as a template. |
||
|
Allows marking an existing template as a virtual machine. |
||
|
Allows creation, modification, or deletion of customization specifications. |
||
|
Allows promote operations on a virtual machine’s disks. |
||
|
Allows reading a customization specification. |
||
|
|||
|
Allows creation of a snapshot from the virtual machine’s current state. |
||
|
Allows removal of a snapshot from the snapshot history. |
||
|
|||
|
Allows exploring the contents of a datastore. |
||
|
Allows performing low-level file operations - read, write, delete, and rename - in a datastore. |
||
|
|||
|
Allows verification of the validity of a session. |
||
|
|||
|
Allows decryption of an encrypted virtual machine. |
||
|
Allows access to encrypted resources. |
||
|
Create a role in VMware with the permissions described in the preceding table and then apply this role to the Inventory section, as described in Creating a VMware role to apply Forklift permissions. |
Creating a VMware role to grant MTV privileges
You can create a role in VMware to grant privileges for Forklift and then grant those privileges to users with that role.
The procedure that follows explains how to do this in general. For detailed instructions, see VMware documentation.
-
In the vCenter Server UI, create a role that includes the set of privileges described in the table in VMware prerequisites.
-
In the vSphere inventory UI, grant privileges for users with this role to the appropriate vSphere logical objects at one of the following levels:
-
At the user or group level: Assign privileges to the appropriate logical objects in the data center and use the Propagate to child objects option.
-
At the object level: Apply the same role individually to all the relevant vSphere logical objects involved in the migration, for example, hosts, vSphere clusters, data centers, or networks.
-
Creating a VDDK image
It is strongly recommended that Forklift should be used with the VMware Virtual Disk Development Kit (VDDK) SDK when transferring virtual disks from VMware vSphere.
|
Creating a VDDK image, although optional, is highly recommended. Using Forklift without VDDK is not recommended and could result in significantly lower migration speeds. |
To make use of this feature, you download the VDDK, build a VDDK image, and push the VDDK image to your image registry.
The VDDK package contains symbolic links, therefore, the procedure of creating a VDDK image must be performed on a file system that preserves symbolic links (symlinks).
|
Storing the VDDK image in a public registry might violate the VMware license terms. |
-
podmaninstalled. -
You are working on a file system that preserves symbolic links (symlinks).
-
If you are using an external registry, KubeVirt must be able to access it.
-
Create and navigate to a temporary directory:
$ mkdir /tmp/<dir_name> && cd /tmp/<dir_name> -
In a browser, navigate to the VMware VDDK version 8 download page.
-
Select version 8.0.1 and click Download.
|
In order to migrate to KubeVirt 4.12, download VDDK version 7.0.3.2 from the VMware VDDK version 7 download page. |
-
Save the VDDK archive file in the temporary directory.
-
Extract the VDDK archive:
$ tar -xzf VMware-vix-disklib-<version>.x86_64.tar.gz -
Create a
Dockerfile:$ cat > Dockerfile <<EOF FROM registry.access.redhat.com/ubi8/ubi-minimal USER 1001 COPY vmware-vix-disklib-distrib /vmware-vix-disklib-distrib RUN mkdir -p /opt ENTRYPOINT ["cp", "-r", "/vmware-vix-disklib-distrib", "/opt"] EOF -
Build the VDDK image:
$ podman build . -t <registry_route_or_server_path>/vddk:<tag> -
Push the VDDK image to the registry:
$ podman push <registry_route_or_server_path>/vddk:<tag> -
Ensure that the image is accessible to your KubeVirt environment.
Increasing the NFC service memory of an ESXi host
If you are migrating more than 10 VMs from an ESXi host in the same migration plan, you must increase the Network File copy (NFC) service memory of the host. Otherwise, the migration fails because the NFC service memory is limited to 10 parallel connections.
-
Log in to the ESXi host as root.
-
Change the value of
maxMemoryto1000000000in/etc/vmware/hostd/config.xml:... <nfcsvc> <path>libnfcsvc.so</path> <enabled>true</enabled> <maxMemory>1000000000</maxMemory> <maxStreamMemory>10485760</maxStreamMemory> </nfcsvc> ... -
Restart
hostd:# /etc/init.d/hostd restartYou do not need to reboot the host.
VDDK validator containers need requests and limits
If you have the cluster or project resource quotas set, you must ensure that you have a sufficient quota for the Forklift pods to perform the migration.
You can see the defaults, which you can override in the ForkliftController custom resource (CR), listed as follows. If necessary, you can adjust these defaults.
These settings are highly dependent on your environment. If there are many migrations happening at once and the quotas are not set enough for the migrations, then the migrations can fail. This can also be correlated to the MAX_VM_INFLIGHT setting that determines how many VMs/disks are migrated at once.
The following defaults can be overriden in the ForkliftController CR:
-
Defaults that affect both cold and warm migrations:
For cold migration, it is likely to be more resource intensive as it performs the disk copy. For warm migration, you could potentially reduce the requests.
-
virt_v2v_container_limits_cpu:
4000m -
virt_v2v_container_limits_memory:
8Gi -
virt_v2v_container_requests_cpu:
1000m -
virt_v2v_container_requests_memory:
1GiCold and warm migration using
virt-v2vcan be resource-intensive. For more details, see Compute power and RAM.
-
-
Defaults that affect any migrations with hooks:
-
hooks_container_limits_cpu:
1000m -
hooks_container_limits_memory:
1Gi -
hooks_container_requests_cpu:
100m -
hooks_container_requests_memory:
150Mi
-
-
Defaults that affect any OVA migrations:
-
ova_container_limits_cpu:
1000m -
ova_container_limits_memory:
1Gi -
ova_container_requests_cpu:
100m -
ova_container_requests_memory:
150Mi
-
oVirt prerequisites
The following prerequisites apply to oVirt migrations:
-
To create a source provider, you must have at least the
UserRoleandReadOnlyAdminroles assigned to you. These are the minimum required permissions, however, any other administrator or superuser permissions will also work.
|
You must keep the |
-
To migrate virtual machines:
-
You must have one of the following:
-
oVirt admin permissions. These permissions allow you to migrate any virtual machine in the system.
-
DiskCreatorandUserVmManagerpermissions on every virtual machine you want to migrate.
-
-
You must use a compatible version of oVirt.
-
You must have the Engine CA certificate, unless it was replaced by a third-party certificate, in which case, specify the Engine Apache CA certificate.
You can obtain the Engine CA certificate by navigating to https://<engine_host>/ovirt-engine/services/pki-resource?resource=ca-certificate&format=X509-PEM-CA in a browser.
-
If you are migrating a virtual machine with a direct logical unit number (LUN) disk, ensure that the nodes in the KubeVirt destination cluster that the VM is expected to run on can access the backend storage.
-
|
OpenStack prerequisites
The following prerequisites apply to OpenStack migrations:
-
You must use a compatible version of OpenStack.
Additional authentication methods for migrations with OpenStack source providers
Forklift supports the following authentication methods for migrations with OpenStack source providers in addition to the standard username and password credential set:
-
Token authentication
-
Application credential authentication
You can use these methods to migrate virtual machines with OpenStack source providers using the command-line interface (CLI) the same way you migrate other virtual machines, except for how you prepare the Secret manifest.
Using token authentication with an OpenStack source provider
You can use token authentication, instead of username and password authentication, when you create an OpenStack source provider.
Forklift supports both of the following types of token authentication:
-
Token with user ID
-
Token with user name
For each type of token authentication, you need to use data from OpenStack to create a Secret manifest.
Have an OpenStack account.
-
In the dashboard of the OpenStack web console, click Project > API Access.
-
Expand Download OpenStack RC file and click OpenStack RC file.
The file that is downloaded, referred to here as
<openstack_rc_file>, includes the following fields used for token authentication:OS_AUTH_URL OS_PROJECT_ID OS_PROJECT_NAME OS_DOMAIN_NAME OS_USERNAME -
To get the data needed for token authentication, run the following command:
$ openstack token issueThe output, referred to here as
<openstack_token_output>, includes thetoken,userID, andprojectIDthat you need for authentication using a token with user ID. -
Create a
Secretmanifest similar to the following:-
For authentication using a token with user ID:
cat << EOF | oc apply -f - apiVersion: v1 kind: Secret metadata: name: openstack-secret-tokenid namespace: openshift-mtv labels: createdForProviderType: openstack type: Opaque stringData: authType: token token: <token_from_openstack_token_output> projectID: <projectID_from_openstack_token_output> userID: <userID_from_openstack_token_output> url: <OS_AUTH_URL_from_openstack_rc_file> EOF -
For authentication using a token with user name:
cat << EOF | oc apply -f -
apiVersion: v1
kind: Secret
metadata:
  name: openstack-secret-tokenname
  namespace: openshift-mtv
  labels:
    createdForProviderType: openstack
type: Opaque
stringData:
  authType: token
  token: <token_from_openstack_token_output>
  domainName: <OS_DOMAIN_NAME_from_openstack_rc_file>
  projectName: <OS_PROJECT_NAME_from_openstack_rc_file>
  username: <OS_USERNAME_from_openstack_rc_file>
  url: <OS_AUTH_URL_from_openstack_rc_file>
EOF
-
Using application credential authentication with an OpenStack source provider
You can use application credential authentication, instead of username and password authentication, when you create an OpenStack source provider.
Forklift supports both of the following types of application credential authentication:
-
Application credential ID
-
Application credential name
For each type of application credential authentication, you need to use data from OpenStack to create a Secret manifest.
You have an OpenStack account.
-
In the dashboard of the OpenStack web console, click Project > API Access.
-
Expand Download OpenStack RC file and click OpenStack RC file.
The file that is downloaded, referred to here as
<openstack_rc_file>, includes the following fields used for application credential authentication:OS_AUTH_URL OS_PROJECT_ID OS_PROJECT_NAME OS_DOMAIN_NAME OS_USERNAME -
To get the data needed for application credential authentication, run the following command:
$ openstack application credential create --role member --role reader --secret redhat forkliftThe output, referred to here as
<openstack_credential_output>, includes:-
The
idandsecretthat you need for authentication using an application credential ID -
The
nameandsecretthat you need for authentication using an application credential name
-
-
Create a
Secretmanifest similar to the following:-
For authentication using the application credential ID:
cat << EOF | oc apply -f - apiVersion: v1 kind: Secret metadata: name: openstack-secret-appid namespace: openshift-mtv labels: createdForProviderType: openstack type: Opaque stringData: authType: applicationcredential applicationCredentialID: <id_from_openstack_credential_output> applicationCredentialSecret: <secret_from_openstack_credential_output> url: <OS_AUTH_URL_from_openstack_rc_file> EOF -
For authentication using the application credential name:
cat << EOF | oc apply -f -
apiVersion: v1
kind: Secret
metadata:
  name: openstack-secret-appname
  namespace: openshift-mtv
  labels:
    createdForProviderType: openstack
type: Opaque
stringData:
  authType: applicationcredential
  applicationCredentialName: <name_from_openstack_credential_output>
  applicationCredentialSecret: <secret_from_openstack_credential_output>
  domainName: <OS_DOMAIN_NAME_from_openstack_rc_file>
  username: <OS_USERNAME_from_openstack_rc_file>
  url: <OS_AUTH_URL_from_openstack_rc_file>
EOF
-
Open Virtual Appliance (OVA) prerequisites
The following prerequisites apply to Open Virtual Appliance (OVA) file migrations:
-
All OVA files are created by VMware vSphere.
|
Migration of OVA files that were not created by VMware vSphere but are compatible with vSphere might succeed. However, migration of such files is not supported by Forklift. Forklift supports only OVA files created by VMware vSphere. |
-
The OVA files are in one or more folders under an NFS shared directory in one of the following structures:
-
In one or more compressed Open Virtualization Format (OVF) packages that hold all the VM information.
The filename of each compressed package must have the
.ovaextension. Several compressed packages can be stored in the same folder.When this structure is used, Forklift scans the root folder and the first-level subfolders for compressed packages.
For example, if the NFS share is
/nfs, then:-
The folder
/nfsis scanned. -
The folder
/nfs/subfolder1is scanned. -
However,
/nfs/subfolder1/subfolder2is not scanned.
-
-
In extracted OVF packages.
When this structure is used, Forklift scans the root folder, first-level subfolders, and second-level subfolders for extracted OVF packages.
However, there can be only one
.ovffile in a folder. Otherwise, the migration will fail.For example, if the NFS share is
/nfs, then:-
The OVF file
/nfs/vm.ovfis scanned. -
The OVF file
/nfs/subfolder1/vm.ovfis scanned. -
The OVF file
/nfs/subfolder1/subfolder2/vm.ovfis scanned. -
However, the OVF file
/nfs/subfolder1/subfolder2/subfolder3/vm.ovfis not scanned.
-
-
KubeVirt prerequisites
The following prerequisites apply to migrations from one KubeVirt cluster to another:
-
Both the source and destination KubeVirt clusters must have the same version of Forklift installed.
-
The source cluster must use KubeVirt 4.16 or later.
-
Migration from a later version of KubeVirt to an earlier one is not supported.
-
Migration from an earlier version of KubeVirt to a later version is supported if both are supported by the current version of Forklift. For example, if the current version of KubeVirt is 4.18, a migration from version 4.16 or 4.17 to version 4.18 is supported, but a migration from version 4.15 to any version is not.
|
It is strongly recommended to migrate only between clusters with the same version of KubeVirt, although migration from an earlier version of KubeVirt to a later one is supported. |
KubeVirt live migration prerequisites
In addition to the regular virt} prerequisites, live migration has the following additional prerequisites:
-
Forklift 2.10.0 or later installed. For more information, see Upgrading the Forklift. Forklift treats all KubeVirt migrations run on Forklift 2.9 or earlier as cold migrations, even if they are configured as live migrations.
-
KubeVirt 4.20.0 or later installed on both source and target clusters.
-
In the Forklift Operator, in the
specportion of theforklift-controllerYAML,feature_ocp_live_migrationis set totrue. You must havecluster-adminprivileges to set this field. -
In the
KubeVirtresource of both clusters in thefeatureGatesof the YAML,DecntralizedLiveMigrationis listed. You must havecluster-adminprivileges to set this field. -
Connectivity between the clusters must be established, including connectivity for state transfer. Technologies such as Submariner can be used for this purpose.
-
The target cluster has
VirtualMachineInstanceTypesandVirtualMachinePreferencesthat match those used by the VMs on the source cluster.
Software compatibility guidelines
You must install compatible software versions. The table that follows lists the relevant software versions for this version of Forklift.
| Forklift | OKD | KubeVirt | VMware vSphere | oVirt | OpenStack |
|---|---|---|---|---|---|
2.10 |
4.20, 4.19, 4.18 |
4.20, 4.19, 4.18 |
6.5 or later |
4.4 SP1 or later |
16.1 or later |
|
Migration from oVirt 4.3 Forklift was tested only with oVirt 4.4 SP1. Migration from oVirt (oVirt) 4.3 has not been tested with Forklift 2.10. While not supported, basic migrations from oVirt 4.3 are expected to work. Generally it is advised to upgrade oVirt Manager to the previously mentioned supported version before the migration to KubeVirt. Therefore, it is recommended to upgrade oVirt to the supported version above before the migration to KubeVirt. However, migrations from oVirt 4.3.11 were tested with Forklift 2.3, and might work in practice in many environments using Forklift 2.10. In this case, it is recommended to upgrade oVirt Manager to the previously mentioned supported version before the migration to KubeVirt. |
OpenShift Operator Life Cycles
For more information about the software maintenance Life Cycle classifications for Operators shipped by Red Hat for use with OpenShift Container Platform, see OpenShift Operator Life Cycles.
Installing and configuring the Forklift Operator
You can install the Forklift Operator by using the OKD web console or the command-line interface (CLI).
In Forklift version 2.4 and later, the Forklift Operator includes the Forklift plugin for the OKD web console.
After you install the Forklift Operator by using either the OKD web console or the CLI, you can configure the Operator.
Installing the Forklift Operator by using the OKD web console
You can install the Forklift Operator by using the OKD web console.
-
OKD 4.20, 4.19, 4.18 installed.
-
KubeVirt Operator installed on an OpenShift migration target cluster.
-
You must be logged in as a user with
cluster-adminpermissions.
-
In the OKD web console, click Operators → OperatorHub.
-
Use the Filter by keyword field to search for forklift-operator.
The Forklift Operator is a Community Operator. Red Hat does not support Community Operators.
-
Click Migration Toolkit for Virtualization Operator and then click Install.
-
Click Create ForkliftController when the button becomes active.
-
Click Create.
Your ForkliftController appears in the list that is displayed.
-
Click Workloads → Pods to verify that the Forklift pods are running.
-
Click Operators → Installed Operators to verify that Migration Toolkit for Virtualization Operator appears in the konveyor-forklift project with the status Succeeded.
When the plugin is ready you will be prompted to reload the page. The Migration menu item is automatically added to the navigation bar, displayed on the left of the OKD web console.
Installing the Forklift Operator by using the command-line interface
You can install the Forklift Operator by using the command-line interface (CLI).
-
OKD 4.20, 4.19, 4.18 installed.
-
KubeVirt Operator installed on an OpenShift migration target cluster.
-
You must be logged in as a user with
cluster-adminpermissions.
-
Create the konveyor-forklift project:
$ cat << EOF | kubectl apply -f - apiVersion: project.openshift.io/v1 kind: Project metadata: name: konveyor-forklift EOF -
Create an
OperatorGroupCR calledmigration:$ cat << EOF | kubectl apply -f - apiVersion: operators.coreos.com/v1 kind: OperatorGroup metadata: name: migration namespace: konveyor-forklift spec: targetNamespaces: - konveyor-forklift EOF -
Create a
SubscriptionCR for the Operator:$ cat << EOF | kubectl apply -f - apiVersion: operators.coreos.com/v1alpha1 kind: Subscription metadata: name: forklift-operator namespace: konveyor-forklift spec: channel: development installPlanApproval: Automatic name: forklift-operator source: community-operators sourceNamespace: openshift-marketplace startingCSV: "konveyor-forklift-operator.2.10.0" EOF -
Create a
ForkliftControllerCR:$ cat << EOF | kubectl apply -f - apiVersion: forklift.konveyor.io/v1beta1 kind: ForkliftController metadata: name: forklift-controller namespace: konveyor-forklift spec: olm_managed: true EOF -
Verify that the Forklift pods are running:
$ kubectl get pods -n konveyor-forkliftThe following is example output:
ExampleNAME READY STATUS RESTARTS AGE forklift-api-bb45b8db4-cpzlg 1/1 Running 0 6m34s forklift-controller-7649db6845-zd25p 2/2 Running 0 6m38s forklift-must-gather-api-78fb4bcdf6-h2r4m 1/1 Running 0 6m28s forklift-operator-59c87cfbdc-pmkfc 1/1 Running 0 28m forklift-ui-plugin-5c5564f6d6-zpd85 1/1 Running 0 6m24s forklift-validation-7d84c74c6f-fj9xg 1/1 Running 0 6m30s forklift-volume-populator-controller-85d5cb64b6-mrlmc 1/1 Running 0 6m36s
Configuring the Forklift Operator
You can configure the following settings of the Forklift Operator by modifying the ForkliftController custom resource (CR), or in the Settings section of the Overview page, unless otherwise indicated.
-
Maximum number of virtual machines (VMs) or disks per plan that Forklift can migrate simultaneously.
-
How long
must gatherreports are retained before being automatically deleted (ForkliftControllerCR only). -
CPU limit allocated to the main controller container.
-
Memory limit allocated to the main controller container.
-
Interval at which a new snapshot is requested before initiating a warm migration.
-
Frequency with which the system checks the status of snapshot creation or removal during a warm migration.
-
Percentage of space in persistent volumes allocated as file system overhead when the
storageclassisfilesystem(ForkliftControllerCR only). -
Fixed amount of additional space allocated in persistent block volumes. This setting is applicable for any
storageclassthat is block-based (ForkliftControllerCR only). -
Configuration map of operating systems to preferences for vSphere source providers (
ForkliftControllerCR only). -
Configuration map of operating systems to preferences for oVirt (oVirt) source providers (
ForkliftControllerCR only). -
Whether to retain importer pods so that the Containerized Data Importer (CDI) does not delete them during migration (
ForkliftControllerCR only).
The procedure for configuring these settings by using the user interface is presented in Configuring MTV settings. The procedure for configuring these settings by modifying the ForkliftController CR is presented following.
-
Change a parameter’s value in the
specsection of theForkliftControllerCR by adding the parameter and value as follows:spec: parameter: value (1)1 Parameters that you can configure using the CLI are shown in the table that follows, along with a description of each parameter and its default value.
| Parameter | Description | Default value |
|---|---|---|
|
Varies with provider as follows:
|
|
|
The duration in hours for retaining |
|
|
The CPU limit allocated to the main controller container. |
|
|
The memory limit allocated to the main controller container. |
|
|
The interval in minutes at which a new snapshot is requested before initiating a warm migration. |
|
|
The frequency in seconds with which the system checks the status of snapshot creation or removal during a warm migration. |
|
|
Percentage of space in persistent volumes allocated as file system overhead when the
|
|
|
Fixed amount of additional space allocated in persistent block volumes. This setting is applicable for any
|
|
|
Config map for vSphere source providers. This config map maps the operating system of the incoming VM to a KubeVirt preference name. This config map needs to be in the namespace where the Forklift Operator is deployed. To see the list of preferences in your KubeVirt environment, open the OpenShift web console and click Virtualization > Preferences. Add values to the config map when this parameter has the default value,
|
|
|
Config map for oVirt source providers. This config map maps the operating system of the incoming VM to a KubeVirt preference name. This config map needs to be in the namespace where the Forklift Operator is deployed. To see the list of preferences in your KubeVirt environment, open the OpenShift web console and click Virtualization → Preferences. You can add values to the config map when this parameter has the default value,
|
|
|
Whether to retain importer pods so that the Containerized Data Importer (CDI) does not delete them during migration.
|
|
Configuring the controller_max_vm_inflight parameter
The value of controller_max_vm_inflight parameter, which is shown in the UI as Max concurrent virtual machine migrations, varies by the source provider of the migration
-
For all migrations except Open Virtual Appliance (OVA) or VMware migrations, the parameter specifies the maximum number of disks that Forklift can transfer simultaneously. In these migrations, Forklift migrates the disks in parallel. This means that if the combined number of disks that you want to migrate is greater than the value of the setting, additional disks must wait until the queue is free, without regard for whether a VM has finished migrating.
For example, if the value of the parameter is 15, and VM A has 5 disks, VM B has 5 disks, and VM C has 6 disks, all the disks except for the 16th disk start migrating at the same time. Once any of them has migrated, the 16th disk can be migrated, even though not all the disks on VM A and the disks on VM B have finished migrating.
-
For OVA migrations, the parameter specifies the maximum number of VMs that Forklift can migrate simultaneously, meaning that all additional disks must wait until at least one VM has been completely migrated.
For example, if the value of the parameter is 2, and VM A has 5 disks, VM B has 5 disks, and VM C has 6 disks, all the disks on VM C must wait to migrate until either all the disks on VM A or on VM B finish migrating.
-
For VMware migrations, the parameter has the following meanings:
-
Cold migration:
-
To local KubeVirt: VMs for each ESXi host that can migrate simultaneously.
-
To remote KubeVirt: Disks for each ESXi host that can migrate simultaneously.
-
-
Warm migration: Disks for each ESXi host that can migrate simultaneously.
-
Migrating virtual machines by using the OKD web console
Use the Forklift user interface to migrate virtual machines (VMs). It is located in the Virtualization section of the OKD web console.
The MTV user interface
The Forklift user interface is integrated into the OKD web console.
In the left panel, you can choose a page related to a component of the migration progress, for example, Providers. Or, if you are an administrator, you can choose Overview, which contains information about migrations and lets you configure Forklift settings.
In pages related to components, you can click on the Projects list, which is in the upper-left portion of the page, and see which projects (namespaces) you are allowed to work with.
The MTV Overview page
The Forklift Overview page displays system-wide information about migrations and a list of Settings you can change.
If you have Administrator privileges, you can access the Overview page by clicking Migration → Overview in the OKD web console.
The Overview page has 3 tabs:
-
Overview
-
YAML
-
Health
-
History
-
Settings
Overview tab
The Overview tab is to help you quickly create providers and find information about the whole system:
-
In the upper pane, is the Welcome section, which includes buttons that let you open the Create provider UI for each vendor (VMware, Open Virtual Appliance, OpenStack, oVirt, and KubeVirt). You can close this section by clicking the Options menu
 in the upper-right corner and selecting Hide from view. You can reopen it by clicking Show the welcome card in the upper-right corner.
 -
In the center-left pane is a "donut" chart named Virtual machines. This chart shows the number of running, failed, and successful virtual machine migrations that Forklift ran for the time interval that you select. You can choose a different interval by clicking the list in the upper-right corner of the pane. You can select a different interval by clicking the list. The options are: Last 24 hours, Last 10 days, Last 31 days, and All. By clicking on each division of the chart, you can navigate to the History tab for information about the migrations.
Data for this chart includes only the most recent run of a migration plan that was modified due to a failure. For example, if a plan with 3 VMs fails 4 times, then this chart shows that 3 VMs failed, not 12.
-
In the center-right pane is an area chart named Migration history. This chart shows the number of migrations that succeeded, failed, or were running during the interval shown in the title of the chart. You can choose a different interval by clicking the Options menu
in the upper-right corner of the pane. The options are: Last 24 hours, Last 10 days, and Last 31 days. By clicking on each division of the chart, you can navigate to the History tab for information about the migrations. -
In the lower-left pane is a "donut" chart named Migration plans. This chart shows the current number of migration plans grouped by their status. This includes plans that were not started, cannot be started, are incomplete, archived, paused, or have an unknown status. By clicking the Show all plans link, you can quickly navigate to the Migration plans page.
Since a single migration might involve many virtual machines, the number of migrations performed using Forklift might vary significantly from the number of migrated virtual machines.
-
In the lower-right pane is a table named Forklift health. This table lists all of the Forklift pods. The most important one,
forklift-controller, is first. The remaining pods are listed in alphabetical order. The View all link opens the Health tab. The status and creation time of each pod are listed. There is also a link to the logs of each pod.
YAML tab
The YAML tab displays the ForkliftController custom resource (CR) that defines the operation of the Forklift Operator. You can modify the CR in this tab.
Health tab
The Health tab has two panes:
-
In the upper pane, there is a table named Health. It lists all the Forklift pods. The most important one,
forklift-controller, is first. The remaining pods are listed in alphabetical order. For each pod, the status, and creation time of the pod are listed, and there is a link to the logs of the pod. -
In the lower pane, there is a table named Conditions. It lists the following possible types (states) of the Forklift Operator, the status of the type, the last time the condition was updated, the reason for the update, and a message about the condition.
History tab
The History tab displays information about migrations.
-
In the upper-left of the page, there is a filter that you can use to display only migrations of a certain status, for example, Succeeded.
-
To the right of the filter is the Group by plan toggle switch, which lets you display either all migrations or view only the most recent migration run per plan within the specified time range.
Settings tab
The table that follows describes the settings that are visible in the Settings tab, their default values, and other possible values that can be set or chosen, if needed.
| Setting | Description | Default value | Additional values |
|---|---|---|---|
Maximum concurrent VM migrations |
Varies with provider as follows:
|
20. |
Adjustable by either using the + and - keys to set a different value or by clicking the textbox and entering a new value. |
Controller main container CPU limit |
The CPU limit that is allocated to the main controller container, in milliCPUs (m). |
500 m. |
Adjustable by selecting another value from the list. Options: 200 m, 500 m, 2000 m, 8000 m. |
Controller main container memory limit |
The memory limit that is allocated to the main controller container in mebibytes (Mi). |
800 Mi. |
Adjustable by selecting another value from the list. Options: 200 Mi, 800 Mi, 2000 Mi, 8000 Mi. |
Controller inventory container memory limit |
The memory limit that is allocated to the inventory controller container in mebibytes (Mi). |
1000 Mi. |
Adjustable by selecting another value from the list. Options: 400 Mi, 1000 Mi, 2000 Mi, 8000 Mi. |
Precopy internal (minutes) |
The interval in minutes at which a new snapshot is requested before initiating a warm migration. |
60 minutes. |
Adjustable by selecting another value from the list. Options: 5 minutes, 30 minutes, 60 minutes, 120 minutes. |
Snapshot polling interval |
The interval in seconds between which the system checks the status of snapshot creation or removal during a warm migration. |
10 seconds. |
Adjustable by choosing another value from the list. Options: 1 second, 5 seconds, 10 seconds, 60 seconds. |
Migrating virtual machines using the MTV user interface
Use the Forklift user interface to migrate VMs from the following providers:
-
VMware vSphere
-
oVirt (oVirt)
-
OpenStack
-
Open Virtual Appliances (OVAs) that were created by VMware vSphere
-
KubeVirt clusters
For all migrations, you specify the source provider, the destination provider, and the migration plan. The specific procedures vary per provider.
|
You must ensure that all Prerequisites and software requirements for all providers and all Specific software requirements for each provider are met. VMware only: You must have the minimal set of VMware privileges. VMware only: Creating a VMware Virtual Disk Development Kit (VDDK) image increases migration speed. |
Migrating virtual machines from VMware vSphere
Adding a VMware vSphere source provider
You can migrate VMware vSphere VMs from VMware vCenter or from a VMware ESX/ESXi server without going through vCenter.
|
EMS enforcement is disabled for migrations with VMware vSphere source providers in order to enable migrations from versions of vSphere that are supported by Forklift but do not comply with the 2023 FIPS requirements. Therefore, users should consider whether migrations from vSphere source providers risk their compliance with FIPS. Supported versions of vSphere are specified in Software compatibility guidelines. |
|
Anti-virus software can cause migrations to fail. It is strongly recommended to remove such software from source VMs before you start a migration. |
|
Forklift does not support migrating VMware Non-Volatile Memory Express (NVMe) disks. |
|
If you input any value of maximum transmission unit (MTU) besides the default value in your migration network, you must also input the same value in the OKD transfer network that you use. For more information about the OKD transfer network, see Creating a VMware vSphere migration plan using the Forklift wizard. |
-
It is strongly recommended to create a VMware Virtual Disk Development Kit (VDDK) image in a secure registry that is accessible to all clusters. A VDDK image accelerates migration and reduces the risk of a plan failing. If you are not using VDDK and a plan fails, retry with VDDK installed. For more information, see Creating a VDDK image.
|
Virtual machine (VM) migrations do not work without VDDK when a VM is backed by VMware vSAN. |
-
Access the Create provider page for VMware by doing one of the following:
-
In the OKD web console, click Migration for Virtualization > Providers.
-
Click Create Provider.
-
Select a Project from the list. The default project shown depends on the active project of Forklift.
If the active project is All projects, then the default project is
openshift-mtv. Otherwise, the default project is the same as the active project.If you have Administrator privileges, you can see all projects, otherwise, you can see only the projects you are authorized to work with.
-
Click VMware.
-
-
If you have Administrator privileges, in the OKD web console, click Migration for Virtualization > Overview.
-
In the Welcome pane, click VMware.
If the Welcome pane is not visible, click Show the welcome card in the upper-right corner of the page, and click VMware when the Welcome pane opens.
-
Select a Project from the list. The default project shown depends on the active project of Forklift.
If the active project is All projects, then the default project is
openshift-mtv. Otherwise, the default project is the same as the active project.If you have Administrator privileges, you can see all projects, otherwise, you can see only the projects you are authorized to work with.
-
-
-
Specify the following fields:
-
Provider details
-
Provider resource name: Name of the source provider.
-
Endpoint type: Select the vSphere provider endpoint type. Options: vCenter or ESXi. You can migrate virtual machines from vCenter, an ESX/ESXi server that is not managed by vCenter, or from an ESX/ESXi server that is managed by vCenter but does not go through vCenter.
-
URL: URL of the SDK endpoint of the vCenter on which the source VM is mounted. Ensure that the URL includes the
sdkpath, usually/sdk. For example,https://vCenter-host-example.com/sdk. If a certificate for FQDN is specified, the value of this field needs to match the FQDN in the certificate. -
VDDK init image:
VDDKInitImagepath. It is strongly recommended to create a VDDK init image to accelerate migrations. For more information, see Creating a VDDK image.Do one of the following:
-
Select the Skip VMWare Virtual Disk Development Kit (VDDK) SDK acceleration (not recommended).
-
Enter the path in the VDDK init image text box. Format:
<registry_route_or_server_path>/vddk:<tag>. -
Upload a VDDK archive and build a VDDK init image from the archive by doing the following:
-
Click Browse next to the VDDK init image archive text box, select the desired file, and click Select.
-
Click Upload.
The URL of the uploaded archive is displayed in the VDDK init image archive text box.
-
-
-
-
Provider credentials
-
Username: vCenter user or ESXi user. For example,
user@vsphere.local. -
Password: vCenter user password or ESXi user password.
-
-
-
Choose one of the following options for validating CA certificates:
-
Use a custom CA certificate: Migrate after validating a custom CA certificate.
-
Use the system CA certificate: Migrate after validating the system CA certificate.
-
Skip certificate validation : Migrate without validating a CA certificate.
-
To use a custom CA certificate, leave the Skip certificate validation switch toggled to left, and either drag the CA certificate to the text box or browse for it and click Select.
-
To use the system CA certificate, leave the Skip certificate validation switch toggled to the left, and leave the CA certificate text box empty.
-
To skip certificate validation, toggle the Skip certificate validation switch to the right.
-
-
-
Optional: Ask Forklift to fetch a custom CA certificate from the provider’s API endpoint URL.
-
Click Fetch certificate from URL. The Verify certificate window opens.
-
If the details are correct, select the I trust the authenticity of this certificate checkbox, and then, click Confirm. If not, click Cancel, and then, enter the correct certificate information manually.
Once confirmed, the CA certificate will be used to validate subsequent communication with the API endpoint.
-
-
Click Create provider to add and save the provider.
The provider appears in the list of providers.
It might take a few minutes for the provider to have the status
Ready. -
Optional: Add access to the UI of the provider:
-
On the Providers page, click the provider.
The Provider details page opens.
-
Click the Edit icon under External UI web link.
-
Enter the link and click Save.
If you do not enter a link, Forklift attempts to calculate the correct link.
-
If Forklift succeeds, the hyperlink of the field points to the calculated link.
-
If Forklift does not succeed, the field remains empty.
-
-
Selecting a migration network for a VMware source provider
You can select a migration network in the OKD web console for a source provider to reduce risk to the source environment and to improve performance.
Using the default network for migration can result in poor performance because the network might not have sufficient bandwidth. This situation can have a negative effect on the source platform because the disk transfer operation might saturate the network.
|
You can also control the network from which disks are transferred from a host by using the Network File Copy (NFC) service in vSphere. |
|
If you input any value of maximum transmission unit (MTU) besides the default value in your migration network, you must also input the same value in the OKD transfer network that you use. For more information about the OKD transfer network, see Creating a migration plan. |
-
The migration network must have enough throughput, minimum speed of 10 Gbps, for disk transfer.
-
The migration network must be accessible to the KubeVirt nodes through the default gateway.
The source virtual disks are copied by a pod that is connected to the pod network of the target namespace.
-
The migration network should have jumbo frames enabled.
-
In the OKD web console, click Migration → Providers for virtualization.
-
Click the host number in the Hosts column beside a provider to view a list of hosts.
-
Select one or more hosts and click Select migration network.
-
Specify the following fields:
-
Network: Network name
-
ESXi host admin username: For example,
root -
ESXi host admin password: Password
-
-
Click Save.
-
Verify that the status of each host is Ready.
If a host status is not Ready, the host might be unreachable on the migration network or the credentials might be incorrect. You can modify the host configuration and save the changes.
Adding a KubeVirt destination provider
You can use a Red Hat KubeVirt provider as both a source provider and a destination provider.
Specifically, the host cluster that is automatically added as a KubeVirt provider can be used as both a source provider and a destination provider.
You can also add another KubeVirt destination provider to the OKD web console in addition to the default KubeVirt destination provider, which is the cluster where you installed Forklift.
You can migrate VMs from the cluster that Forklift is deployed on to another cluster or from a remote cluster to the cluster that Forklift is deployed on.
-
You must have a KubeVirt service account token with
cluster-adminprivileges.
-
Access the Create KubeVirt provider interface by doing one of the following:
-
In the OKD web console, click Migration for Virtualization > Providers.
-
Click Create Provider.
-
Select a Project from the list. The default project shown depends on the active project of Forklift.
If the active project is All projects, then the default project is
openshift-mtv. Otherwise, the default project is the same as the active project.If you have Administrator privileges, you can see all projects, otherwise, you can see only the projects you are authorized to work with.
-
Click KubeVirt.
-
-
If you have Administrator privileges, in the OKD web console, click Migration for Virtualization > Overview.
-
In the Welcome pane, click KubeVirt.
If the Welcome pane is not visible, click Show the welcome card in the upper-right corner of the page, and click KubeVirt when the Welcome pane opens.
-
Select a Project from the list. The default project shown depends on the active project of Forklift.
If the active project is All projects, then the default project is
openshift-mtv. Otherwise, the default project is the same as the active project.If you have Administrator privileges, you can see all projects, otherwise, you can see only the projects you are authorized to work with.
-
-
-
Specify the following fields:
-
Provider resource name: Name of the source provider
-
URL: URL of the endpoint of the API server
-
Service account bearer token: Token for a service account with
cluster-adminprivilegesIf both URL and Service account bearer token are left blank, the local OKD cluster is used.
-
-
Choose one of the following options for validating CA certificates:
-
Use a custom CA certificate: Migrate after validating a custom CA certificate.
-
Use the system CA certificate: Migrate after validating the system CA certificate.
-
Skip certificate validation : Migrate without validating a CA certificate.
-
To use a custom CA certificate, leave the Skip certificate validation switch toggled to left, and either drag the CA certificate to the text box or browse for it and click Select.
-
To use the system CA certificate, leave the Skip certificate validation switch toggled to the left, and leave the CA certificate text box empty.
-
To skip certificate validation, toggle the Skip certificate validation switch to the right.
-
-
-
Optional: Ask Forklift to fetch a custom CA certificate from the provider’s API endpoint URL.
-
Click Fetch certificate from URL. The Verify certificate window opens.
-
If the details are correct, select the I trust the authenticity of this certificate checkbox, and then, click Confirm. If not, click Cancel, and then, enter the correct certificate information manually.
Once confirmed, the CA certificate will be used to validate subsequent communication with the API endpoint.
-
-
Click Create provider to add and save the provider.
The provider appears in the list of providers.
Selecting a migration network for a KubeVirt provider
You can select a default migration network for a KubeVirt provider in the OKD web console to improve performance. The default migration network is used to transfer disks to the namespaces in which it is configured.
After you select a transfer network, associate its network attachment definition (NAD) with the gateway to be used by this network.
In Forklift version 2.9 and earlier, Forklift used the pod network as the default network.
In version 2.10.0 and later, Forklift detects if you have selected a user-defined network (UDN) as your default network. Therefore, if you set the UDN to be the migration’s namespace, you do not need to select a new default network when you create your migration plan.
|
Forklift supports using UDNs for all providers except KubeVirt. |
UDNs are discussed in greater detail in About user defined networks. Migration procedures have been updated to include UDNs.
|
You can override the default migration network of the provider by selecting a different network when you create a migration plan. |
-
In the OKD web console, click Migration > Providers for virtualization.
-
Click the KubeVirt provider whose migration network you want to change.
When the Providers detail page opens:
-
Click the Networks tab.
-
Click Set default transfer network.
-
Select a default transfer network from the list and click Save.
-
Configure a gateway in the network used for Forklift migrations by completing the following steps:
-
In the OKD web console, click Networking > NetworkAttachmentDefinitions.
-
Select the appropriate default transfer network NAD.
-
Click the YAML tab.
-
Add
forklift.konveyor.io/routeto the metadata:annotations section of the YAML, as in the following example:apiVersion: k8s.cni.cncf.io/v1 kind: NetworkAttachmentDefinition metadata: name: localnet-network namespace: mtv-test annotations: forklift.konveyor.io/route: <IP address> (1)1 The NetworkAttachmentDefinitionparameter is needed to configure an IP address for the interface, either from the Dynamic Host Configuration Protocol (DHCP) or statically. Configuring the IP address enables the interface to reach the configured gateway. -
Click Save.
-
Creating a VMware vSphere migration plan by using the MTV wizard
You can migrate VMware vSphere virtual machines (VMs) from VMware vCenter or from a VMware ESX or ESXi server by using the Forklift plan creation wizard.
The wizard is designed to lead you step-by-step in creating a migration plan.
|
Do not include virtual machines with guest-initiated storage connections, such as Internet Small Computer Systems Interface (iSCSI) connections or Network File System (NFS) mounts. These require either additional planning before migration or reconfiguration after migration. This prevents concurrent disk access to the storage the guest points to. |
|
A plan cannot contain more than 500 VMs or 500 disks. |
|
When you click Create plan on the Review and create page of the wizard, Forklift validates your plan. If everything is OK, the Plan details page for your plan opens. This page contains settings that do not appear in the wizard, but are important. Be sure to read and follow the instructions for this page carefully, even though it is outside the plan creation wizard. The page can be opened later, any time before you run the plan, so you can come back to it if needed. |
-
Have a VMware source provider and a KubeVirt destination provider. For more information, see Adding a VMware vSphere source provider or Adding a KubeVirt destination provider.
-
If you plan to create a Network map or a Storage map that will be used by more than one migration plan, create it in the Network maps or Storage maps page of the UI before you create a migration plan that uses that map.
-
If you are using a user-defined network (UDN), note the name of its namespace as defined in KubeVirt.
-
On the OKD web console, click Migration for Virtualization > Migration plans.
-
Click Create plan.
The Create migration plan wizard opens.
-
On the General page, specify the following fields:
-
Plan name: Enter a name.
-
Plan project: Select from the list.
-
Source provider: Select from the list.
-
Target provider: Select from the list.
-
Target project: Select from the list. If you are using a UDN, this is the namespace defined in KubeVirt.
-
-
Click Next.
-
On the Virtual machines page, select the virtual machines you want to migrate and click Next.
-
If you are using a UDN, verify that the IP address of the provider is outside the subnet of the UDN. If the IP address is within the subnet of the UDN, the migration fails.
-
On the Network map page, choose one of the following options:
-
Use an existing network map: Select an existing network map from the list.
These are network maps available for all plans, and therefore, they are ownerless in terms of the system. If you select this option and choose a map, a copy of that map is attached to your plan, and your plan is the owner of that copy. Any changes you make to your copy do not affect the original plan or any copies that other users have.
If you choose an existing map, be sure it has the same source provider and the same target provider as the ones you want to use in your plan.
-
Use a new network map: Allows you to create a new network map by supplying the following data. This map is attached to this plan, which is then considered to be its owner. Maps that you create using this option are not available in the Use an existing network map option because each is created with an owner.
You can create an ownerless network map, which you and others can use for additional migration plans, in the Network Maps section of the UI.
-
Source network: Select from the list.
-
Target network: Select from the list.
If needed, click Add mapping to add another mapping.
-
Network map name: Enter a name or let Forklift automatically generate a name for the network map.
-
-
-
Click Next.
-
On the Storage map page, choose one of the following options:
-
Use an existing storage map: Select an existing storage map from the list.
These are storage maps available for all plans, and therefore, they are ownerless in terms of the system. If you select this option and choose a map, a copy of that map is attached to your plan, and your plan is the owner of that copy. Any changes you make to your copy do not affect the original plan or any copies that other users have.
If you choose an existing map, be sure it has the same source provider and the same target provider as the ones you want to use in your plan.
-
Use new storage map: Allows you to create one or two new storage maps by supplying the following data. These maps are attached to this plan, which is then their owner. Maps that you create using this option are not available in the Use an existing storage map option because each is created with an owner.
You can create an ownerless storage map, which you and others can use for additional migration plans, in the Storage Maps section of the UI.
-
Source storage: Select from the list.
-
Target storage: Select from the list.
If needed, click Add mapping to add another mapping.
-
Storage map name: Enter a name or let Forklift automatically generate a name for the storage map.
-
-
-
Click Next.
-
On the Migration type page, choose one of the following:
-
Cold migration (default)
-
Warm migration
-
-
Click Next.
-
On the Other settings (optional) page, specify any of the following settings that are appropriate for your plan. All are optional.
-
Disk decryption passphrases: For disks encrypted using Linux Unified Key Setup (LUKS).
-
Enter a decryption passphrase for a LUKS-encrypted device.
-
To add another passphrase, click Add passphrase and add a passphrase.
-
Repeat as needed.
You do not need to enter the passphrases in a specific order. For each LUKS-encrypted device, Forklift tries each passphrase until one unlocks the device.
-
-
Transfer Network: The network used to transfer the VMs to KubeVirt. This is the default transfer network of the provider.
-
Verify that the transfer network is in the selected target project.
-
To choose a different transfer network, select a different transfer network from the list.
-
Optional: To configure another OKD network in the OKD web console, click Networking > NetworkAttachmentDefinitions.
To learn more about the different types of networks OKD supports, see Additional Networks in OpenShift Container Platform.
-
To adjust the maximum transmission unit (MTU) of the OKD transfer network, you must also change the MTU of the VMware migration network. For more information, see Selecting a migration network for a VMware source provider.
-
-
Preserve static IPs: By default, virtual network interface controllers (vNICs) change during the migration process. As a result, vNICs that are configured with a static IP linked to the interface name in the guest VM lose their IP during migration.
-
To preserve static IPs, select the Preserve the static IPs checkbox.
Forklift then issues a warning message about any VMs whose vNIC properties are missing. To retrieve any missing vNIC properties, run those VMs in vSphere. This causes the vNIC properties to be reported to Forklift.
-
-
Root device: Applies to multi-boot VM migrations only. By default, Forklift uses the first bootable device detected as the root device.
-
To specify a different root device, enter it in the text box.
Forklift uses the following format for disk location:
/dev/sd<disk_identifier><disk_partition>. For example, if the second disk is the root device and the operating system is on the disk’s second partition, the format would be:/dev/sdb2. After you enter the boot device, click Save.If the conversion fails because the boot device provided is incorrect, it is possible to get the correct information by checking the conversion pod logs.
-
-
Shared disks: Applies to cold migrations only. Shared disks are disks that are attached to multiple VMs and that use the multi-writer option. These characteristics make shared disks difficult to migrate. By default, Forklift migrates shared disks.
Migrating shared disks might slow down the migration process.
-
To migrate shared disks in the migration plan, verify that Shared disks is selected in the checkbox.
-
To avoid migrating shared disks, clear the Shared disks checkbox.
-
-
-
Click Next.
-
On the Hooks (optional) page, you can add a pre-migration hook, a post-migration hook, or both types of migration hooks. All are optional.
-
To add a hook, select the appropriate Enable hook checkbox.
-
Enter the Hook runner image.
-
Enter the Ansible playbook of the hook in the window.
You cannot include more than one pre-migration hook or more than one post-migration hook in a migration plan.
-
Click Next.
-
On the Review and Create page, review the information displayed.
-
Edit any item by doing the following:
-
Click its Edit step link.
The wizard opens to the page where you defined the item.
-
Edit the item.
-
Either click Next to advance to the next page of the wizard, or click Skip to review to return directly to the Review and create page.
-
-
When you finish reviewing the details of the plan, click Create plan. Forklift validates your plan.
When your plan is validated, the Plan details page for your plan opens in the Details tab.
The Plan settings section of the page includes settings that you specified in the Other settings (optional) page and some additional optional settings. The steps below refer to the additional optional steps, but all of the settings can be edited by clicking the Options menu
, making the change, and then clicking Save. -
Check the following items on the Plan settings section of the page:
-
Volume name template: Specifies a template for the volume interface name for the VMs in your plan.
The template follows the Go template syntax and has access to the following variables:
-
.PVCName: Name of the PVC mounted to the VM using this volume -
.VolumeIndex: Sequential index of the volume interface (0-based)Examples
-
"disk-{{.VolumeIndex}}" -
"pvc-{{.PVCName}}"Variable names cannot exceed 63 characters.
-
To specify a volume name template for all the VMs in your plan, do the following:
-
Click the Edit icon.
-
Click Enter custom naming template.
-
Enter the template according to the instructions.
-
Click Save.
-
-
To specify a different volume name template only for specific VMs, do the following:
-
Click the Virtual Machines tab.
-
Select the desired VMs.
-
Click the Options menu
of the VM. -
Select Edit Volume name template.
-
Enter the template according to the instructions.
-
Click Save.
Changes you make on the Virtual Machines tab override any changes on the Plan details page.
-
-
-
PVC name template: Specifies a template for the name of the persistent volume claim (PVC) for the VMs in your plan.
The template follows the Go template syntax and has access to the following variables:
-
.VmName: Name of the VM -
.PlanName: Name of the migration plan -
.DiskIndex: Initial volume index of the disk -
.RootDiskIndex: Index of the root diskExamples
-
"{{.VmName}}-disk-{{.DiskIndex}}" -
"{{if eq .DiskIndex .RootDiskIndex}}root{{else}}data{{end}}-{{.DiskIndex}}"Variable names cannot exceed 63 characters.
-
To specify a PVC name template for all the VMs in your plan, do the following:
-
Click the Edit icon.
-
Click Enter custom naming template.
-
Enter the template according to the instructions.
-
Click Save.
-
-
To specify a PVC name template only for specific VMs, do the following:
-
Click the Virtual Machines tab.
-
Select the desired VMs.
-
Click the Options menu
of the VM. -
Select Edit PVC name template.
-
Enter the template according to the instructions.
-
Click Save.
Changes you make on the Virtual Machines tab override any changes on the Plan details page.
-
-
-
Network name template: Specifies a template for the network interface name for the VMs in your plan.
The template follows the Go template syntax and has access to the following variables:
-
.NetworkName:If the target network ismultus, add the name of the Multus Network Attachment Definition. Otherwise, leave this variable empty. -
.NetworkNamespace: If the target network ismultus, add the namespace where the Multus Network Attachment Definition is located. -
.NetworkType: Network type. Options:multusorpod. -
.NetworkIndex: Sequential index of the network interface (0-based).Examples
-
"net-{{.NetworkIndex}}" -
{{if eq .NetworkType "pod"}}pod{{else}}multus-{{.NetworkIndex}}{{end}}"Variable names cannot exceed 63 characters.
-
To specify a network name template for all the VMs in your plan, do the following:
-
Click the Edit icon.
-
Click Enter custom naming template.
-
Enter the template according to the instructions.
-
Click Save.
-
-
To specify a different network name template only for specific VMs, do the following:
-
Click the Virtual Machines tab.
-
Select the desired VMs.
-
Click the Options menu
of the VM. -
Select Edit Network name template.
-
Enter the template according to the instructions.
-
Click Save.
Changes you make on the Virtual Machines tab override any changes on the Plan details page.
-
-
-
Raw copy mode: By default, during migration, virtual machines (VMs) are converted using a tool named
virt-v2vthat makes them compatible with KubeVirt. For more information about the virt-v2v conversion process, see How Forklift uses the virt-v2v tool in Migrating your virtual machines to Red Hat KubeVirt. Raw copy mode copies VMs without converting them. This allows for faster conversions, migrating VMs running a wider range of operating systems, and supporting migrating disks encrypted using Linux Unified Key Setup (LUKS) without needing keys. However, VMs migrated using raw copy mode might not function properly on KubeVirt.-
To use raw copy mode for your migration plan, do the following:
-
Click the Edit icon.
-
Toggle the Raw copy mode switch.
-
Click Save.
Forklift validates any changes you made on this page.
-
-
-
-
In addition to listing details based on your entries in the wizard, the Plan details tab includes the following two sections after the details of the plan:
-
Migration history: Details about successful and unsuccessful attempts to run the plan
-
Conditions: Any changes that need to be made to the plan so that it can run successfully
-
-
When you have fixed all conditions listed, you can run your plan from the Plans page.
The Plan details page also includes five additional tabs, which are described in the table that follows:
Table 13. Tabs of the Plan details page YAML Virtual Machines Resources Mappings Hooks Editable YAML
Planmanifest based on your plan’s details including source provider, network and storage maps, VMs, and any issues with your VMsThe VMs the plan migrates
Calculated resources: VMs, CPUs, and total memory for both total VMs and running VMs
Editable specification of the network and storage maps used by your plan
Updatable specification of the hooks used by your plan, if any
Running a migration plan in the MTV UI
You can run a migration plan and view its progress in the OKD web console.
-
Valid migration plan.
-
In the OKD web console, click Migration > Plans for virtualization.
The Plans list displays the source and target providers, the number of virtual machines (VMs) being migrated, the status, the date that the migration started, and the description of each plan.
-
Click Start beside a migration plan to start the migration.
-
Click Start in the confirmation window that opens.
The plan’s Status changes to Running, and the migration’s progress is displayed.
Warm migration only:
-
The precopy stage starts.
-
Click Cutover to complete the migration.
Do not take a snapshot of a VM after you start a migration. Taking a snaphot after a migration starts might cause the migration to fail.
-
-
Optional: Click the links in the migration’s Status to see its overall status and the status of each VM:
-
The link on the left indicates whether the migration failed, succeeded, or is ongoing. It also reports the number of VMs whose migration succeeded, failed, or was canceled.
-
The link on the right opens the Virtual Machines tab of the Plan Details page. For each VM, the tab displays the following data:
-
The name of the VM
-
The start and end times of the migration
-
The amount of data copied
-
A progress pipeline for the VM’s migration
vMotion, including svMotion, and relocation must be disabled for VMs that are being imported to avoid data corruption.
-
-
-
Optional: To view your migration’s logs, either as it is running or after it is completed, perform the following actions:
-
Click the Virtual Machines tab.
-
Click the arrow (>) to the left of the virtual machine whose migration progress you want to check.
The VM’s details are displayed.
-
In the Pods section, in the Pod links column, click the Logs link.
The Logs tab opens.
Logs are not always available. The following are common reasons for logs not being available:
-
The migration is from KubeVirt to KubeVirt. In this case,
virt-v2vis not involved, so no pod is required. -
No pod was created.
-
The pod was deleted.
-
The migration failed before running the pod.
-
-
To see the raw logs, click the Raw link.
-
To download the logs, click the Download link.
-
Migration plan options
On the Plans for virtualization page of the OKD web console, you can click the Options menu ![]() beside a migration plan to access the following options:
beside a migration plan to access the following options:
-
Edit Plan: Edit the details of a migration plan. If the plan is running or has completed successfully, you cannot edit the following options:
-
All properties on the Settings section of the Plan details page. For example, warm or cold migration, target namespace, and preserved static IPs.
-
The plan’s mapping on the Mappings tab.
-
The hooks listed on the Hooks tab.
-
-
Start migration: Active only if relevant.
-
Restart migration: Restart a migration that was interrupted. Before choosing this option, make sure there are no error messages. If there are, you need to edit the plan.
-
Cutover: Warm migrations only. Active only if relevant. Clicking Cutover opens the Cutover window, which supports the following options:
-
Set cutover: Set the date and time for a cutover.
-
Remove cutover: Cancel a scheduled cutover. Active only if relevant.
-
-
Duplicate Plan: Create a new migration plan with the same virtual machines (VMs), parameters, mappings, and hooks as an existing plan. You can use this feature for the following tasks:
-
Migrate VMs to a different namespace.
-
Edit an archived migration plan.
-
Edit a migration plan with a different status, for example, failed, canceled, running, critical, or ready.
-
-
Archive Plan: Delete the logs, history, and metadata of a migration plan. The plan cannot be edited or restarted. It can only be viewed, duplicated, or deleted.
Archive Plan is irreversible. However, you can duplicate an archived plan.
-
Delete Plan: Permanently remove a migration plan. You cannot delete a running migration plan.
Delete Plan is irreversible.
Deleting a migration plan does not remove temporary resources. To remove temporary resources, archive the plan first before deleting it.
The results of archiving and then deleting a migration plan vary by whether you created the plan and its storage and network mappings using the CLI or the UI.
-
If you created them using the UI, then the migration plan and its mappings no longer appear in the UI.
-
If you created them using the CLI, then the mappings might still appear in the UI. This is because mappings in the CLI can be used by more than one migration plan, but mappings created in the UI can only be used in one migration plan.
-
About network maps in migration plans
You can create network maps in Forklift migration plans to map source networks to KubeVirt networks.
There are two types of network maps: maps created for a specific migration plan and maps created for use by any migration plan.
-
Maps created for a specific plan are said to be owned by that plan. You can create these kinds of maps in the Network maps step of the Plan creation wizard.
-
Maps created for use by any migration plan are to said to be ownerless. You can create these kinds of maps in the Network maps page of the Migration for Virtualization section of the KubeVirt web console.
You, or anyone working in the same project, can use them when creating a migration plan in the Plan creation wizard. When you choose one of these unowned maps for a migration plan, Forklift creates a copy of the map and defines your migration plan as the owner of that copy. Any changes you make to the copy do not affect the original map, nor do they apply to any other plan that uses a copy of the map. Both types of network maps for a project are shown in the Network maps page, but there is an important difference in the information displayed in the Owner column of that page for each:
-
Maps created in the Network maps page of the Migration for Virtualization section of the KubeVirt web console are shown as having no owner.
-
Maps created in the Network maps step of the Plan creation wizard are shown as being owned by the migration plan.
Creating ownerless network maps in the Forklift UI
You can create ownerless network maps by using the Forklift UI to map source networks to KubeVirt networks.
-
In the OKD web console, click Migration for Virtualization > Network maps.
-
Click Create NetworkMap.
The Create NetworkMap page opens.
-
Enter the YAML or JSON definitions into the editor, or drag and drop a file into the editor.
-
If you enter YAML definitions, use the following:
$  cat << EOF | kubectl apply -f -
apiVersion: forklift.konveyor.io/v1beta1
kind: NetworkMap
metadata:
  name: <network_map>
  namespace: <namespace>
spec:
  map:
    - destination:
        name: <network_name>
        type: pod (1)
      source: (2)
        id: <source_network_id>
        name: <source_network_name>
    - destination:
        name: <network_attachment_definition> (3)
        namespace: <network_attachment_definition_namespace> (4)
        type: multus
      source:
        id: <source_network_id>
        name: <source_network_name>
  provider:
    source:
      name: <source_provider>
      namespace: <namespace>
    destination:
      name: <destination_provider>
      namespace: <namespace>
EOF| 1 | Allowed values are pod, multus, and ignored. Use ignored to avoid attaching VMs to this network for this migration. |
| 2 | You can use either the id or the name parameter to specify the source network. For id, specify the VMware vSphere network Managed Object Reference (moRef). For more information about retrieving the moRef, see Retrieving a VMware vSphere moRef in Migrating your virtual machines to Red Hat KubeVirt. |
| 3 | Specify a network attachment definition for each additional KubeVirt network. |
| 4 | Required only when type is multus. Specify the namespace of the KubeVirt network attachment definition. |
-
Optional: To download your input, click Download.
-
Click Create.
Your map appears in the list of network maps.
About storage maps in migration plans
You can create storage maps in Forklift migration plans to map source disk storages to KubeVirt storage classes.
There are two types of storage maps: maps created for a specific migration plan and maps created for use by any migration plan.
-
Maps created for a specific plan are said to be owned by that plan. You can create these kinds of maps in the Storage maps step of the Plan creation wizard.
-
Maps created for use by any migration plan are to said to be ownerless. You can create these kinds of maps in the Storage maps page of the Migration for Virtualization section of the KubeVirt web console.
You, or anyone working in the same project, can use them when creating a migration plan in the Plan creation wizard. When you choose one of these unowned maps for a migration plan, Forklift creates a copy of the map and defines your migration plan as the owner of that copy. Any changes you make to the copy do not affect the original map, nor do they apply to any other plan that uses a copy of the map. Both types of storage maps for a project are shown in the Storage maps page, but there is an important difference in the information displayed in the Owner column of that page for each:
-
Maps created in the Storage maps page of the Migration for Virtualization section of the KubeVirt web console are shown as having no owner.
-
Maps created in the Storage maps step of the Plan creation wizard are shown as being owned by the migration plan.
Creating ownerless storage maps in the Forklift UI
You can create ownerless storage maps by using the Forklift UI to map source disk storages to KubeVirt storage classes.
You can create this type of map by using one of the following methods:
-
Create with form, selecting items such as a source provider from lists.
-
Create with YAML, either by entering YAML or JSON definitions or by attaching files containing the same.
You can create ownerless storage maps by using the form page of the Forklift UI.
-
Have a VMware source provider and a KubeVirt destination provider. For more information, see Adding a VMware vSphere source provider or Adding a KubeVirt destination provider.
-
In the OKD web console, click Migration for Virtualization > Storage maps.
-
Click Create storage map > Create with form.
-
Specify the following:
-
Map name: Name of the storage map.
-
Project: Select from the list.
-
Source provider: Select from the list.
-
Target provider: Select from the list.
-
Source storage: Select from the list.
-
Target storage: Select from the list
-
-
Optional: If this is a storage map for a migration using storage copy offload, specify the following offload options:
-
Offload plugin: Select from the list.
-
Storage secret: Select from the list.
-
Storage product: Select from the list
Storage copy offload is Developer Preview software only. Developer Preview software is not supported by Red Hat in any way and is not functionally complete or production-ready. Do not use Developer Preview software for production or business-critical workloads. Developer Preview software provides early access to upcoming product software in advance of its possible inclusion in a Red Hat product offering. Customers can use this software to test functionality and provide feedback during the development process. This software might not have any documentation, is subject to change or removal at any time, and has received limited testing. Red Hat might provide ways to submit feedback on Developer Preview software without an associated SLA.
For more information about the support scope of Red Hat Developer Preview software, see Developer Preview Support Scope.
-
-
Optional: Click Add mapping to create additional storage maps, including mapping multiple storage sources to a single target storage class.
-
Click Create.
Your map appears in the list of storage maps.
Creating ownerless storage maps using YAML or JSON definitions in the Forklift UI
You can create ownerless storage maps by using YAML or JSON definitions in the Forklift UI.
-
In the OKD web console, click Migration for Virtualization > Storage maps.
-
Click Create storage map > Create with YAML.
The Create StorageMap page opens.
-
Enter the YAML or JSON definitions into the editor, or drag and drop a file into the editor.
-
If you enter YAML definitions, use the following:
$ cat << EOF | kubectl apply -f -
apiVersion: forklift.konveyor.io/v1beta1
kind: StorageMap
metadata:
  name: <storage_map>
  namespace: <namespace>
spec:
  map:
    - destination:
        storageClass: <storage_class>
        accessMode: <access_mode> (1)
      source:
        id: <source_datastore> (2)
  provider:
    source:
      name: <source_provider>
      namespace: <namespace>
    destination:
      name: <destination_provider>
      namespace: <namespace>
EOF| 1 | Allowed values are ReadWriteOnce and ReadWriteMany. |
| 2 | Specify the VMware vSphere datastore moRef. For example, f2737930-b567-451a-9ceb-2887f6207009. For more information about retrieving the moRef, see Retrieving a VMware vSphere moRef in Migrating your virtual machines to Red Hat KubeVirt. |
-
Optional: To download your input, click Download.
-
Click Create.
Your map appears in the list of storage maps.
Canceling a migration
You can cancel the migration of some or all virtual machines (VMs) while a migration plan is in progress by using the OKD web console.
-
In the OKD web console, click Plans for virtualization.
-
Click the name of a running migration plan to view the migration details.
-
Select one or more VMs and click Cancel.
-
Click Yes, cancel to confirm the cancellation.
In the Migration details by VM list, the status of the canceled VMs is Canceled. The unmigrated and the migrated virtual machines are not affected.
You can restart a canceled migration by clicking Restart beside the migration plan on the Migration plans page.
Migrating virtual machines from oVirt
Adding an oVirt source provider
You can add an oVirt source provider by using the OKD web console.
-
Engine CA certificate, unless it was replaced by a third-party certificate, in which case, specify the Engine Apache CA certificate
-
Access the Create provider page for oVirt by doing one of the following:
-
In the OKD web console, click Migration for Virtualization > Providers.
-
Click Create Provider.
-
Select a Project from the list. The default project shown depends on the active project of Forklift.
If the active project is All projects, then the default project is
openshift-mtv. Otherwise, the default project is the same as the active project.If you have Administrator privileges, you can see all projects, otherwise, you can see only the projects you are authorized to work with.
-
Click oVirt.
-
-
If you have Administrator privileges, in the OKD web console, click Migration for Virtualization > Overview.
-
In the Welcome pane, click oVirt.
If the Welcome pane is not visible, click Show the welcome card in the upper-right corner of the page, and click oVirt when the Welcome pane opens.
-
Select a Project from the list. The default project shown depends on the active project of Forklift.
If the active project is All projects, then the default project is
openshift-mtv. Otherwise, the default project is the same as the active project.If you have Administrator privileges, you can see all projects, otherwise, you can see only the projects you are authorized to work with.
-
-
-
Specify the following fields:
-
Provider resource name: Name of the source provider.
-
URL: URL of the API endpoint of the oVirt Manager (RHVM) on which the source VM is mounted. Ensure that the URL includes the path leading to the RHVM API server, usually
/ovirt-engine/api. For example,https://rhv-host-example.com/ovirt-engine/api. -
Username: Username.
-
Password: Password.
-
-
Choose one of the following options for validating CA certificates:
-
Use a custom CA certificate: Migrate after validating a custom CA certificate.
-
Use the system CA certificate: Migrate after validating the system CA certificate.
-
Skip certificate validation : Migrate without validating a CA certificate.
-
To use a custom CA certificate, leave the Skip certificate validation switch toggled to left, and either drag the CA certificate to the text box or browse for it and click Select.
-
To use the system CA certificate, leave the Skip certificate validation switch toggled to the left, and leave the CA certificate text box empty.
-
To skip certificate validation, toggle the Skip certificate validation switch to the right.
-
-
-
Optional: Ask Forklift to fetch a custom CA certificate from the provider’s API endpoint URL.
-
Click Fetch certificate from URL. The Verify certificate window opens.
-
If the details are correct, select the I trust the authenticity of this certificate checkbox, and then, click Confirm. If not, click Cancel, and then, enter the correct certificate information manually.
Once confirmed, the CA certificate will be used to validate subsequent communication with the API endpoint.
-
-
Click Create provider to add and save the provider.
The provider appears in the list of providers.
-
Optional: Add access to the UI of the provider:
-
On the Providers page, click the provider.
The Provider details page opens.
-
Click the Edit icon under External UI web link.
-
Enter the link and click Save.
If you do not enter a link, Forklift attempts to calculate the correct link.
-
If Forklift succeeds, the hyperlink of the field points to the calculated link.
-
If Forklift does not succeed, the field remains empty.
-
-
Adding a KubeVirt destination provider
You can use a Red Hat KubeVirt provider as both a source provider and a destination provider.
Specifically, the host cluster that is automatically added as a KubeVirt provider can be used as both a source provider and a destination provider.
You can also add another KubeVirt destination provider to the OKD web console in addition to the default KubeVirt destination provider, which is the cluster where you installed Forklift.
You can migrate VMs from the cluster that Forklift is deployed on to another cluster or from a remote cluster to the cluster that Forklift is deployed on.
-
You must have a KubeVirt service account token with
cluster-adminprivileges.
-
Access the Create KubeVirt provider interface by doing one of the following:
-
In the OKD web console, click Migration for Virtualization > Providers.
-
Click Create Provider.
-
Select a Project from the list. The default project shown depends on the active project of Forklift.
If the active project is All projects, then the default project is
openshift-mtv. Otherwise, the default project is the same as the active project.If you have Administrator privileges, you can see all projects, otherwise, you can see only the projects you are authorized to work with.
-
Click KubeVirt.
-
-
If you have Administrator privileges, in the OKD web console, click Migration for Virtualization > Overview.
-
In the Welcome pane, click KubeVirt.
If the Welcome pane is not visible, click Show the welcome card in the upper-right corner of the page, and click KubeVirt when the Welcome pane opens.
-
Select a Project from the list. The default project shown depends on the active project of Forklift.
If the active project is All projects, then the default project is
openshift-mtv. Otherwise, the default project is the same as the active project.If you have Administrator privileges, you can see all projects, otherwise, you can see only the projects you are authorized to work with.
-
-
-
Specify the following fields:
-
Provider resource name: Name of the source provider
-
URL: URL of the endpoint of the API server
-
Service account bearer token: Token for a service account with
cluster-adminprivilegesIf both URL and Service account bearer token are left blank, the local OKD cluster is used.
-
-
Choose one of the following options for validating CA certificates:
-
Use a custom CA certificate: Migrate after validating a custom CA certificate.
-
Use the system CA certificate: Migrate after validating the system CA certificate.
-
Skip certificate validation : Migrate without validating a CA certificate.
-
To use a custom CA certificate, leave the Skip certificate validation switch toggled to left, and either drag the CA certificate to the text box or browse for it and click Select.
-
To use the system CA certificate, leave the Skip certificate validation switch toggled to the left, and leave the CA certificate text box empty.
-
To skip certificate validation, toggle the Skip certificate validation switch to the right.
-
-
-
Optional: Ask Forklift to fetch a custom CA certificate from the provider’s API endpoint URL.
-
Click Fetch certificate from URL. The Verify certificate window opens.
-
If the details are correct, select the I trust the authenticity of this certificate checkbox, and then, click Confirm. If not, click Cancel, and then, enter the correct certificate information manually.
Once confirmed, the CA certificate will be used to validate subsequent communication with the API endpoint.
-
-
Click Create provider to add and save the provider.
The provider appears in the list of providers.
Selecting a migration network for a KubeVirt provider
You can select a default migration network for a KubeVirt provider in the OKD web console to improve performance. The default migration network is used to transfer disks to the namespaces in which it is configured.
After you select a transfer network, associate its network attachment definition (NAD) with the gateway to be used by this network.
In Forklift version 2.9 and earlier, Forklift used the pod network as the default network.
In version 2.10.0 and later, Forklift detects if you have selected a user-defined network (UDN) as your default network. Therefore, if you set the UDN to be the migration’s namespace, you do not need to select a new default network when you create your migration plan.
|
Forklift supports using UDNs for all providers except KubeVirt. |
UDNs are discussed in greater detail in About user defined networks. Migration procedures have been updated to include UDNs.
|
You can override the default migration network of the provider by selecting a different network when you create a migration plan. |
-
In the OKD web console, click Migration > Providers for virtualization.
-
Click the KubeVirt provider whose migration network you want to change.
When the Providers detail page opens:
-
Click the Networks tab.
-
Click Set default transfer network.
-
Select a default transfer network from the list and click Save.
-
Configure a gateway in the network used for Forklift migrations by completing the following steps:
-
In the OKD web console, click Networking > NetworkAttachmentDefinitions.
-
Select the appropriate default transfer network NAD.
-
Click the YAML tab.
-
Add
forklift.konveyor.io/routeto the metadata:annotations section of the YAML, as in the following example:apiVersion: k8s.cni.cncf.io/v1 kind: NetworkAttachmentDefinition metadata: name: localnet-network namespace: mtv-test annotations: forklift.konveyor.io/route: <IP address> (1)1 The NetworkAttachmentDefinitionparameter is needed to configure an IP address for the interface, either from the Dynamic Host Configuration Protocol (DHCP) or statically. Configuring the IP address enables the interface to reach the configured gateway. -
Click Save.
-
Creating a Red Hat Virtualization migration plan by using the MTV wizard
You can migrate oVirt virtual machines (VMs) by using the Forklift plan creation wizard.
The wizard is designed to lead you step-by-step in creating a migration plan.
|
Do not include virtual machines with guest-initiated storage connections, such as Internet Small Computer Systems Interface (iSCSI) connections or Network File System (NFS) mounts. These require either additional planning before migration or reconfiguration after migration. This prevents concurrent disk access to the storage the guest points to. |
|
A plan cannot contain more than 500 VMs or 500 disks. |
|
When you click Create plan on the Review and create page of the wizard, Forklift validates your plan. If everything is OK, the Plan details page for your plan opens. This page contains settings that do not appear in the wizard, but are important. Be sure to read and follow the instructions for this page carefully, even though it is outside the plan creation wizard. The page can be opened later, any time before you run the plan, so you can come back to it if needed. |
-
Have an oVirt source provider and a KubeVirt destination provider. For more information, see Adding a oVirt source provider or Adding a KubeVirt destination provider.
-
If you plan to create a Network map or a Storage map that will be used by more than one migration plan, create it in the Network maps or Storage maps page of the UI before you create a migration plan that uses that map.
-
If you are using a user-defined network (UDN), note the name of the namespace as defined in KubeVirt.
-
In the OKD web console, click Migration for Virtualization > Migration plans.
-
Click Create plan.
The Create migration plan wizard opens.
-
On the General page, specify the following fields:
-
Plan name: Enter a name.
-
Plan project: Select from the list.
-
Source provider: Select from the list.
-
Target provider: Select from the list.
-
Target project: Select from the list. If you are using a UDN, this is the namespace defined in KubeVirt.
-
-
Click Next.
-
On the Virtual machines page, select the virtual machines you want to migrate and click Next.
-
If you are using a UDN, verify that the IP address of the provider is outside the subnet of the UDN. If the IP address is within the subnet of the UDN, the migration fails.
-
On the Network map page, choose one of the following options:
-
Use an existing network map: Select an existing network map from the list.
These are network maps available for all plans, and therefore, they are ownerless in terms of the system. If you select this option and choose a map, a copy of that map is attached to your plan, and your plan is the owner of that copy. Any changes you make to your copy do not affect the original plan or any copies that other users have.
If you choose an existing map, be sure it has the same source provider and the same target provider as the ones you want to use in your plan.
-
Use a new network map: Allows you to create a new network map by supplying the following data. This map is attached to this plan, which is then considered to be its owner. Maps that you create using this option are not available in the Use an existing network map option because each is created with an owner.
You can create an ownerless network map, which you and others can use for additional migration plans, in the Network Maps section of the UI.
-
Source network: Select from the list.
-
Target network: Select from the list.
If needed, click Add mapping to add another mapping.
-
Network map name: Enter a name or let Forklift automatically generate a name for the network map.
-
-
-
Click Next.
-
On the Storage map page, choose one of the following options:
-
Use an existing storage map: Select an existing storage map from the list.
These are storage maps available for all plans, and therefore, they are ownerless in terms of the system. If you select this option and choose a map, a copy of that map is attached to your plan, and your plan is the owner of that copy. Any changes you make to your copy do not affect the original plan or any copies that other users have.
If you choose an existing map, be sure it has the same source provider and the same target provider as the ones you want to use in your plan.
-
Use new storage map: Allows you to create one or two new storage maps by supplying the following data. These maps are attached to this plan, which is then their owner. Maps that you create using this option are not available in the Use an existing storage map option because each is created with an owner.
You can create an ownerless storage map, which you and others can use for additional migration plans, in the Storage Maps section of the UI.
-
Source storage: Select from the list.
-
Target storage: Select from the list.
If needed, click Add mapping to add another mapping.
-
Storage map name: Enter a name or let Forklift automatically generate a name for the storage map.
-
-
-
Click Next.
-
On the Migration type page, choose one of the following:
-
Cold migration (default)
-
Warm migration
-
-
Click Next.
-
On the Other settings (optional) page, you have the option to change the Transfer network of your migration plan.
The transfer network is the network used to transfer the VMs to KubeVirt. This is the default transfer network of the provider.
-
Verify that the transfer network is in the selected target project.
-
To choose a different transfer network, select a different transfer network from the list.
-
Optional: To configure another OKD network in the OKD web console, click Networking > NetworkAttachmentDefinitions.
To learn more about the different types of networks OKD supports, see Additional Networks in OpenShift Container Platform.
-
To adjust the maximum transmission unit (MTU) of the OKD transfer network, you must also change the MTU of the VMware migration network. For more information, see Selecting a migration network for a VMware source provider.
-
-
Click Next.
-
On the Hooks (optional) page, you can add a pre-migration hook, a post-migration hook, or both types of migration hooks. All are optional.
-
To add a hook, select the appropriate Enable hook checkbox.
-
Enter the Hook runner image.
-
Enter the Ansible playbook of the hook in the window.
You cannot include more than one pre-migration hook or more than one post-migration hook in a migration plan.
-
Click Next.
-
On the Review and Create page, review the information displayed.
-
Edit any item by doing the following:
-
Click its Edit step link.
The wizard opens to the page where you defined the item.
-
Edit the item.
-
Either click Next to advance to the next page of the wizard, or click Skip to review to return directly to the Review and create page.
-
-
When you finish reviewing the details of the plan, click Create plan. Forklift validates your plan.
When your plan is validated, the Plan details page for your plan opens in the Details tab.
The Plan settings section of the page includes settings that you specified in the Other settings (optional) page and some additional optional settings. The steps below refer to the additional optional steps, but all of the settings can be edited by clicking the Options menu
, making the change, and then clicking Save. -
Check the following item on the Plan settings section of the page:
-
Preserve CPU mode: Generally, the CPU model (type) for oVirt VMs is set at the cluster level. However, the CPU model can be set at the VM level, which is called a custom CPU model.
By default, MTV sets the CPU model on the destination cluster as follows: MTV preserves custom CPU settings for VMs that have them. For VMs without custom CPU settings, MTV does not set the CPU model. Instead, the CPU model is later set by OpenShift Virtualization.
To preserve the cluster-level CPU model of your oVirt VMs, do the following:
-
Click the Options menu
. -
Toggle the Whether to preserve the CPU model switch.
-
Click Save.
Forklift validates any changes you made on this page.
-
-
-
In addition to listing details based on your entries in the wizard, the Plan details tab includes the following two sections after the details of the plan:
-
Migration history: Details about successful and unsuccessful attempts to run the plan
-
Conditions: Any changes that need to be made to the plan so that it can run successfully
-
-
When you have fixed all conditions listed, you can run your plan from the Plans page.
The Plan details page also includes five additional tabs, which are described in the table that follows:
Table 14. Tabs of the Plan details page YAML Virtual Machines Resources Mappings Hooks Editable YAML
Planmanifest based on your plan’s details including source provider, network and storage maps, VMs, and any issues with your VMsThe VMs the plan migrates
Calculated resources: VMs, CPUs, and total memory for both total VMs and running VMs
Editable specification of the network and storage maps used by your plan
Updatable specification of the hooks used by your plan, if any
Running a migration plan in the MTV UI
You can run a migration plan and view its progress in the OKD web console.
-
Valid migration plan.
-
In the OKD web console, click Migration > Plans for virtualization.
The Plans list displays the source and target providers, the number of virtual machines (VMs) being migrated, the status, the date that the migration started, and the description of each plan.
-
Click Start beside a migration plan to start the migration.
-
Click Start in the confirmation window that opens.
The plan’s Status changes to Running, and the migration’s progress is displayed.
Warm migration only:
-
The precopy stage starts.
-
Click Cutover to complete the migration.
Do not take a snapshot of a VM after you start a migration. Taking a snaphot after a migration starts might cause the migration to fail.
-
-
Optional: Click the links in the migration’s Status to see its overall status and the status of each VM:
-
The link on the left indicates whether the migration failed, succeeded, or is ongoing. It also reports the number of VMs whose migration succeeded, failed, or was canceled.
-
The link on the right opens the Virtual Machines tab of the Plan Details page. For each VM, the tab displays the following data:
-
The name of the VM
-
The start and end times of the migration
-
The amount of data copied
-
A progress pipeline for the VM’s migration
-
-
-
Optional: To view your migration’s logs, either as it is running or after it is completed, perform the following actions:
-
Click the Virtual Machines tab.
-
Click the arrow (>) to the left of the virtual machine whose migration progress you want to check.
The VM’s details are displayed.
-
In the Pods section, in the Pod links column, click the Logs link.
The Logs tab opens.
Logs are not always available. The following are common reasons for logs not being available:
-
The migration is from KubeVirt to KubeVirt. In this case,
virt-v2vis not involved, so no pod is required. -
No pod was created.
-
The pod was deleted.
-
The migration failed before running the pod.
-
-
To see the raw logs, click the Raw link.
-
To download the logs, click the Download link.
-
Migration plan options
On the Plans for virtualization page of the OKD web console, you can click the Options menu ![]() beside a migration plan to access the following options:
beside a migration plan to access the following options:
-
Edit Plan: Edit the details of a migration plan. If the plan is running or has completed successfully, you cannot edit the following options:
-
All properties on the Settings section of the Plan details page. For example, warm or cold migration, target namespace, and preserved static IPs.
-
The plan’s mapping on the Mappings tab.
-
The hooks listed on the Hooks tab.
-
-
Start migration: Active only if relevant.
-
Restart migration: Restart a migration that was interrupted. Before choosing this option, make sure there are no error messages. If there are, you need to edit the plan.
-
Cutover: Warm migrations only. Active only if relevant. Clicking Cutover opens the Cutover window, which supports the following options:
-
Set cutover: Set the date and time for a cutover.
-
Remove cutover: Cancel a scheduled cutover. Active only if relevant.
-
-
Duplicate Plan: Create a new migration plan with the same virtual machines (VMs), parameters, mappings, and hooks as an existing plan. You can use this feature for the following tasks:
-
Migrate VMs to a different namespace.
-
Edit an archived migration plan.
-
Edit a migration plan with a different status, for example, failed, canceled, running, critical, or ready.
-
-
Archive Plan: Delete the logs, history, and metadata of a migration plan. The plan cannot be edited or restarted. It can only be viewed, duplicated, or deleted.
Archive Plan is irreversible. However, you can duplicate an archived plan.
-
Delete Plan: Permanently remove a migration plan. You cannot delete a running migration plan.
Delete Plan is irreversible.
Deleting a migration plan does not remove temporary resources. To remove temporary resources, archive the plan first before deleting it.
The results of archiving and then deleting a migration plan vary by whether you created the plan and its storage and network mappings using the CLI or the UI.
-
If you created them using the UI, then the migration plan and its mappings no longer appear in the UI.
-
If you created them using the CLI, then the mappings might still appear in the UI. This is because mappings in the CLI can be used by more than one migration plan, but mappings created in the UI can only be used in one migration plan.
-
About network maps in migration plans
You can create network maps in Forklift migration plans to map source networks to KubeVirt networks.
There are two types of network maps: maps created for a specific migration plan and maps created for use by any migration plan.
-
Maps created for a specific plan are said to be owned by that plan. You can create these kinds of maps in the Network maps step of the Plan creation wizard.
-
Maps created for use by any migration plan are to said to be ownerless. You can create these kinds of maps in the Network maps page of the Migration for Virtualization section of the KubeVirt web console.
You, or anyone working in the same project, can use them when creating a migration plan in the Plan creation wizard. When you choose one of these unowned maps for a migration plan, Forklift creates a copy of the map and defines your migration plan as the owner of that copy. Any changes you make to the copy do not affect the original map, nor do they apply to any other plan that uses a copy of the map. Both types of network maps for a project are shown in the Network maps page, but there is an important difference in the information displayed in the Owner column of that page for each:
-
Maps created in the Network maps page of the Migration for Virtualization section of the KubeVirt web console are shown as having no owner.
-
Maps created in the Network maps step of the Plan creation wizard are shown as being owned by the migration plan.
Creating ownerless network maps in the Forklift UI
You can create ownerless network maps by using the Forklift UI to map source networks to KubeVirt networks.
-
In the OKD web console, click Migration for Virtualization > Network maps.
-
Click Create NetworkMap.
The Create NetworkMap page opens.
-
Enter the YAML or JSON definitions into the editor, or drag and drop a file into the editor.
-
If you enter YAML definitions, use the following:
$  cat << EOF | kubectl apply -f -
apiVersion: forklift.konveyor.io/v1beta1
kind: NetworkMap
metadata:
  name: <network_map>
  namespace: <namespace>
spec:
  map:
    - destination:
        name: <network_name>
        type: pod (1)
      source: (2)
        id: <source_network_id>
        name: <source_network_name>
    - destination:
        name: <network_attachment_definition> (3)
        namespace: <network_attachment_definition_namespace> (4)
        type: multus
      source:
        id: <source_network_id>
        name: <source_network_name>
  provider:
    source:
      name: <source_provider>
      namespace: <namespace>
    destination:
      name: <destination_provider>
      namespace: <namespace>
EOF| 1 | Allowed values are pod and multus. |
| 2 | You can use either the id or the name parameter to specify the source network. For id, specify the oVirt network Universal Unique ID (UUID). |
| 3 | Specify a network attachment definition for each additional KubeVirt network. |
| 4 | Required only when type is multus. Specify the namespace of the KubeVirt network attachment definition. |
-
Optional: To download your input, click Download.
-
Click Create.
Your map appears in the list of network maps.
About storage maps in migration plans
You can create storage maps in Forklift migration plans to map source disk storages to KubeVirt storage classes.
There are two types of storage maps: maps created for a specific migration plan and maps created for use by any migration plan.
-
Maps created for a specific plan are said to be owned by that plan. You can create these kinds of maps in the Storage maps step of the Plan creation wizard.
-
Maps created for use by any migration plan are to said to be ownerless. You can create these kinds of maps in the Storage maps page of the Migration for Virtualization section of the KubeVirt web console.
You, or anyone working in the same project, can use them when creating a migration plan in the Plan creation wizard. When you choose one of these unowned maps for a migration plan, Forklift creates a copy of the map and defines your migration plan as the owner of that copy. Any changes you make to the copy do not affect the original map, nor do they apply to any other plan that uses a copy of the map. Both types of storage maps for a project are shown in the Storage maps page, but there is an important difference in the information displayed in the Owner column of that page for each:
-
Maps created in the Storage maps page of the Migration for Virtualization section of the KubeVirt web console are shown as having no owner.
-
Maps created in the Storage maps step of the Plan creation wizard are shown as being owned by the migration plan.
Creating ownerless storage maps in the Forklift UI
You can create ownerless storage maps by using the Forklift UI to map source disk storages to KubeVirt storage classes.
You can create this type of map by using one of the following methods:
-
Create with form, selecting items such as a source provider from lists.
-
Create with YAML, either by entering YAML or JSON definitions or by attaching files containing the same.
Creating ownerless storage maps using the form page of the Forklift UI
You can create ownerless storage maps by using the form page of the Forklift UI.
-
Have a oVirt source provider and a KubeVirt destination provider. For more information, see Adding a oVirt source provider or Adding a KubeVirt destination provider.
-
In the OKD web console, click Migration for Virtualization > Storage maps.
-
Click Create storage map > Create with form.
-
Specify the following:
-
Map name: Name of the storage map.
-
Project: Select from the list.
-
Source provider: Select from the list.
-
Target provider: Select from the list.
-
Source storage: Select from the list.
-
Target storage: Select from the list
-
-
Optional: Click Add mapping to create additional storage maps, including mapping multiple storage sources to a single target storage class.
-
Click Create.
Your map appears in the list of storage maps.
Creating ownerless storage maps using YAML or JSON definitions in the Forklift UI
You can create ownerless storage maps by using YAML or JSON definitions in the Forklift UI.
-
In the OKD web console, click Migration for Virtualization > Storage maps.
-
Click Create storage map > Create with YAML.
The Create StorageMap page opens.
-
Enter the YAML or JSON definitions into the editor, or drag and drop a file into the editor.
-
If you enter YAML definitions, use the following:
$ cat << EOF | kubectl apply -f -
apiVersion: forklift.konveyor.io/v1beta1
kind: StorageMap
metadata:
  name: <storage_map>
  namespace: <namespace>
spec:
  map:
    - destination:
        storageClass: <storage_class>
        accessMode: <access_mode> (1)
      source:
        id: <source_storage_domain> (2)
  provider:
    source:
      name: <source_provider>
      namespace: <namespace>
    destination:
      name: <destination_provider>
      namespace: <namespace>
EOF| 1 | Allowed values are ReadWriteOnce and ReadWriteMany. |
| 2 | Specify the oVirt storage domain UUID. For example, f2737930-b567-451a-9ceb-2887f6207009. |
-
Optional: To download your input, click Download.
-
Click Create.
Your map appears in the list of storage maps.
Canceling a migration
You can cancel the migration of some or all virtual machines (VMs) while a migration plan is in progress by using the OKD web console.
-
In the OKD web console, click Plans for virtualization.
-
Click the name of a running migration plan to view the migration details.
-
Select one or more VMs and click Cancel.
-
Click Yes, cancel to confirm the cancellation.
In the Migration details by VM list, the status of the canceled VMs is Canceled. The unmigrated and the migrated virtual machines are not affected.
You can restart a canceled migration by clicking Restart beside the migration plan on the Migration plans page.
Migrating virtual machines from OpenStack
Adding an OpenStack source provider
You can add an OpenStack source provider by using the OKD web console.
|
When you migrate an image-based VM from an OpenStack provider, a snapshot is created for the image that is attached to the source VM, and the data from the snapshot is copied over to the target VM. This means that the target VM will have the same state as that of the source VM at the time the snapshot was created. |
-
Access the Create provider page for OpenStack by doing one of the following:
-
In the OKD web console, click Migration for Virtualization > Providers.
-
Click Create Provider.
-
Select a Project from the list. The default project shown depends on the active project of Forklift.
If the active project is All projects, then the default project is
openshift-mtv. Otherwise, the default project is the same as the active project.If you have Administrator privileges, you can see all projects, otherwise, you can see only the projects you are authorized to work with.
-
Click OpenStack.
-
-
If you have Administrator privileges, in the OKD web console, click Migration for Virtualization > Overview.
-
In the Welcome pane, click OpenStack.
If the Welcome pane is not visible, click Show the welcome card in the upper-right corner of the page, and click OpenStack when the Welcome pane opens.
-
Select a Project from the list. The default project shown depends on the active project of Forklift.
If the active project is All projects, then the default project is
openshift-mtv. Otherwise, the default project is the same as the active project.If you have Administrator privileges, you can see all projects, otherwise, you can see only the projects you are authorized to work with.
-
-
-
Specify the following fields:
-
Provider resource name: Name of the source provider.
-
URL: URL of the OpenStack Identity (Keystone) endpoint. For example,
http://controller:5000/v3. -
Authentication type: Choose one of the following methods of authentication and supply the information related to your choice. For example, if you choose Application credential ID as the authentication type, the Application credential ID and the Application credential secret fields become active, and you need to supply the ID and the secret.
-
Application credential ID
-
Application credential ID: OpenStack application credential ID
-
Application credential secret: OpenStack application credential
Secret
-
-
Application credential name
-
Application credential name: OpenStack application credential name
-
Application credential secret: OpenStack application credential
Secret -
Username: OpenStack username
-
Domain: OpenStack domain name
-
-
Token with user ID
-
Token: OpenStack token
-
User ID: OpenStack user ID
-
Project ID: OpenStack project ID
-
-
Token with user Name
-
Token: OpenStack token
-
Username: OpenStack username
-
Project: OpenStack project
-
Domain name: OpenStack domain name
-
-
Password
-
Username: OpenStack username
-
Password: OpenStack password
-
Project: OpenStack project
-
Domain: OpenStack domain name
-
-
-
-
Choose one of the following options for validating CA certificates:
-
Use a custom CA certificate: Migrate after validating a custom CA certificate.
-
Use the system CA certificate: Migrate after validating the system CA certificate.
-
Skip certificate validation : Migrate without validating a CA certificate.
-
To use a custom CA certificate, leave the Skip certificate validation switch toggled to left, and either drag the CA certificate to the text box or browse for it and click Select.
-
To use the system CA certificate, leave the Skip certificate validation switch toggled to the left, and leave the CA certificate text box empty.
-
To skip certificate validation, toggle the Skip certificate validation switch to the right.
-
-
-
Optional: Ask Forklift to fetch a custom CA certificate from the provider’s API endpoint URL.
-
Click Fetch certificate from URL. The Verify certificate window opens.
-
If the details are correct, select the I trust the authenticity of this certificate checkbox, and then, click Confirm. If not, click Cancel, and then, enter the correct certificate information manually.
Once confirmed, the CA certificate will be used to validate subsequent communication with the API endpoint.
-
-
Click Create provider to add and save the provider.
The provider appears in the list of providers.
-
Optional: Add access to the UI of the provider:
-
On the Providers page, click the provider.
The Provider details page opens.
-
Click the Edit icon under External UI web link.
-
Enter the link and click Save.
If you do not enter a link, Forklift attempts to calculate the correct link.
-
If Forklift succeeds, the hyperlink of the field points to the calculated link.
-
If Forklift does not succeed, the field remains empty.
-
-
Adding a KubeVirt destination provider
You can use a Red Hat KubeVirt provider as both a source provider and a destination provider.
Specifically, the host cluster that is automatically added as a KubeVirt provider can be used as both a source provider and a destination provider.
You can also add another KubeVirt destination provider to the OKD web console in addition to the default KubeVirt destination provider, which is the cluster where you installed Forklift.
You can migrate VMs from the cluster that Forklift is deployed on to another cluster or from a remote cluster to the cluster that Forklift is deployed on.
-
You must have a KubeVirt service account token with
cluster-adminprivileges.
-
Access the Create KubeVirt provider interface by doing one of the following:
-
In the OKD web console, click Migration for Virtualization > Providers.
-
Click Create Provider.
-
Select a Project from the list. The default project shown depends on the active project of Forklift.
If the active project is All projects, then the default project is
openshift-mtv. Otherwise, the default project is the same as the active project.If you have Administrator privileges, you can see all projects, otherwise, you can see only the projects you are authorized to work with.
-
Click KubeVirt.
-
-
If you have Administrator privileges, in the OKD web console, click Migration for Virtualization > Overview.
-
In the Welcome pane, click KubeVirt.
If the Welcome pane is not visible, click Show the welcome card in the upper-right corner of the page, and click KubeVirt when the Welcome pane opens.
-
Select a Project from the list. The default project shown depends on the active project of Forklift.
If the active project is All projects, then the default project is
openshift-mtv. Otherwise, the default project is the same as the active project.If you have Administrator privileges, you can see all projects, otherwise, you can see only the projects you are authorized to work with.
-
-
-
Specify the following fields:
-
Provider resource name: Name of the source provider
-
URL: URL of the endpoint of the API server
-
Service account bearer token: Token for a service account with
cluster-adminprivilegesIf both URL and Service account bearer token are left blank, the local OKD cluster is used.
-
-
Choose one of the following options for validating CA certificates:
-
Use a custom CA certificate: Migrate after validating a custom CA certificate.
-
Use the system CA certificate: Migrate after validating the system CA certificate.
-
Skip certificate validation : Migrate without validating a CA certificate.
-
To use a custom CA certificate, leave the Skip certificate validation switch toggled to left, and either drag the CA certificate to the text box or browse for it and click Select.
-
To use the system CA certificate, leave the Skip certificate validation switch toggled to the left, and leave the CA certificate text box empty.
-
To skip certificate validation, toggle the Skip certificate validation switch to the right.
-
-
-
Optional: Ask Forklift to fetch a custom CA certificate from the provider’s API endpoint URL.
-
Click Fetch certificate from URL. The Verify certificate window opens.
-
If the details are correct, select the I trust the authenticity of this certificate checkbox, and then, click Confirm. If not, click Cancel, and then, enter the correct certificate information manually.
Once confirmed, the CA certificate will be used to validate subsequent communication with the API endpoint.
-
-
Click Create provider to add and save the provider.
The provider appears in the list of providers.
Selecting a migration network for a KubeVirt provider
You can select a default migration network for a KubeVirt provider in the OKD web console to improve performance. The default migration network is used to transfer disks to the namespaces in which it is configured.
After you select a transfer network, associate its network attachment definition (NAD) with the gateway to be used by this network.
In Forklift version 2.9 and earlier, Forklift used the pod network as the default network.
In version 2.10.0 and later, Forklift detects if you have selected a user-defined network (UDN) as your default network. Therefore, if you set the UDN to be the migration’s namespace, you do not need to select a new default network when you create your migration plan.
|
Forklift supports using UDNs for all providers except KubeVirt. |
UDNs are discussed in greater detail in About user defined networks. Migration procedures have been updated to include UDNs.
|
You can override the default migration network of the provider by selecting a different network when you create a migration plan. |
-
In the OKD web console, click Migration > Providers for virtualization.
-
Click the KubeVirt provider whose migration network you want to change.
When the Providers detail page opens:
-
Click the Networks tab.
-
Click Set default transfer network.
-
Select a default transfer network from the list and click Save.
-
Configure a gateway in the network used for Forklift migrations by completing the following steps:
-
In the OKD web console, click Networking > NetworkAttachmentDefinitions.
-
Select the appropriate default transfer network NAD.
-
Click the YAML tab.
-
Add
forklift.konveyor.io/routeto the metadata:annotations section of the YAML, as in the following example:apiVersion: k8s.cni.cncf.io/v1 kind: NetworkAttachmentDefinition metadata: name: localnet-network namespace: mtv-test annotations: forklift.konveyor.io/route: <IP address> (1)1 The NetworkAttachmentDefinitionparameter is needed to configure an IP address for the interface, either from the Dynamic Host Configuration Protocol (DHCP) or statically. Configuring the IP address enables the interface to reach the configured gateway. -
Click Save.
-
Creating an OpenStack migration plan by using the MTV wizard
You can migrate OpenStack virtual machines (VMs) by using the Forklift plan creation wizard.
The wizard is designed to lead you step-by-step in creating a migration plan.
|
Do not include virtual machines with guest-initiated storage connections, such as Internet Small Computer Systems Interface (iSCSI) connections or Network File System (NFS) mounts. These require either additional planning before migration or reconfiguration after migration. This prevents concurrent disk access to the storage the guest points to. |
|
A plan cannot contain more than 500 VMs or 500 disks. |
|
When you click Create plan on the Review and create page of the wizard, Forklift validates your plan. If everything is OK, the Plan details page for your plan opens. This page contains settings that do not appear in the wizard, but are important. Be sure to read and follow the instructions for this page carefully, even though it is outside the plan creation wizard. The page can be opened later, any time before you run the plan, so you can come back to it if needed. |
-
Have an OpenStack source provider and an KubeVirt destination provider. For more information, see Adding an OpenStack source provider or Adding a KubeVirt destination provider.
-
If you plan to create a Network map or a Storage map that will be used by more than one migration plan, create it in the Network maps or Storage maps page of the UI before you create a migration plan that uses that map.
-
If you are using a user-defined network (UDN), note the name of its namespace as defined in KubeVirt.
-
In the OKD web console, click Migration for Virtualization > Migration plans.
-
Click Create plan.
The Create migration plan wizard opens.
-
On the General page, specify the following fields:
-
Plan name: Enter a name.
-
Plan project: Select from the list.
-
Source provider: Select from the list.
-
Target provider: Select from the list.
-
Target project: Select from the list. If you are using a UDN, this is the namespace defined in KubeVirt.
-
-
Click Next.
-
On the Virtual machines page, select the virtual machines you want to migrate and click Next.
-
If you are using a UDN, verify that the IP address of the provider is outside the subnet of the UDN. If the IP address is within the subnet of the UDN, the migration fails.
-
On the Network map page, choose one of the following options:
-
Use an existing network map: Select an existing network map from the list.
These are network maps available for all plans, and therefore, they are ownerless in terms of the system. If you select this option and choose a map, a copy of that map is attached to your plan, and your plan is the owner of that copy. Any changes you make to your copy do not affect the original plan or any copies that other users have.
If you choose an existing map, be sure it has the same source provider and the same target provider as the ones you want to use in your plan.
-
Use a new network map: Allows you to create a new network map by supplying the following data. This map is attached to this plan, which is then considered to be its ownerr. Maps that you create using this option are not available in the Use an existing network map option because each is created with an owner.
You can create an ownerless network map, which you and others can use for additional migration plans, in the Network Maps section of the UI.
-
Source network: Select from the list.
-
Target network: Select from the list.
If needed, click Add mapping to add another mapping.
-
Network map name: Enter a name or let Forklift automatically generate a name for the network map.
-
-
-
Click Next.
-
On the Storage map page, choose one of the following options:
-
Use an existing storage map: Select an existing storage map from the list.
These are storage maps available for all plans, and therefore, they are ownerless in terms of the system. If you select this option and choose a map, a copy of that map is attached to your plan, and your plan is the owner of that copy. Any changes you make to your copy do not affect the original plan or any copies that other users have.
If you choose an existing map, be sure it has the same source provider and the same target provider as the ones you want to use in your plan.
-
Use new storage map: Allows you to create one or two new storage maps by supplying the following data. These maps are attached to this plan, which is then their owner. Maps that you create using this option are not available in the Use an existing storage map option because each is created with an owner.
You can create an ownerless storage map, which you and others can use for additional migration plans, in the Storage Maps section of the UI.
-
Source storage: Select from the list.
-
Target storage: Select from the list.
If needed, click Add mapping to add another mapping.
-
Storage map name: Enter a name or let Forklift automatically generate a name for the storage map.
-
-
-
Click Next.
-
On the Other settings (optional) page, you have the option to change the Transfer network of your migration plan.
The transfer network is the network used to transfer the VMs to KubeVirt. This is the default transfer network of the provider.
-
Verify that the transfer network is in the selected target project.
-
To choose a different transfer network, select a different transfer network from the list.
-
Optional: To configure another OKD network in the OKD web console, click Networking > NetworkAttachmentDefinitions.
To learn more about the different types of networks OKD supports, see Additional Networks in OpenShift Container Platform.
-
To adjust the maximum transmission unit (MTU) of the OKD transfer network, you must also change the MTU of the VMware migration network. For more information, see Selecting a migration network for a VMware source provider.
-
-
Click Next.
-
On the Hooks (optional) page, you can add a pre-migration hook, a post-migration hook, or both types of migration hooks. All are optional.
-
To add a hook, select the appropriate Enable hook checkbox.
-
Enter the Hook runner image.
-
Enter the Ansible playbook of the hook in the window.
You cannot include more than one pre-migration hook or more than one post-migration hook in a migration plan.
-
Click Next.
-
On the Review and Create page, review the information displayed.
-
Edit any item by doing the following:
-
Click its Edit step link.
The wizard opens to the page where you defined the item.
-
Edit the item.
-
Either click Next to advance to the next page of the wizard, or click Skip to review to return directly to the Review and create page.
-
-
When you finish reviewing the details of the plan, click Create plan. Forklift validates your plan.
When your plan is validated, the Plan details page for your plan opens in the Details tab.
-
In addition to listing details based on your entries in the wizard, the Plan details tab includes the following two sections after the details of the plan:
-
Migration history: Details about successful and unsuccessful attempts to run the plan
-
Conditions: Any changes that need to be made to the plan so that it can run successfully
-
-
When you have fixed all conditions listed, you can run your plan from the Plans page.
The Plan details page also includes five additional tabs, which are described in the table that follows:
Table 15. Tabs of the Plan details page YAML Virtual Machines Resources Mappings Hooks Editable YAML
Planmanifest based on your plan’s details including source provider, network and storage maps, VMs, and any issues with your VMsThe VMs the plan migrates
Calculated resources: VMs, CPUs, and total memory for both total VMs and running VMs
Editable specification of the network and storage maps used by your plan
Updatable specification of the hooks used by your plan, if any
Running a migration plan in the MTV UI
You can run a migration plan and view its progress in the OKD web console.
-
Valid migration plan.
-
In the OKD web console, click Migration > Plans for virtualization.
The Plans list displays the source and target providers, the number of virtual machines (VMs) being migrated, the status, the date that the migration started, and the description of each plan.
-
Click Start beside a migration plan to start the migration.
-
Click Start in the confirmation window that opens.
The plan’s Status changes to Running, and the migration’s progress is displayed.
+
Do not take a snapshot of a VM after you start a migration. Taking a snaphot after a migration starts might cause the migration to fail.
-
Optional: Click the links in the migration’s Status to see its overall status and the status of each VM:
-
The link on the left indicates whether the migration failed, succeeded, or is ongoing. It also reports the number of VMs whose migration succeeded, failed, or was canceled.
-
The link on the right opens the Virtual Machines tab of the Plan Details page. For each VM, the tab displays the following data:
-
The name of the VM
-
The start and end times of the migration
-
The amount of data copied
-
A progress pipeline for the VM’s migration
-
-
-
Optional: To view your migration’s logs, either as it is running or after it is completed, perform the following actions:
-
Click the Virtual Machines tab.
-
Click the arrow (>) to the left of the virtual machine whose migration progress you want to check.
The VM’s details are displayed.
-
In the Pods section, in the Pod links column, click the Logs link.
The Logs tab opens.
Logs are not always available. The following are common reasons for logs not being available:
-
The migration is from KubeVirt to KubeVirt. In this case,
virt-v2vis not involved, so no pod is required. -
No pod was created.
-
The pod was deleted.
-
The migration failed before running the pod.
-
-
To see the raw logs, click the Raw link.
-
To download the logs, click the Download link.
-
Migration plan options
On the Plans for virtualization page of the OKD web console, you can click the Options menu ![]() beside a migration plan to access the following options:
beside a migration plan to access the following options:
-
Edit Plan: Edit the details of a migration plan. If the plan is running or has completed successfully, you cannot edit the following options:
-
All properties on the Settings section of the Plan details page. For example, warm or cold migration, target namespace, and preserved static IPs.
-
The plan’s mapping on the Mappings tab.
-
The hooks listed on the Hooks tab.
-
-
Start migration: Active only if relevant.
-
Restart migration: Restart a migration that was interrupted. Before choosing this option, make sure there are no error messages. If there are, you need to edit the plan.
-
Cutover: Warm migrations only. Active only if relevant. Clicking Cutover opens the Cutover window, which supports the following options:
-
Set cutover: Set the date and time for a cutover.
-
Remove cutover: Cancel a scheduled cutover. Active only if relevant.
-
-
Duplicate Plan: Create a new migration plan with the same virtual machines (VMs), parameters, mappings, and hooks as an existing plan. You can use this feature for the following tasks:
-
Migrate VMs to a different namespace.
-
Edit an archived migration plan.
-
Edit a migration plan with a different status, for example, failed, canceled, running, critical, or ready.
-
-
Archive Plan: Delete the logs, history, and metadata of a migration plan. The plan cannot be edited or restarted. It can only be viewed, duplicated, or deleted.
Archive Plan is irreversible. However, you can duplicate an archived plan.
-
Delete Plan: Permanently remove a migration plan. You cannot delete a running migration plan.
Delete Plan is irreversible.
Deleting a migration plan does not remove temporary resources. To remove temporary resources, archive the plan first before deleting it.
The results of archiving and then deleting a migration plan vary by whether you created the plan and its storage and network mappings using the CLI or the UI.
-
If you created them using the UI, then the migration plan and its mappings no longer appear in the UI.
-
If you created them using the CLI, then the mappings might still appear in the UI. This is because mappings in the CLI can be used by more than one migration plan, but mappings created in the UI can only be used in one migration plan.
-
About network maps in migration plans
You can create network maps in Forklift migration plans to map source networks to KubeVirt networks.
There are two types of network maps: maps created for a specific migration plan and maps created for use by any migration plan.
-
Maps created for a specific plan are said to be owned by that plan. You can create these kinds of maps in the Network maps step of the Plan creation wizard.
-
Maps created for use by any migration plan are to said to be ownerless. You can create these kinds of maps in the Network maps page of the Migration for Virtualization section of the KubeVirt web console.
You, or anyone working in the same project, can use them when creating a migration plan in the Plan creation wizard. When you choose one of these unowned maps for a migration plan, Forklift creates a copy of the map and defines your migration plan as the owner of that copy. Any changes you make to the copy do not affect the original map, nor do they apply to any other plan that uses a copy of the map. Both types of network maps for a project are shown in the Network maps page, but there is an important difference in the information displayed in the Owner column of that page for each:
-
Maps created in the Network maps page of the Migration for Virtualization section of the KubeVirt web console are shown as having no owner.
-
Maps created in the Network maps step of the Plan creation wizard are shown as being owned by the migration plan.
Creating ownerless network maps in the Forklift UI
You can create ownerless network maps by using the Forklift UI to map source networks to KubeVirt networks.
-
In the OKD web console, click Migration for Virtualization > Network maps.
-
Click Create NetworkMap.
The Create NetworkMap page opens.
-
Enter the YAML or JSON definitions into the editor, or drag and drop a file into the editor.
-
If you enter YAML definitions, use the following:
$  cat << EOF | kubectl apply -f -
apiVersion: forklift.konveyor.io/v1beta1
kind: NetworkMap
metadata:
  name: <network_map>
  namespace: <namespace>
spec:
  map:
    - destination:
        name: <network_name>
        type: pod (1)
      source:(2)
        id: <source_network_id>
        name: <source_network_name>
    - destination:
        name: <network_attachment_definition> (3)
        namespace: <network_attachment_definition_namespace> (4)
        type: multus
      source:
        id: <source_network_id>
        name: <source_network_name>
  provider:
    source:
      name: <source_provider>
      namespace: <namespace>
    destination:
      name: <destination_provider>
      namespace: <namespace>
EOF| 1 | Allowed values are pod and multus. |
| 2 | You can use either the id or the name parameter to specify the source network. For id, specify the OpenStack network UUID. |
| 3 | Specify a network attachment definition for each additional KubeVirt network. |
| 4 | Required only when type is multus. Specify the namespace of the KubeVirt network attachment definition. |
-
Optional: To download your input, click Download.
-
Click Create.
Your map appears in the list of network maps.
About storage maps in migration plans
You can create storage maps in Forklift migration plans to map source disk storages to KubeVirt storage classes.
There are two types of storage maps: maps created for a specific migration plan and maps created for use by any migration plan.
-
Maps created for a specific plan are said to be owned by that plan. You can create these kinds of maps in the Storage maps step of the Plan creation wizard.
-
Maps created for use by any migration plan are to said to be ownerless. You can create these kinds of maps in the Storage maps page of the Migration for Virtualization section of the KubeVirt web console.
You, or anyone working in the same project, can use them when creating a migration plan in the Plan creation wizard. When you choose one of these unowned maps for a migration plan, Forklift creates a copy of the map and defines your migration plan as the owner of that copy. Any changes you make to the copy do not affect the original map, nor do they apply to any other plan that uses a copy of the map. Both types of storage maps for a project are shown in the Storage maps page, but there is an important difference in the information displayed in the Owner column of that page for each:
-
Maps created in the Storage maps page of the Migration for Virtualization section of the KubeVirt web console are shown as having no owner.
-
Maps created in the Storage maps step of the Plan creation wizard are shown as being owned by the migration plan.
Creating ownerless storage maps in the Forklift UI
You can create ownerless storage maps by using the Forklift UI to map source disk storages to KubeVirt storage classes.
You can create this type of map by using one of the following methods:
-
Create with form, selecting items such as a source provider from lists.
-
Create with YAML, either by entering YAML or JSON definitions or by attaching files containing the same.
Creating ownerless storage maps using the form page of the Forklift UI
You can create ownerless storage maps by using the form page of the Forklift UI.
-
Have an OpenStack source provider and a KubeVirt destination provider. For more information, see Adding an OKD source provider or Adding a KubeVirt destination provider.
-
In the OKD web console, click Migration for Virtualization > Storage maps.
-
Click Create storage map > Create with form.
-
Specify the following:
-
Map name: Name of the storage map.
-
Project: Select from the list.
-
Source provider: Select from the list.
-
Target provider: Select from the list.
-
Source storage: Select from the list.
-
Target storage: Select from the list
-
-
Optional: Click Add mapping to create additional storage maps, including mapping multiple storage sources to a single target storage class.
-
Click Create.
Your map appears in the list of storage maps.
Creating ownerless storage maps using YAML or JSON definitions in the Forklift UI
You can create ownerless storage maps by using YAML or JSON definitions in the Forklift UI.
-
In the OKD web console, click Migration for Virtualization > Storage maps.
-
Click Create storage map > Create with YAML.
The Create StorageMap page opens.
-
Enter the YAML or JSON definitions into the editor, or drag and drop a file into the editor.
-
If you enter YAML definitions, use the following:
$ cat << EOF | kubectl apply -f -
apiVersion: forklift.konveyor.io/v1beta1
kind: StorageMap
metadata:
  name: <storage_map>
  namespace: <namespace>
spec:
  map:
    - destination:
        storageClass: <storage_class>
        accessMode: <access_mode> (1)
      source:
        id: <source_volume_type> (2)
  provider:
    source:
      name: <source_provider>
      namespace: <namespace>
    destination:
      name: <destination_provider>
      namespace: <namespace>
EOF| 1 | Allowed values are ReadWriteOnce and ReadWriteMany. |
| 2 | Specify the OpenStack volume_type UUID. For example, f2737930-b567-451a-9ceb-2887f6207009. |
-
Optional: To download your input, click Download.
-
Click Create.
Your map appears in the list of storage maps.
Canceling a migration
You can cancel the migration of some or all virtual machines (VMs) while a migration plan is in progress by using the OKD web console.
-
In the OKD web console, click Plans for virtualization.
-
Click the name of a running migration plan to view the migration details.
-
Select one or more VMs and click Cancel.
-
Click Yes, cancel to confirm the cancellation.
In the Migration details by VM list, the status of the canceled VMs is Canceled. The unmigrated and the migrated virtual machines are not affected.
You can restart a canceled migration by clicking Restart beside the migration plan on the Migration plans page.
Migrating virtual machines from OVA
Adding an Open Virtual Appliance (OVA) source provider
You can add Open Virtual Appliance (OVA) files that were created by VMware vSphere as a source provider by using the OKD web console.
-
Access the Create provider page for Open Virtual Appliance by doing one of the following:
-
In the OKD web console, click Migration for Virtualization > Providers.
-
Click Create Provider.
-
Select a Project from the list. The default project shown depends on the active project of Forklift.
If the active project is All projects, then the default project is
openshift-mtv. Otherwise, the default project is the same as the active project.If you have Administrator privileges, you can see all projects, otherwise, you can see only the projects you are authorized to work with.
-
Click Open Virtual Appliance.
-
-
If you have Administrator privileges, in the OKD web console, click Migration for Virtualization > Overview.
-
In the Welcome pane, click Open Virtual Appliance.
If the Welcome pane is not visible, click Show the welcome card in the upper-right corner of the page, and click Open Virtual Appliance when the Welcome pane opens.
-
Select a Project from the list. The default project shown depends on the active project of Forklift.
If the active project is All projects, then the default project is
openshift-mtv. Otherwise, the default project is the same as the active project.If you have Administrator privileges, you can see all projects, otherwise, you can see only the projects you are authorized to work with.
-
-
-
Specify the following fields:
-
Provider resource name: Name of the source provider
-
URL: URL of the NFS file share that serves the OVA
-
-
Click Create provider to add and save the provider.
The provider appears in the list of providers.
An error message might appear that states that an error has occurred. You can ignore this message.
Adding a KubeVirt destination provider
You can use a Red Hat KubeVirt provider as both a source provider and a destination provider.
Specifically, the host cluster that is automatically added as a KubeVirt provider can be used as both a source provider and a destination provider.
You can also add another KubeVirt destination provider to the OKD web console in addition to the default KubeVirt destination provider, which is the cluster where you installed Forklift.
You can migrate VMs from the cluster that Forklift is deployed on to another cluster or from a remote cluster to the cluster that Forklift is deployed on.
-
You must have a KubeVirt service account token with
cluster-adminprivileges.
-
Access the Create KubeVirt provider interface by doing one of the following:
-
In the OKD web console, click Migration for Virtualization > Providers.
-
Click Create Provider.
-
Select a Project from the list. The default project shown depends on the active project of Forklift.
If the active project is All projects, then the default project is
openshift-mtv. Otherwise, the default project is the same as the active project.If you have Administrator privileges, you can see all projects, otherwise, you can see only the projects you are authorized to work with.
-
Click KubeVirt.
-
-
If you have Administrator privileges, in the OKD web console, click Migration for Virtualization > Overview.
-
In the Welcome pane, click KubeVirt.
If the Welcome pane is not visible, click Show the welcome card in the upper-right corner of the page, and click KubeVirt when the Welcome pane opens.
-
Select a Project from the list. The default project shown depends on the active project of Forklift.
If the active project is All projects, then the default project is
openshift-mtv. Otherwise, the default project is the same as the active project.If you have Administrator privileges, you can see all projects, otherwise, you can see only the projects you are authorized to work with.
-
-
-
Specify the following fields:
-
Provider resource name: Name of the source provider
-
URL: URL of the endpoint of the API server
-
Service account bearer token: Token for a service account with
cluster-adminprivilegesIf both URL and Service account bearer token are left blank, the local OKD cluster is used.
-
-
Choose one of the following options for validating CA certificates:
-
Use a custom CA certificate: Migrate after validating a custom CA certificate.
-
Use the system CA certificate: Migrate after validating the system CA certificate.
-
Skip certificate validation : Migrate without validating a CA certificate.
-
To use a custom CA certificate, leave the Skip certificate validation switch toggled to left, and either drag the CA certificate to the text box or browse for it and click Select.
-
To use the system CA certificate, leave the Skip certificate validation switch toggled to the left, and leave the CA certificate text box empty.
-
To skip certificate validation, toggle the Skip certificate validation switch to the right.
-
-
-
Optional: Ask Forklift to fetch a custom CA certificate from the provider’s API endpoint URL.
-
Click Fetch certificate from URL. The Verify certificate window opens.
-
If the details are correct, select the I trust the authenticity of this certificate checkbox, and then, click Confirm. If not, click Cancel, and then, enter the correct certificate information manually.
Once confirmed, the CA certificate will be used to validate subsequent communication with the API endpoint.
-
-
Click Create provider to add and save the provider.
The provider appears in the list of providers.
Selecting a migration network for a KubeVirt provider
You can select a default migration network for a KubeVirt provider in the OKD web console to improve performance. The default migration network is used to transfer disks to the namespaces in which it is configured.
After you select a transfer network, associate its network attachment definition (NAD) with the gateway to be used by this network.
In Forklift version 2.9 and earlier, Forklift used the pod network as the default network.
In version 2.10.0 and later, Forklift detects if you have selected a user-defined network (UDN) as your default network. Therefore, if you set the UDN to be the migration’s namespace, you do not need to select a new default network when you create your migration plan.
|
Forklift supports using UDNs for all providers except KubeVirt. |
UDNs are discussed in greater detail in About user defined networks. Migration procedures have been updated to include UDNs.
|
You can override the default migration network of the provider by selecting a different network when you create a migration plan. |
-
In the OKD web console, click Migration > Providers for virtualization.
-
Click the KubeVirt provider whose migration network you want to change.
When the Providers detail page opens:
-
Click the Networks tab.
-
Click Set default transfer network.
-
Select a default transfer network from the list and click Save.
-
Configure a gateway in the network used for Forklift migrations by completing the following steps:
-
In the OKD web console, click Networking > NetworkAttachmentDefinitions.
-
Select the appropriate default transfer network NAD.
-
Click the YAML tab.
-
Add
forklift.konveyor.io/routeto the metadata:annotations section of the YAML, as in the following example:apiVersion: k8s.cni.cncf.io/v1 kind: NetworkAttachmentDefinition metadata: name: localnet-network namespace: mtv-test annotations: forklift.konveyor.io/route: <IP address> (1)1 The NetworkAttachmentDefinitionparameter is needed to configure an IP address for the interface, either from the Dynamic Host Configuration Protocol (DHCP) or statically. Configuring the IP address enables the interface to reach the configured gateway. -
Click Save.
-
Creating an Open Virtualization Appliance (OVA) migration plan by using the MTV wizard
You can migrate Open Virtual Appliance (OVA) files that were created by VMware vSphere by using the Forklift plan creation wizard.
The wizard is designed to lead you step-by-step in creating a migration plan.
|
Do not include virtual machines with guest-initiated storage connections, such as Internet Small Computer Systems Interface (iSCSI) connections or Network File System (NFS) mounts. These require either additional planning before migration or reconfiguration after migration. This prevents concurrent disk access to the storage the guest points to. |
|
A plan cannot contain more than 500 VMs or 500 disks. |
|
When you click Create plan on the Review and create page of the wizard, Forklift validates your plan. If everything is OK, the Plan details page for your plan opens. This page contains settings that do not appear in the wizard, but are important. Be sure to read and follow the instructions for this page carefully, even though it is outside the plan creation wizard. The page can be opened later, any time before you run the plan, so you can come back to it if needed. |
-
Have an OVA source provider and a KubeVirt destination provider. For more information, see Adding an Open Virtual Appliance (OVA) source provider or Adding a KubeVirt destination provider.
-
If you plan to create a Network map or a Storage map that will be used by more than one migration plan, create it in the Network maps or Storage maps page of the UI before you create a migration plan that uses that map.
-
If you are using a user-defined network (UDN), note the name of its namespace as defined in KubeVirt.
-
In the OKD web console, click Migration for Virtualization > Migration plans.
-
Click Create plan.
The Create migration plan wizard opens.
-
On the General page, specify the following fields:
-
Plan name: Enter a name.
-
Plan project: Select from the list.
-
Source provider: Select from the list.
-
Target provider: Select from the list.
-
Target project: Select from the list. If you are using a UDN, this is the namespace defined in KubeVirt.
-
-
Click Next.
-
On the Virtual machines page, select the virtual machines you want to migrate and click Next.
-
If you are using a UDN, verify that the IP address of the provider is outside the subnet of the UDN. If the IP address is within the subnet of the UDN, the migration fails.
-
On the Network map page, choose one of the following options:
-
Use an existing network map: Select an existing network map from the list.
These are network maps available for all plans, and therefore, they are ownerless in terms of the system. If you select this option and choose a map, a copy of that map is attached to your plan, and your plan is the owner of that copy. Any changes you make to your copy do not affect the original plan or any copies that other users have.
If you choose an existing map, be sure it has the same source provider and the same target provider as the ones you want to use in your plan.
-
Use a new network map: Allows you to create a new network map by supplying the following data. This map is attached to this plan, which is then considered to be its owner. Maps that you create using this option are not available in the Use an existing network map option because each is created with an owner.
You can create an ownerless network map, which you and others can use for additional migration plans, in the Network Maps section of the UI.
-
Source network: Select from the list.
-
Target network: Select from the list.
If needed, click Add mapping to add another mapping.
-
Network map name: Enter a name or let Forklift automatically generate a name for the network map.
-
-
-
Click Next.
-
On the Storage map page, choose one of the following options:
-
Use an existing storage map: Select an existing storage map from the list.
These are storage maps available for all plans, and therefore, they are ownerless in terms of the system. If you select this option and choose a map, a copy of that map is attached to your plan, and your plan is the owner of that copy. Any changes you make to your copy do not affect the original plan or any copies that other users have.
If you choose an existing map, be sure it has the same source provider and the same target provider as the ones you want to use in your plan.
-
Use new storage map: Allows you to create one or two new storage maps by supplying the following data. These maps are attached to this plan, which is then their owner. Maps that you create using this option are not available in the Use an existing storage map option because each is created with an owner.
You can create an ownerless storage map, which you and others can use for additional migration plans, in the Storage Maps section of the UI.
-
Source storage: Select from the list.
-
Target storage: Select from the list.
If needed, click Add mapping to add another mapping.
-
Storage map name: Enter a name or let Forklift automatically generate a name for the storage map.
-
-
-
Click Next.
-
On the Other settings (optional) page, you have the option to change the Transfer network of your migration plan.
The transfer network is the network used to transfer the VMs to KubeVirt. This is the default transfer network of the provider.
-
Verify that the transfer network is in the selected target project.
-
To choose a different transfer network, select a different transfer network from the list.
-
Optional: To configure another OKD network in the OKD web console, click Networking > NetworkAttachmentDefinitions.
To learn more about the different types of networks OKD supports, see Additional Networks in OpenShift Container Platform.
-
To adjust the maximum transmission unit (MTU) of the OKD transfer network, you must also change the MTU of the VMware migration network. For more information, see Selecting a migration network for a VMware source provider.
-
-
Click Next.
-
On the Hooks (optional) page, you can add a pre-migration hook, a post-migration hook, or both types of migration hooks. All are optional.
-
To add a hook, select the appropriate Enable hook checkbox.
-
Enter the Hook runner image.
-
Enter the Ansible playbook of the hook in the window.
You cannot include more than one pre-migration hook or more than one post-migration hook in a migration plan.
-
Click Next.
-
On the Review and Create page, review the information displayed.
-
Edit any item by doing the following:
-
Click its Edit step link.
The wizard opens to the page where you defined the item.
-
Edit the item.
-
Either click Next to advance to the next page of the wizard, or click Skip to review to return directly to the Review and create page.
-
-
When you finish reviewing the details of the plan, click Create plan. Forklift validates your plan.
When your plan is validated, the Plan details page for your plan opens in the Details tab.
-
In addition to listing details based on your entries in the wizard, the Plan details tab includes the following two sections after the details of the plan:
-
Migration history: Details about successful and unsuccessful attempts to run the plan
-
Conditions: Any changes that need to be made to the plan so that it can run successfully
-
-
When you have fixed all conditions listed, you can run your plan from the Plans page.
The Plan details page also includes five additional tabs, which are described in the table that follows:
Table 16. Tabs of the Plan details page YAML Virtual Machines Resources Mappings Hooks Editable YAML
Planmanifest based on your plan’s details including source provider, network and storage maps, VMs, and any issues with your VMsThe VMs the plan migrates
Calculated resources: VMs, CPUs, and total memory for both total VMs and running VMs
Editable specification of the network and storage maps used by your plan
Updatable specification of the hooks used by your plan, if any
Running a migration plan in the MTV UI
You can run a migration plan and view its progress in the OKD web console.
-
Valid migration plan.
-
In the OKD web console, click Migration > Plans for virtualization.
The Plans list displays the source and target providers, the number of virtual machines (VMs) being migrated, the status, the date that the migration started, and the description of each plan.
-
Click Start beside a migration plan to start the migration.
-
Click Start in the confirmation window that opens.
The plan’s Status changes to Running, and the migration’s progress is displayed.
+
Do not take a snapshot of a VM after you start a migration. Taking a snaphot after a migration starts might cause the migration to fail.
-
Optional: Click the links in the migration’s Status to see its overall status and the status of each VM:
-
The link on the left indicates whether the migration failed, succeeded, or is ongoing. It also reports the number of VMs whose migration succeeded, failed, or was canceled.
-
The link on the right opens the Virtual Machines tab of the Plan Details page. For each VM, the tab displays the following data:
-
The name of the VM
-
The start and end times of the migration
-
The amount of data copied
-
A progress pipeline for the VM’s migration
-
-
-
Optional: To view your migration’s logs, either as it is running or after it is completed, perform the following actions:
-
Click the Virtual Machines tab.
-
Click the arrow (>) to the left of the virtual machine whose migration progress you want to check.
The VM’s details are displayed.
-
In the Pods section, in the Pod links column, click the Logs link.
The Logs tab opens.
Logs are not always available. The following are common reasons for logs not being available:
-
The migration is from KubeVirt to KubeVirt. In this case,
virt-v2vis not involved, so no pod is required. -
No pod was created.
-
The pod was deleted.
-
The migration failed before running the pod.
-
-
To see the raw logs, click the Raw link.
-
To download the logs, click the Download link.
-
Migration plan options
On the Plans for virtualization page of the OKD web console, you can click the Options menu ![]() beside a migration plan to access the following options:
beside a migration plan to access the following options:
-
Edit Plan: Edit the details of a migration plan. If the plan is running or has completed successfully, you cannot edit the following options:
-
All properties on the Settings section of the Plan details page. For example, warm or cold migration, target namespace, and preserved static IPs.
-
The plan’s mapping on the Mappings tab.
-
The hooks listed on the Hooks tab.
-
-
Start migration: Active only if relevant.
-
Restart migration: Restart a migration that was interrupted. Before choosing this option, make sure there are no error messages. If there are, you need to edit the plan.
-
Cutover: Warm migrations only. Active only if relevant. Clicking Cutover opens the Cutover window, which supports the following options:
-
Set cutover: Set the date and time for a cutover.
-
Remove cutover: Cancel a scheduled cutover. Active only if relevant.
-
-
Duplicate Plan: Create a new migration plan with the same virtual machines (VMs), parameters, mappings, and hooks as an existing plan. You can use this feature for the following tasks:
-
Migrate VMs to a different namespace.
-
Edit an archived migration plan.
-
Edit a migration plan with a different status, for example, failed, canceled, running, critical, or ready.
-
-
Archive Plan: Delete the logs, history, and metadata of a migration plan. The plan cannot be edited or restarted. It can only be viewed, duplicated, or deleted.
Archive Plan is irreversible. However, you can duplicate an archived plan.
-
Delete Plan: Permanently remove a migration plan. You cannot delete a running migration plan.
Delete Plan is irreversible.
Deleting a migration plan does not remove temporary resources. To remove temporary resources, archive the plan first before deleting it.
The results of archiving and then deleting a migration plan vary by whether you created the plan and its storage and network mappings using the CLI or the UI.
-
If you created them using the UI, then the migration plan and its mappings no longer appear in the UI.
-
If you created them using the CLI, then the mappings might still appear in the UI. This is because mappings in the CLI can be used by more than one migration plan, but mappings created in the UI can only be used in one migration plan.
-
About network maps in migration plans
You can create network maps in Forklift migration plans to map source networks to KubeVirt networks.
There are two types of network maps: maps created for a specific migration plan and maps created for use by any migration plan.
-
Maps created for a specific plan are said to be owned by that plan. You can create these kinds of maps in the Network maps step of the Plan creation wizard.
-
Maps created for use by any migration plan are to said to be ownerless. You can create these kinds of maps in the Network maps page of the Migration for Virtualization section of the KubeVirt web console.
You, or anyone working in the same project, can use them when creating a migration plan in the Plan creation wizard. When you choose one of these unowned maps for a migration plan, Forklift creates a copy of the map and defines your migration plan as the owner of that copy. Any changes you make to the copy do not affect the original map, nor do they apply to any other plan that uses a copy of the map. Both types of network maps for a project are shown in the Network maps page, but there is an important difference in the information displayed in the Owner column of that page for each:
-
Maps created in the Network maps page of the Migration for Virtualization section of the KubeVirt web console are shown as having no owner.
-
Maps created in the Network maps step of the Plan creation wizard are shown as being owned by the migration plan.
Creating ownerless network maps in the Forklift UI
You can create ownerless network maps by using the Forklift UI to map source networks to KubeVirt networks.
-
In the OKD web console, click Migration for Virtualization > Network maps.
-
Click Create NetworkMap.
The Create NetworkMap page opens.
-
Enter the YAML or JSON definitions into the editor, or drag and drop a file into the editor.
-
If you enter YAML definitions, use the following:
$  cat << EOF | kubectl apply -f -
apiVersion: forklift.konveyor.io/v1beta1
kind: NetworkMap
metadata:
  name: <network_map>
  namespace: <namespace>
spec:
  map:
    - destination:
        name: <network_name>
        type: pod (1)
      source:
        id: <source_network_id> (2)
    - destination:
        name: <network_attachment_definition> (3)
        namespace: <network_attachment_definition_namespace> (4)
        type: multus
      source:
        id: <source_network_id>
  provider:
    source:
      name: <source_provider>
      namespace: <namespace>
    destination:
      name: <destination_provider>
      namespace: <namespace>
EOF| 1 | Allowed values are pod and multus. |
| 2 | Specify the OVA network Universal Unique ID (UUID). |
| 3 | Specify a network attachment definition for each additional KubeVirt network. |
| 4 | Required only when type is multus. Specify the namespace of the KubeVirt network attachment definition. |
-
Optional: To download your input, click Download.
-
Click Create.
Your map appears in the list of network maps.
About storage maps in migration plans
You can create storage maps in Forklift migration plans to map source disk storages to KubeVirt storage classes.
There are two types of storage maps: maps created for a specific migration plan and maps created for use by any migration plan.
-
Maps created for a specific plan are said to be owned by that plan. You can create these kinds of maps in the Storage maps step of the Plan creation wizard.
-
Maps created for use by any migration plan are to said to be ownerless. You can create these kinds of maps in the Storage maps page of the Migration for Virtualization section of the KubeVirt web console.
You, or anyone working in the same project, can use them when creating a migration plan in the Plan creation wizard. When you choose one of these unowned maps for a migration plan, Forklift creates a copy of the map and defines your migration plan as the owner of that copy. Any changes you make to the copy do not affect the original map, nor do they apply to any other plan that uses a copy of the map. Both types of storage maps for a project are shown in the Storage maps page, but there is an important difference in the information displayed in the Owner column of that page for each:
-
Maps created in the Storage maps page of the Migration for Virtualization section of the KubeVirt web console are shown as having no owner.
-
Maps created in the Storage maps step of the Plan creation wizard are shown as being owned by the migration plan.
Creating ownerless storage maps in the Forklift UI
You can create ownerless storage maps by using the Forklift UI to map source disk storages to KubeVirt storage classes.
You can create this type of map by using one of the following methods:
-
Create with form, selecting items such as a source provider from lists.
-
Create with YAML, either by entering YAML or JSON definitions or by attaching files containing the same.
Creating ownerless storage maps using the form page of the Forklift UI
You can create ownerless storage maps by using the form page of the Forklift UI.
-
Have an Open Virtual Appliance (OVA) source provider and a KubeVirt destination provider. For more information, see Adding an Open Virtual Appliance (OVA) source provider or Adding a KubeVirt destination provider.
-
In the OKD web console, click Migration for Virtualization > Storage maps.
-
Click Create storage map > Create with form.
-
Specify the following:
-
Map name: Name of the storage map.
-
Project: Select from the list.
-
Source provider: Select from the list.
-
Target provider: Select from the list.
-
Source storage: Select from the list.
-
Target storage: Select from the list
-
-
Optional: Click Add mapping to create additional storage maps, including mapping multiple storage sources to a single target storage class.
-
Click Create.
Your map appears in the list of storage maps.
Creating ownerless storage maps using YAML or JSON definitions in the Forklift UI
You can create ownerless storage maps by using YAML or JSON definitions in the Forklift UI.
-
In the OKD web console, click Migration for Virtualization > Storage maps.
-
Click Create storage map > Create with YAML.
The Create StorageMap page opens.
-
Enter the YAML or JSON definitions into the editor, or drag and drop a file into the editor.
-
If you enter YAML definitions, use the following:
$ cat << EOF | kubectl apply -f -
apiVersion: forklift.konveyor.io/v1beta1
kind: StorageMap
metadata:
  name: <storage_map>
  namespace: <namespace>
spec:
  map:
    - destination:
        storageClass: <storage_class>
        accessMode: <access_mode> (1)
      source:
        name:  Dummy storage for source provider <provider_name> (2)
  provider:
    source:
      name: <source_provider>
      namespace: <namespace>
    destination:
      name: <destination_provider>
      namespace: <namespace>
EOF| 1 | Allowed values are ReadWriteOnce and ReadWriteMany. |
| 2 | For OVA, the StorageMap can map only a single storage, which all the disks from the OVA are associated with, to a storage class at the destination. For this reason, the storage is referred to in the UI as "Dummy storage for source provider <provider_name>". In the YAML, write the phrase as it appears above, without the quotation marks and replacing <provider_name> with the actual name of the provider. |
-
Optional: To download your input, click Download.
-
Click Create.
Your map appears in the list of storage maps.
Canceling a migration
You can cancel the migration of some or all virtual machines (VMs) while a migration plan is in progress by using the OKD web console.
-
In the OKD web console, click Plans for virtualization.
-
Click the name of a running migration plan to view the migration details.
-
Select one or more VMs and click Cancel.
-
Click Yes, cancel to confirm the cancellation.
In the Migration details by VM list, the status of the canceled VMs is Canceled. The unmigrated and the migrated virtual machines are not affected.
You can restart a canceled migration by clicking Restart beside the migration plan on the Migration plans page.
Migrating virtual machines from KubeVirt
Adding a Red Hat KubeVirt source provider
You can use a Red Hat KubeVirt provider as both a source provider and a destination provider.
Specifically, the host cluster that is automatically added as a KubeVirt provider can be used as both a source provider and a destination provider.
You can migrate VMs from the cluster that Forklift is deployed on to another cluster, or from a remote cluster to the cluster that Forklift is deployed on.
|
The OKD cluster version of the source provider must be 4.16 or later. |
-
Access the Create provider interface KubeVirt by doing one of the following:
-
In the OKD web console, click Migration for Virtualization > Providers.
-
Click Create Provider.
-
Select a Project from the list. The default project shown depends on the active project of Forklift.
If the active project is All projects, then the default project is
openshift-mtv. Otherwise, the default project is the same as the active project.If you have Administrator privileges, you can see all projects, otherwise, you can see only the projects you are authorized to work with.
-
Click KubeVirt.
-
-
If you have Administrator privileges, in the OKD web console, click Migration for Virtualization > Overview.
-
In the Welcome pane, click KubeVirt.
If the Welcome pane is not visible, click Show the welcome card in the upper-right corner of the page, and click KubeVirt when the Welcome pane opens.
-
Select a Project from the list. The default project shown depends on the active project of Forklift.
If the active project is All projects, then the default project is
openshift-mtv. Otherwise, the default project is the same as the active project.If you have Administrator privileges, you can see all projects, otherwise, you can see only the projects you are authorized to work with.
-
-
-
Specify the following fields:
-
Provider resource name: Name of the source provider
-
URL: URL of the endpoint of the API server
-
Service account bearer token: Token for a service account with
cluster-adminprivilegesIf both URL and Service account bearer token are left blank, the local OKD cluster is used.
-
-
Choose one of the following options for validating CA certificates:
-
Use a custom CA certificate: Migrate after validating a custom CA certificate.
-
Use the system CA certificate: Migrate after validating the system CA certificate.
-
Skip certificate validation : Migrate without validating a CA certificate.
-
To use a custom CA certificate, leave the Skip certificate validation switch toggled to left, and either drag the CA certificate to the text box or browse for it and click Select.
-
To use the system CA certificate, leave the Skip certificate validation switch toggled to the left, and leave the CA certificate text box empty.
-
To skip certificate validation, toggle the Skip certificate validation switch to the right.
-
-
-
Optional: Ask Forklift to fetch a custom CA certificate from the provider’s API endpoint URL.
-
Click Fetch certificate from URL. The Verify certificate window opens.
-
If the details are correct, select the I trust the authenticity of this certificate checkbox, and then, click Confirm. If not, click Cancel, and then, enter the correct certificate information manually.
Once confirmed, the CA certificate will be used to validate subsequent communication with the API endpoint.
-
-
Click Create provider to add and save the provider.
The provider appears in the list of providers.
-
Optional: Add access to the UI of the provider:
-
On the Providers page, click the provider.
The Provider details page opens.
-
Click the Edit icon under External UI web link.
-
Enter the link and click Save.
If you do not enter a link, Forklift attempts to calculate the correct link.
-
If Forklift succeeds, the hyperlink of the field points to the calculated link.
-
If Forklift does not succeed, the field remains empty.
-
-
Adding a KubeVirt destination provider
You can use a Red Hat KubeVirt provider as both a source provider and a destination provider.
Specifically, the host cluster that is automatically added as a KubeVirt provider can be used as both a source provider and a destination provider.
You can also add another KubeVirt destination provider to the OKD web console in addition to the default KubeVirt destination provider, which is the cluster where you installed Forklift.
You can migrate VMs from the cluster that Forklift is deployed on to another cluster or from a remote cluster to the cluster that Forklift is deployed on.
-
You must have a KubeVirt service account token with
cluster-adminprivileges.
-
Access the Create KubeVirt provider interface by doing one of the following:
-
In the OKD web console, click Migration for Virtualization > Providers.
-
Click Create Provider.
-
Select a Project from the list. The default project shown depends on the active project of Forklift.
If the active project is All projects, then the default project is
openshift-mtv. Otherwise, the default project is the same as the active project.If you have Administrator privileges, you can see all projects, otherwise, you can see only the projects you are authorized to work with.
-
Click KubeVirt.
-
-
If you have Administrator privileges, in the OKD web console, click Migration for Virtualization > Overview.
-
In the Welcome pane, click KubeVirt.
If the Welcome pane is not visible, click Show the welcome card in the upper-right corner of the page, and click KubeVirt when the Welcome pane opens.
-
Select a Project from the list. The default project shown depends on the active project of Forklift.
If the active project is All projects, then the default project is
openshift-mtv. Otherwise, the default project is the same as the active project.If you have Administrator privileges, you can see all projects, otherwise, you can see only the projects you are authorized to work with.
-
-
-
Specify the following fields:
-
Provider resource name: Name of the source provider
-
URL: URL of the endpoint of the API server
-
Service account bearer token: Token for a service account with
cluster-adminprivilegesIf both URL and Service account bearer token are left blank, the local OKD cluster is used.
-
-
Choose one of the following options for validating CA certificates:
-
Use a custom CA certificate: Migrate after validating a custom CA certificate.
-
Use the system CA certificate: Migrate after validating the system CA certificate.
-
Skip certificate validation : Migrate without validating a CA certificate.
-
To use a custom CA certificate, leave the Skip certificate validation switch toggled to left, and either drag the CA certificate to the text box or browse for it and click Select.
-
To use the system CA certificate, leave the Skip certificate validation switch toggled to the left, and leave the CA certificate text box empty.
-
To skip certificate validation, toggle the Skip certificate validation switch to the right.
-
-
-
Optional: Ask Forklift to fetch a custom CA certificate from the provider’s API endpoint URL.
-
Click Fetch certificate from URL. The Verify certificate window opens.
-
If the details are correct, select the I trust the authenticity of this certificate checkbox, and then, click Confirm. If not, click Cancel, and then, enter the correct certificate information manually.
Once confirmed, the CA certificate will be used to validate subsequent communication with the API endpoint.
-
-
Click Create provider to add and save the provider.
The provider appears in the list of providers.
Selecting a migration network for a KubeVirt provider
You can select a default migration network for a KubeVirt provider in the OKD web console to improve performance. The default migration network is used to transfer disks to the namespaces in which it is configured.
After you select a transfer network, associate its network attachment definition (NAD) with the gateway to be used by this network.
In Forklift version 2.9 and earlier, Forklift used the pod network as the default network.
In version 2.10.0 and later, Forklift detects if you have selected a user-defined network (UDN) as your default network. Therefore, if you set the UDN to be the migration’s namespace, you do not need to select a new default network when you create your migration plan.
|
Forklift supports using UDNs for all providers except KubeVirt. |
UDNs are discussed in greater detail in About user defined networks. Migration procedures have been updated to include UDNs.
|
You can override the default migration network of the provider by selecting a different network when you create a migration plan. |
-
In the OKD web console, click Migration > Providers for virtualization.
-
Click the KubeVirt provider whose migration network you want to change.
When the Providers detail page opens:
-
Click the Networks tab.
-
Click Set default transfer network.
-
Select a default transfer network from the list and click Save.
-
Configure a gateway in the network used for Forklift migrations by completing the following steps:
-
In the OKD web console, click Networking > NetworkAttachmentDefinitions.
-
Select the appropriate default transfer network NAD.
-
Click the YAML tab.
-
Add
forklift.konveyor.io/routeto the metadata:annotations section of the YAML, as in the following example:apiVersion: k8s.cni.cncf.io/v1 kind: NetworkAttachmentDefinition metadata: name: localnet-network namespace: mtv-test annotations: forklift.konveyor.io/route: <IP address> (1)1 The NetworkAttachmentDefinitionparameter is needed to configure an IP address for the interface, either from the Dynamic Host Configuration Protocol (DHCP) or statically. Configuring the IP address enables the interface to reach the configured gateway. -
Click Save.
-
Creating an KubeVirt migration plan by using the MTV wizard
You can migrate KubeVirt virtual machines (VMs) by using the Forklift plan creation wizard.
The wizard is designed to lead you step-by-step in creating a migration plan.
|
Do not include virtual machines with guest-initiated storage connections, such as Internet Small Computer Systems Interface (iSCSI) connections or Network File System (NFS) mounts. These require either additional planning before migration or reconfiguration after migration. This prevents concurrent disk access to the storage the guest points to. |
|
A plan cannot contain more than 500 VMs or 500 disks. |
|
When you click Create plan on the Review and create page of the wizard, Forklift validates your plan. If everything is OK, the Plan details page for your plan opens. This page contains settings that do not appear in the wizard, but are important. Be sure to read and follow the instructions for this page carefully, even though it is outside the plan creation wizard. The page can be opened later, any time before you run the plan, so you can come back to it if needed. |
-
Have an KubeVirt source provider and an KubeVirt destination provider. For more information, see Adding an KubeVirt source provider or Adding a KubeVirt destination provider.
-
If you plan to create a Network map or a Storage map that will be used by more than one migration plan, create it in the Network maps or Storage maps page of the UI before you create a migration plan that uses that map.
-
In the OKD web console, click Migration for Virtualization > Migration plans.
-
Click Create plan.
The Create migration plan wizard opens.
-
On the General page, specify the following fields:
-
Plan name: Enter a name.
-
Plan project: Select from the list.
-
Source provider: Select from the list.
-
Target provider: Select from the list.
-
Target project: Select from the list.
-
-
Click Next.
-
On the Virtual machines page, select the virtual machines you want to migrate and click Next.
-
On the Network map page, choose one of the following options:
-
Use an existing network map: Select an existing network map from the list.
These are network maps available for all plans, and therefore, they are ownerless in terms of the system. If you select this option and choose a map, a copy of that map is attached to your plan, and your plan is the owner of that copy. Any changes you make to your copy do not affect the original plan or any copies that other users have.
If you choose an existing map, be sure it has the same source provider and target provider as the ones you want to use in your plan.
-
Use a new network map: Allows you to create a new network map by supplying the following data. This map is attached to this plan, which is then considered to be its owner. Maps that you create using this option are not available in the Use an existing network map option because each is created with an owner.
You can create an ownerless network map, which you and others can use for additional migration plans, in the Network Maps section of the UI.
-
Source network: Select from the list.
-
Target network: Select from the list.
If needed, click Add mapping to add another mapping.
-
Network map name: Enter a name or let Forklift automatically generate a name for the network map.
-
-
-
Click Next.
-
On the Storage map page, choose one of the following options:
-
Use an existing storage map: Select an existing storage map from the list.
These are storage maps available for all plans, and therefore, they are ownerless in terms of the system. If you select this option and choose a map, a copy of that map is attached to your plan, and your plan is the owner of that copy. Any changes you make to your copy do not affect the original plan or any copies that other users have.
If you choose an existing map, be sure it has the same source provider and the same target provider as the ones you want to use in your plan.
-
Use new storage map: Allows you to create one or two new storage maps by supplying the following data. These maps are attached to this plan, which is then their owner. Maps that you create using this option are not available in the Use an existing storage map option because each is created with an owner.
You can create an ownerless storage map, which you and others can use for additional migration plans, in the Storage Maps section of the UI.
-
Source storage: Select from the list.
-
Target storage: Select from the list.
If needed, click Add mapping to add another mapping.
-
Storage map name: Enter a name or let Forklift automatically generate a name for the storage map.
-
-
-
Click Next.
-
On the Other settings (optional) page, you have the option to change the Transfer network of your migration plan.
The transfer network is the network used to transfer the VMs to KubeVirt. This is the default transfer network of the provider.
-
Verify that the transfer network is in the selected target project.
-
To choose a different transfer network, select a different transfer network from the list.
-
Optional: To configure another OKD network in the OKD web console, click Networking > NetworkAttachmentDefinitions.
To learn more about the different types of networks OKD supports, see Additional Networks in OpenShift Container Platform.
-
To adjust the maximum transmission unit (MTU) of the OKD transfer network, you must also change the MTU of the VMware migration network. For more information, see Selecting a migration network for a VMware source provider.
-
-
Click Next.
-
On the Hooks (optional) page, you can add a pre-migration hook, a post-migration hook, or both types of migration hooks. All are optional.
-
To add a hook, select the appropriate Enable hook checkbox.
-
Enter the Hook runner image.
-
Enter the Ansible playbook of the hook in the window.
You cannot include more than one pre-migration hook or more than one post-migration hook in a migration plan.
-
Click Next.
-
On the Review and Create page, review the information displayed.
-
Edit any item by doing the following:
-
Click its Edit step link.
The wizard opens to the page where you defined the item.
-
Edit the item.
-
Either click Next to advance to the next page of the wizard, or click Skip to review to return directly to the Review and create page.
-
-
When you finish reviewing the details of the plan, click Create plan. Forklift validates your plan.
When your plan is validated, the Plan details page for your plan opens in the Details tab.
-
In addition to listing details based on your entries in the wizard, the Plan details tab includes the following two sections after the details of the plan:
-
Migration history: Details about successful and unsuccessful attempts to run the plan
-
Conditions: Any changes that need to be made to the plan so that it can run successfully
-
-
When you have fixed all conditions listed, you can run your plan from the Plans page.
The Plan details page also includes five additional tabs, which are described in the table that follows:
Table 17. Tabs of the Plan details page YAML Virtual Machines Resources Mappings Hooks Editable YAML
Planmanifest based on your plan’s details including source provider, network and storage maps, VMs, and any issues with your VMsThe VMs the plan migrates
Calculated resources: VMs, CPUs, and total memory for both total VMs and running VMs
Editable specification of the network and storage maps used by your plan
Updatable specification of the hooks used by your plan, if any
Creating a migration plan for a live migration by using the Forklift wizard
You create a migration plan for a live migration of virtual machines (VMs) almost exactly as you create a migration plan for a cold migration. The only difference is that you specify it is a Live migration in the Migration type page.
As described in KubeVirt live migration prerequisites.
-
In the OKD web console, click Migration for Virtualization > Migration plans.
-
Click Create plan.
The Create migration plan wizard opens.
-
On the General page, specify the following fields:
-
Plan name: Enter a name.
-
Plan project: Select from the list.
-
Source provider: Select from the list. You can use any KubeVirt provider. You do not need to create a new one for a live migration.
-
Target provider: Select from the list. Be sure to select the correct KubeVirt target provider.
-
Target project: Select from the list.
-
-
Click Next.
-
On the Virtual machines page, select the virtual machines you want to migrate and ensure they are powered on. A live migration fails if any of its VMs are powered off.
-
Click Next.
-
On the Network map page, choose one of the following options:
-
Use an existing network map: Select an existing network map from the list.
These are network maps available for all plans, and therefore, they are ownerless in terms of the system. If you select this option and choose a map, a copy of that map is attached to your plan, and your plan is the owner of that copy. Any changes you make to your copy do not affect the original plan or any copies that other users have.
If you select an existing map, be sure it has the same source provider and target provider as the ones you want to use in your plan.
-
Use a new network map: Allows you to create a new network map by supplying the following data. This map is attached to this plan, which is then considered to be its owner. Maps that you create using this option are not available in the Use an existing network map option because each is created with an owner.
You can create an ownerless network map, which you and others can use for additional migration plans, in the Network Maps section of the UI.
-
Source network: Select from the list.
-
Target network: Select from the list.
If needed, click Add mapping to add another mapping.
-
Network map name: Enter a name or let Forklift automatically generate a name for the network map.
-
-
-
Click Next.
-
On the Storage map page, choose one of the following options:
-
Use an existing storage map: Select an existing storage map from the list.
These are storage maps available for all plans, and therefore, they are ownerless in terms of the system. If you select this option and choose a map, a copy of that map is attached to your plan, and your plan is the owner of that copy. Any changes you make to your copy do not affect the original plan or any copies that other users have.
If you choose an existing map, be sure it has the same source provider and the same target provider as the ones you want to use in your plan.
-
Use new storage map: Allows you to create one or two new storage maps by supplying the following data. These maps are attached to this plan, which is then their owner. Maps that you create using this option are not available in the Use an existing storage map option because each is created with an owner.
You can create an ownerless storage map, which you and others can use for additional migration plans, in the Storage Maps section of the UI.
-
Source storage: Select from the list.
-
Target storage: Select from the list.
If needed, click Add mapping to add another mapping.
-
Storage map name: Enter a name or let Forklift automatically generate a name for the storage map.
-
-
-
Click Next.
-
On the Migration type page, choose Live migration.
If Live migration does not appear as an option, return to the General page and verify that both the source provider and target provider are KubeVirt clusters.
If they are both KubeVirt clusters, have someone with
cluster-adminprivileges ensure that the prerequisites for live migration are met. For more information, see KubeVirt live migration prerequisites. -
Click Next.
-
On the Other settings (optional) page, click Next without doing anything else.
-
On the Hooks (optional) page, you can add a pre-migration hook, a post-migration hook, or both types of migration hooks. All are optional.
-
To add a hook, select the appropriate Enable hook checkbox.
-
Enter the Hook runner image.
-
Enter the Ansible playbook of the hook in the window.
You cannot include more than one pre-migration hook or more than one post-migration hook in a migration plan.
-
Click Next.
-
On the Review and Create page, review the information displayed.
-
Edit any item by doing the following:
-
Click its Edit step link.
The wizard opens to the page where you defined the item.
-
Edit the item.
-
Either click Next to advance to the next page of the wizard, or click Skip to review to return directly to the Review and create page.
-
-
When you finish reviewing the details of the plan, click Create plan. Forklift validates your plan.
When your plan is validated, the Plan details page for your plan opens in the Details tab.
-
In addition to listing details based on your entries in the wizard, the Plan details tab includes the following two sections after the details of the plan:
-
Migration history: Details about successful and unsuccessful attempts to run the plan
-
Conditions: Any changes that need to be made to the plan so that it can run successfully
-
-
When you have fixed all conditions listed, you can run your plan from the Plans page.
The Plan details page also includes five additional tabs, which are described in the table that follows:
Table 18. Tabs of the Plan details page YAML Virtual Machines Resources Mappings Hooks Editable YAML
Planmanifest based on your plan’s details including source provider, network and storage maps, VMs, and any issues with your VMsThe VMs the plan migrates
Calculated resources: VMs, CPUs, and total memory for both total VMs and running VMs
Editable specification of the network and storage maps used by your plan
Updatable specification of the hooks used by your plan, if any
Running a migration plan in the MTV UI
You can run a migration plan and view its progress in the OKD web console.
-
Valid migration plan.
-
In the OKD web console, click Migration > Plans for virtualization.
The Plans list displays the source and target providers, the number of virtual machines (VMs) being migrated, the status, the date that the migration started, and the description of each plan.
-
Click Start beside a migration plan to start the migration.
-
Click Start in the confirmation window that opens.
The plan’s Status changes to Running, and the migration’s progress is displayed.
+
Do not take a snapshot of a VM after you start a migration. Taking a snaphot after a migration starts might cause the migration to fail.
-
Optional: Click the links in the migration’s Status to see its overall status and the status of each VM:
-
The link on the left indicates whether the migration failed, succeeded, or is ongoing. It also reports the number of VMs whose migration succeeded, failed, or was canceled.
-
The link on the right opens the Virtual Machines tab of the Plan Details page. For each VM, the tab displays the following data:
-
The name of the VM
-
The start and end times of the migration
-
The amount of data copied
-
A progress pipeline for the VM’s migration
-
-
-
Optional: To view your migration’s logs, either as it is running or after it is completed, perform the following actions:
-
Click the Virtual Machines tab.
-
Click the arrow (>) to the left of the virtual machine whose migration progress you want to check.
The VM’s details are displayed.
-
In the Pods section, in the Pod links column, click the Logs link.
The Logs tab opens.
Logs are not always available. The following are common reasons for logs not being available:
-
The migration is from KubeVirt to KubeVirt. In this case,
virt-v2vis not involved, so no pod is required. -
No pod was created.
-
The pod was deleted.
-
The migration failed before running the pod.
-
-
To see the raw logs, click the Raw link.
-
To download the logs, click the Download link.
-
Running a migration plan for a live migration between KubeVirt clusters
You can run a migration plan and view its progress in the OKD web console.
-
Valid migration plan.
-
In the OKD web console, click Migration > Plans for virtualization.
The Plans list displays the source and target providers, the number of virtual machines (VMs) being migrated, the status, the date that the migration started, and the description of each plan.
-
Click Start beside a migration plan to start the migration.
-
Click Start in the confirmation window that opens.
The plan’s Status changes to Running, and the migration’s progress is displayed in the following stages:
-
Initiate : Migration begins.
-
PrepareTarget: Forklift creates empty target
DataVolumesin the target KubeVirt cluster. Forklift then copies all secrets or config maps that are mounted by a source VM to the target namespace. Forklift then creates target VMs in a running state. Forklift also creates aVirtualMachineInstanceMigrationresource for each cluster so that the VMs can synchronize. -
Synchronization: KubeVirt now synchronizes the VMs by using the
KubeVirtresource of each source VM to transfer the VM’s state to each target VM. This communication is done using theVirtualMachineInstanceMigrationresource.Do not take a snapshot of a VM after you start a migration. Taking a snaphot after a migration starts might cause the migration to fail.
-
-
Optional: Click the links in the migration’s Status to see its overall status and the status of each VM:
-
The link on the left indicates whether the migration failed, succeeded, or is ongoing. It also reports the number of VMs whose migration succeeded, failed, or was canceled.
-
The link on the right opens the Virtual Machines tab of the Plan Details page. For each VM, the tab displays the following data:
-
The name of the VM
-
The start and end times of the migration
-
A progress pipeline for the VM’s migration
-
-
-
Optional: To view your migration’s logs, either as it is running or after it is completed, perform the following actions:
-
Click the Virtual Machines tab.
-
Click the arrow (>) to the left of the virtual machine whose migration progress you want to check.
The VM’s details are displayed.
-
In the Pods section, in the Pod links column, click the Logs link.
The Logs tab opens.
Logs are not always available. The following are common reasons for logs not being available:
-
The migration is from KubeVirt to KubeVirt. In this case,
virt-v2vis not involved, so no pod is required. -
No pod was created.
-
The pod was deleted.
-
The migration failed before running the pod.
-
-
To see the raw logs, click the Raw link.
-
To download the logs, click the Download link.
-
Migration plan options
On the Plans for virtualization page of the OKD web console, you can click the Options menu ![]() beside a migration plan to access the following options:
beside a migration plan to access the following options:
-
Edit Plan: Edit the details of a migration plan. If the plan is running or has completed successfully, you cannot edit the following options:
-
All properties on the Settings section of the Plan details page. For example, warm or cold migration, target namespace, and preserved static IPs.
-
The plan’s mapping on the Mappings tab.
-
The hooks listed on the Hooks tab.
-
-
Start migration: Active only if relevant.
-
Restart migration: Restart a migration that was interrupted. Before choosing this option, make sure there are no error messages. If there are, you need to edit the plan.
-
Cutover: Warm migrations only. Active only if relevant. Clicking Cutover opens the Cutover window, which supports the following options:
-
Set cutover: Set the date and time for a cutover.
-
Remove cutover: Cancel a scheduled cutover. Active only if relevant.
-
-
Duplicate Plan: Create a new migration plan with the same virtual machines (VMs), parameters, mappings, and hooks as an existing plan. You can use this feature for the following tasks:
-
Migrate VMs to a different namespace.
-
Edit an archived migration plan.
-
Edit a migration plan with a different status, for example, failed, canceled, running, critical, or ready.
-
-
Archive Plan: Delete the logs, history, and metadata of a migration plan. The plan cannot be edited or restarted. It can only be viewed, duplicated, or deleted.
Archive Plan is irreversible. However, you can duplicate an archived plan.
-
Delete Plan: Permanently remove a migration plan. You cannot delete a running migration plan.
Delete Plan is irreversible.
Deleting a migration plan does not remove temporary resources. To remove temporary resources, archive the plan first before deleting it.
The results of archiving and then deleting a migration plan vary by whether you created the plan and its storage and network mappings using the CLI or the UI.
-
If you created them using the UI, then the migration plan and its mappings no longer appear in the UI.
-
If you created them using the CLI, then the mappings might still appear in the UI. This is because mappings in the CLI can be used by more than one migration plan, but mappings created in the UI can only be used in one migration plan.
-
About network maps in migration plans
You can create network maps in Forklift migration plans to map source networks to KubeVirt networks.
There are two types of network maps: maps created for a specific migration plan and maps created for use by any migration plan.
-
Maps created for a specific plan are said to be owned by that plan. You can create these kinds of maps in the Network maps step of the Plan creation wizard.
-
Maps created for use by any migration plan are to said to be ownerless. You can create these kinds of maps in the Network maps page of the Migration for Virtualization section of the KubeVirt web console.
You, or anyone working in the same project, can use them when creating a migration plan in the Plan creation wizard. When you choose one of these unowned maps for a migration plan, Forklift creates a copy of the map and defines your migration plan as the owner of that copy. Any changes you make to the copy do not affect the original map, nor do they apply to any other plan that uses a copy of the map. Both types of network maps for a project are shown in the Network maps page, but there is an important difference in the information displayed in the Owner column of that page for each:
-
Maps created in the Network maps page of the Migration for Virtualization section of the KubeVirt web console are shown as having no owner.
-
Maps created in the Network maps step of the Plan creation wizard are shown as being owned by the migration plan.
Creating ownerless network maps in the Forklift UI
You can create ownerless network maps by using the Forklift UI to map source networks to KubeVirt networks.
-
In the OKD web console, click Migration for Virtualization > Network maps.
-
Click Create NetworkMap.
The Create NetworkMap page opens.
-
Enter the YAML or JSON definitions into the editor, or drag and drop a file into the editor.
-
If you enter YAML definitions, use the following:
$  cat << EOF | kubectl apply -f -
apiVersion: forklift.konveyor.io/v1beta1
kind: NetworkMap
metadata:
  name: <network_map>
  namespace: <namespace>
spec:
  map:
    - destination:
        name: <network_name>
        type: pod (1)
      source:
        name: <network_name>
        type: pod
    - destination:
        name: <network_attachment_definition> (2)
        namespace: <network_attachment_definition_namespace> (3)
        type: multus
      source:
        name: <network_attachment_definition>
        namespace: <network_attachment_definition_namespace>
        type: multus
  provider:
    source:
      name: <source_provider>
      namespace: <namespace>
    destination:
      name: <destination_provider>
      namespace: <namespace>
EOF| 1 | Allowed values are pod and multus. |
| 2 | Specify a network attachment definition for each additional KubeVirt network. Specify the namespace either by using the namespace property or with a name built as follows: <network_namespace>/<network_name>. |
| 3 | Required only when type is multus. Specify the namespace of the KubeVirt network attachment definition. |
-
Optional: To download your input, click Download.
-
Click Create.
Your map appears in the list of network maps.
About storage maps in migration plans
You can create storage maps in Forklift migration plans to map source disk storages to KubeVirt storage classes.
There are two types of storage maps: maps created for a specific migration plan and maps created for use by any migration plan.
-
Maps created for a specific plan are said to be owned by that plan. You can create these kinds of maps in the Storage maps step of the Plan creation wizard.
-
Maps created for use by any migration plan are to said to be ownerless. You can create these kinds of maps in the Storage maps page of the Migration for Virtualization section of the KubeVirt web console.
You, or anyone working in the same project, can use them when creating a migration plan in the Plan creation wizard. When you choose one of these unowned maps for a migration plan, Forklift creates a copy of the map and defines your migration plan as the owner of that copy. Any changes you make to the copy do not affect the original map, nor do they apply to any other plan that uses a copy of the map. Both types of storage maps for a project are shown in the Storage maps page, but there is an important difference in the information displayed in the Owner column of that page for each:
-
Maps created in the Storage maps page of the Migration for Virtualization section of the KubeVirt web console are shown as having no owner.
-
Maps created in the Storage maps step of the Plan creation wizard are shown as being owned by the migration plan.
Creating ownerless storage maps in the Forklift UI
You can create ownerless storage maps by using the Forklift UI to map source disk storages to KubeVirt storage classes.
You can create this type of map by using one of the following methods:
-
Create with form, selecting items such as a source provider from lists.
-
Create with YAML, either by entering YAML or JSON definitions or by attaching files containing the same.
Creating ownerless storage maps using the form page of the Forklift UI
You can create ownerless storage maps by using the form page of the Forklift UI.
-
Have a KubeVirt source provider and a KubeVirt destination provider. For more information, see Adding a KubeVirt source provider or Adding a KubeVirt destination provider.
-
In the OKD web console, click Migration for Virtualization > Storage maps.
-
Click Create storage map > Create with form.
-
Specify the following:
-
Map name: Name of the storage map.
-
Project: Select from the list.
-
Source provider: Select from the list.
-
Target provider: Select from the list.
-
Source storage: Select from the list.
-
Target storage: Select from the list
-
-
Optional: Click Add mapping to create additional storage maps, including mapping multiple storage sources to a single target storage class.
-
Click Create.
Your map appears in the list of storage maps.
Creating ownerless storage maps using YAML or JSON definitions in the Forklift UI
You can create ownerless storage maps by using YAML or JSON definitions in the Forklift UI.
-
In the OKD web console, click Migration for Virtualization > Storage maps.
-
Click Create storage map > Create with YAML.
The Create StorageMap page opens.
-
Enter the YAML or JSON definitions into the editor, or drag and drop a file into the editor.
-
If you enter YAML definitions, use the following:
[source,yaml,subs="attributes"]
$ cat << EOF | {oc} apply -f -
apiVersion: forklift.konveyor.io/v1beta1
kind: StorageMap
metadata:
  name: <storage_map>
  namespace: <namespace>
spec:
  map:
    - destination:
        storageClass: <storage_class>
        accessMode: <access_mode> (1)
      source:
        name: <storage_class>
  provider:
    source:
      name: <source_provider>
      namespace: <namespace>
    destination:
      name: <destination_provider>
      namespace: <namespace>
EOF
| 1 | Allowed values are ReadWriteOnce and ReadWriteMany. |
-
Optional: To download your input, click Download.
-
Click Create.
Your map appears in the list of storage maps.
Canceling a migration
You can cancel the migration of some or all virtual machines (VMs) while a migration plan is in progress by using the OKD web console.
-
In the OKD web console, click Plans for virtualization.
-
Click the name of a running migration plan to view the migration details.
-
Select one or more VMs and click Cancel.
-
Click Yes, cancel to confirm the cancellation.
In the Migration details by VM list, the status of the canceled VMs is Canceled. The unmigrated and the migrated virtual machines are not affected.
You can restart a canceled migration by clicking Restart beside the migration plan on the Migration plans page.
Migrating virtual machines from the command line
You migrate virtual machines (VMs) using the command-line interface (CLI) by creating Forklift custom resources (CRs). The CRs and the migration procedure vary by source provider.
|
You must specify a name for cluster-scoped CRs. You must specify both a name and a namespace for namespace-scoped CRs. To migrate to or from an OKD cluster that is different from the one the migration plan is defined on, you must have an KubeVirt service account token with |
|
You must ensure that all Prerequisites and software requirements for all providers and all Specific software requirements for each provider are met. |
Permissions needed by non-administrators to work with migration plan components
If you are an administrator, you can work with all components of migration plans (for example, providers, network mappings, and migration plans).
By default, non-administrators have limited ability to work with migration plans and their components. As an administrator, you can modify their roles to allow them full access to all components, or you can give them limited permissions.
For example, administrators can assign non-administrators one or more of the following cluster roles for migration plans:
| Role | Description |
|---|---|
|
Can view migration plans but not to create, delete or modify them |
|
Can create, delete or modify (all parts of |
|
All |
|
Predefined cluster roles include a resource (for example, |
As a more comprehensive example, you can grant non-administrators the following set of permissions per namespace:
-
Create and modify storage maps, network maps, and migration plans for the namespaces they have access to
-
Attach providers created by administrators to storage maps, network maps, and migration plans
-
Not be able to create providers or to change system settings
| Actions | API group | Resource |
|---|---|---|
|
|
|
|
|
|
|
|
|
|
|
|
|
|
|
|
|
|
|
|
|
|
Empty string |
|
|
Non-administrators need to have the |
Running a VMware vSphere migration from the command-line
You can migrate from a VMware vSphere source provider by using the command-line interface (CLI).
|
Anti-virus software can cause migrations to fail. It is strongly recommended to remove such software from source VMs before you start a migration. |
|
Forklift does not support migrating VMware Non-Volatile Memory Express (NVMe) disks. |
|
To migrate virtual machines (VMs) that have shared disks, see Migrating virtual machines with shared disks. |
-
If you are using a user-defined network (UDN), note the name of its namespace as defined in KubeVirt.
-
Create a
Secretmanifest for the source provider credentials:$ cat << EOF | kubectl apply -f - apiVersion: v1 kind: Secret metadata: name: <secret> namespace: <namespace> ownerReferences: (1) - apiVersion: forklift.konveyor.io/v1beta1 kind: Provider name: <provider_name> uid: <provider_uid> labels: createdForProviderType: vsphere createdForResourceType: providers type: Opaque stringData: user: <user> (2) password: <password> (3) insecureSkipVerify: <"true"/"false"> (4) cacert: | (5) <ca_certificate> url: <api_end_point> (6) EOF1 The ownerReferencessection is optional.2 Specify the vCenter user or the ESX/ESXi user. 3 Specify the password of the vCenter user or the ESX/ESXi user. 4 Specify "true"to skip certificate verification, and specify"false"to verify the certificate. Defaults to"false"if not specified. Skipping certificate verification proceeds with an insecure migration and then the certificate is not required. Insecure migration means that the transferred data is sent over an insecure connection and potentially sensitive data could be exposed.5 When this field is not set and skip certificate verification is disabled, Forklift attempts to use the system CA. 6 Specify the API endpoint URL of the vCenter or the ESX/ESXi, for example, https://<vCenter_host>/sdk.
-
Create a
Providermanifest for the source provider:$ cat << EOF | kubectl apply -f - apiVersion: forklift.konveyor.io/v1beta1 kind: Provider metadata: name: <source_provider> namespace: <namespace> spec: type: vsphere url: <api_end_point> (1) settings: vddkInitImage: <VDDK_image> (2) sdkEndpoint: vcenter (3) secret: name: <secret> (4) namespace: <namespace> EOF1 Specify the URL of the API endpoint, for example, https://<vCenter_host>/sdk.2 Optional, but it is strongly recommended to create a VDDK image to accelerate migrations. Follow OpenShift documentation to specify the VDDK image you created. 3 Options: vcenteroresxi.4 Specify the name of the provider SecretCR.
-
Create a
Hostmanifest:$ cat << EOF | kubectl apply -f - apiVersion: forklift.konveyor.io/v1beta1 kind: Host metadata: name: <vmware_host> namespace: <namespace> spec: provider: namespace: <namespace> name: <source_provider> (1) id: <source_host_mor> (2) ipAddress: <source_network_ip> (3) EOF1 Specify the name of the VMware vSphere ProviderCR.2 Specify the Managed Object Reference (moRef) of the VMware vSphere host. To retrieve the moRef, see Retrieving a VMware vSphere moRef. 3 Specify the IP address of the VMware vSphere migration network.
-
Create a
NetworkMapmanifest to map the source and destination networks:$ cat << EOF | kubectl apply -f - apiVersion: forklift.konveyor.io/v1beta1 kind: NetworkMap metadata: name: <network_map> namespace: <namespace> spec: map: - destination: name: <network_name> type: pod (1) source: (2) id: <source_network_id> name: <source_network_name> - destination: name: <network_attachment_definition> (3) namespace: <network_attachment_definition_namespace> (4) type: multus source: id: <source_network_id> name: <source_network_name> provider: source: name: <source_provider> namespace: <namespace> destination: name: <destination_provider> namespace: <namespace> (5) EOF1 Allowed values are pod,multus, andignored. Useignoredto avoid attaching VMs to this network for this migration.2 You can use either the idor thenameparameter to specify the source network. Forid, specify the VMware vSphere network Managed Object Reference (moRef). To retrieve the moRef, see Retrieving a VMware vSphere moRef.3 Specify a network attachment definition for each additional KubeVirt network. 4 Required only when typeismultus. Specify the namespace of the KubeVirt network attachment definition.5 If you are using a user-defined network (UDN), its namespace is defined in KubeVirt.
-
Create a
StorageMapmanifest to map source and destination storage:$ cat << EOF | kubectl apply -f - apiVersion: forklift.konveyor.io/v1beta1 kind: StorageMap metadata: name: <storage_map> namespace: <namespace> spec: map: - destination: storageClass: <storage_class> accessMode: <access_mode> (1) source: id: <source_datastore> (2) provider: source: name: <source_provider> namespace: <namespace> destination: name: <destination_provider> namespace: <namespace> EOF1 Allowed values are ReadWriteOnceandReadWriteMany.2 Specify the VMware vSphere datastore moRef. For example, f2737930-b567-451a-9ceb-2887f6207009. To retrieve the moRef, see Retrieving a VMware vSphere moRef. -
Optional: Create a
Hookmanifest to run custom code on a VM during the phase specified in thePlanCR:$ cat << EOF | kubectl apply -f - apiVersion: forklift.konveyor.io/v1beta1 kind: Hook metadata: name: <hook> namespace: <namespace> spec: image: quay.io/kubev2v/hook-runner serviceAccount:<service account> (1) playbook: | LS0tCi0gbm... (2) EOF1 Optional: OKD service account. Use the serviceAccountparameter to modify any cluster resources.2 Base64-encoded Ansible Playbook. If you specify a playbook, the imagemust include anansible-runner.You can use the default
hook-runnerimage or specify a custom image. If you specify a custom image, you do not have to specify a playbook.
-
Enter the following command to create the network attachment definition (NAD) of the transfer network used for Forklift migrations.
You use this definition to configure an IP address for the interface, either from the Dynamic Host Configuration Protocol (DHCP) or statically.
Configuring the IP address enables the interface to reach the configured gateway.
$ oc edit NetworkAttachmentDefinitions <name_of_the_NAD_to_edit> apiVersion: k8s.cni.cncf.io/v1 kind: NetworkAttachmentDefinition metadata: name: <name_of_transfer_network> namespace: <namespace> annotations: forklift.konveyor.io/route: <IP_address> -
Create a
Planmanifest for the migration:$ cat << EOF | kubectl apply -f - apiVersion: forklift.konveyor.io/v1beta1 kind: Plan metadata: name: <plan> (1) namespace: <namespace> spec: warm: false (2) provider: source: name: <source_provider> namespace: <namespace> destination: name: <destination_provider> namespace: <namespace> map: (3) network: (4) name: <network_map> (5) namespace: <namespace> storage: (6) name: <storage_map> (7) namespace: <namespace> preserveStaticIPs: (8) networkNameTemplate: <network_interface_template> (9) pvcNameTemplate: <pvc_name_template> (10) pvcNameTemplateUseGenerateName: true (11) skipGuestConversion: false (12) targetNamespace: <target_namespace> useCompatibilityMode: true (13) volumeNameTemplate: <volume_name_template> (14) vms: (15) - id: <source_vm1> (16) - name: <source_vm2> networkNameTemplate: <network_interface_template_for_this_vm> (17) pvcNameTemplate: <pvc_name_template_for_this_vm> (18) volumeNameTemplate: <volume_name_template_for_this_vm> (19) targetName: <target_name> (20) hooks: (21) - hook: namespace: <namespace> name: <hook> (22) step: <step> (23) EOF1 Specify the name of the PlanCR.2 Specify whether the migration is warm - true- or cold -false. If you specify a warm migration without specifying a value for thecutoverparameter in theMigrationmanifest, only the precopy stage will run.3 Specify only one network map and one storage map per plan. 4 Specify a network mapping even if the VMs to be migrated are not assigned to a network. The mapping can be empty in this case. 5 Specify the name of the NetworkMapCR.6 Specify a storage mapping even if the VMs to be migrated are not assigned with disk images. The mapping can be empty in this case. 7 Specify the name of the StorageMapCR.8 By default, virtual network interface controllers (vNICs) change during the migration process. As a result, vNICs that are configured with a static IP address linked to the interface name in the guest VM lose their IP address. To avoid this, set preserveStaticIPstotrue. Forklift issues a warning message about any VMs for which vNIC properties are missing. To retrieve any missing vNIC properties, run those VMs in vSphere in order for the vNIC properties to be reported to Forklift.9 Optional. Specify a template for the network interface name for the VMs in your plan. The template follows the Go template syntax and has access to the following variables: -
.NetworkName:If the target network ismultus, add the name of the Multus Network Attachment Definition. Otherwise, leave this variable empty. -
.NetworkNamespace: If the target network ismultus, add the namespace where the Multus Network Attachment Definition is located. -
.NetworkType: Specifies the network type. Options:multusorpod. -
.NetworkIndex: Sequential index of the network interface (0-based).Examples
-
"net-{{.NetworkIndex}}" -
{{if eq .NetworkType "pod"}}pod{{else}}multus-{{.NetworkIndex}}{{end}}"Variable names cannot exceed 63 characters. This rule applies to a network name network template, a PVC name template, a VM name template, and a volume name template.
10 Optional. Specify a template for the persistent volume claim (PVC) name for a plan. The template follows the Go template syntax and has access to the following variables: -
.VmName: Name of the VM. -
.PlanName: Name of the migration plan. -
.DiskIndex: Initial volume index of the disk. -
.RootDiskIndex: Index of the root disk. -
.Shared: Options:true, for a shared volume,false, for a non-shared volume.Examples
-
"{{.VmName}}-disk-{{.DiskIndex}}" -
"{{if eq .DiskIndex .RootDiskIndex}}root{{else}}data{{end}}-{{.DiskIndex}}" -
"{{if .Shared}}shared-{{end}}{{.VmName}}-{{.DiskIndex}}"
11 Optional: -
When set to
true, Forklift adds one or more randomly generated alphanumeric characters to the name of the PVC in order to ensure all PVCs have unique names. -
When set to
false, if you specify apvcNameTemplate, Forklift does not add such characters to the name of the PVC.If you set
pvcNameTemplateUseGenerateNametofalse, the generated PVC name might not be unique and might cause conflicts.
12 Determines whether VMs are converted before migration using the virt-v2vtool, which makes the VMs compatible with KubeVirt.-
When set to
false, the default value, Forklift migrates VMs usingvirt-v2v. -
When set to
true, Forklift migrates VMs using raw copy mode, which copies the VMs without converting them first.Raw copy mode copies VMs without converting them with
virt-v2v. This allows for faster conversions, migrating VMs running a wider range of operating systems, as well as supporting migrating disks encrypted using Linux Unified Key Setup (LUKS) without needing keys. However, VMs migrated using raw copy mode might not function properly on KubeVirt. For more information onvirt-v2v, see How Forklift uses the virt-v2v tool.
13 Determines whether the migration uses VirtIO devices or compatibility devices (SATA bus, E1000E NIC) when skipGuestConversionistrue, that is, when raw copy mode is used for the migration. The setting ofuseCompatibilityModehas no effect whenskipGuestConversionisfalse, becausevirt-v2vconversion always uses VirtIO devices.-
When set to
true, the default setting, Forklift uses compatibility devices (SATA bus, E1000E NIC) in the migration process to ensure that the VMs can be booted after migration. -
When set to
false, Forklift uses high-performance VirtIO devices in the migration process, andvirt-v2vensures that the VMs can be booted after migration. Before using this option, verify that VirtIO drivers are already installed in the source VMs.
14 Optional: Specify a template for the volume interface name for the VMs in your plan. The template follows the Go template syntax and has access to the following variables: -
.PVCName: Name of the PVC mounted to the VM using this volume. -
.VolumeIndex: Sequential index of the volume interface (0-based).Examples
-
"disk-{{.VolumeIndex}}" -
"pvc-{{.PVCName}}"
15 You can use either the idor thenameparameter to specify the source VMs. If you are using a UDN, verify that the IP address of the provider is outside the subnet of the UDN. If the IP address is within the subnet of the UDN, the migration fails.16 Specify the VMware vSphere VM moRef. To retrieve the moRef, see Retrieving a VMware vSphere moRef. 17 Optional: Specify a network interface name for the specific VM. Overrides the value set in spec:networkNameTemplate. Variables and examples as in callout 9.18 Optional: Specify a PVC name for the specific VM. Overrides the value set in spec:pvcNameTemplate. Variables and examples as in callout 10.19 Optional: Specify a volume name for the specific VM. Overrides the value set in spec:volumeNameTemplate. Variables and examples as in callout 14.20 Optional: Forklift automatically generates a name for the target VM. You can override this name by using this parameter and entering a new name. The name you enter must be unique, and it must be a valid Kubernetes subdomain. Otherwise, the migration fails automatically. 21 Optional: Specify up to two hooks for a VM. Each hook must run during a separate migration step. 22 Specify the name of the HookCR.23 Allowed values are PreHookbefore the migration plan starts orPostHookafter the migration is complete.When you migrate a VMware 7 VM to an OKD 4.13+ platform that uses CentOS 7.9, the name of the network interfaces changes and the static IP configuration for the VM no longer works.
-
-
Create a
Migrationmanifest to run thePlanCR:$ cat << EOF | kubectl apply -f - apiVersion: forklift.konveyor.io/v1beta1 kind: Migration metadata: name: <name_of_migration_cr> namespace: <namespace> spec: plan: name: <name_of_plan_cr> namespace: <namespace> cutover: <optional_cutover_time> EOFIf you specify a cutover time, use the ISO 8601 format with the UTC time offset, for example,
2024-04-04T01:23:45.678+09:00.
|
There is an issue with the In Forklift, you need to add permissions at the data center level, which includes storage, networks, switches, and so on, which are used by the VM. You must then propagate the permissions to the child elements. If you do not want to add this level of permissions, you must manually add the permissions to each object on the VM host required. |
Retrieving a VMware vSphere moRef
When you migrate VMs with a VMware vSphere source provider by using Forklift from the command line, you need to know the managed object reference (moRef) of certain entities in vSphere, such as datastores, networks, and VMs.
You can retrieve the moRef of one or more vSphere entities from the Inventory service. You can then use each moRef as a reference for retrieving the moRef of another entity.
-
Retrieve the routes for the project:
oc get route -n openshift-mtv -
Retrieve the
Inventoryservice route:$ kubectl get route <inventory_service> -n konveyor-forklift -
Retrieve the access token:
$ TOKEN=$(oc whoami -t) -
Retrieve the moRef of a VMware vSphere provider:
$ curl -H "Authorization: Bearer $TOKEN" https://<inventory_service_route>/providers/vsphere -k -
Retrieve the datastores of a VMware vSphere source provider:
$ curl -H "Authorization: Bearer $TOKEN" https://<inventory_service_route>/providers/vsphere/<provider id>/datastores/ -kExample output[ { "id": "datastore-11", "parent": { "kind": "Folder", "id": "group-s5" }, "path": "/Datacenter/datastore/v2v_general_porpuse_ISCSI_DC", "revision": 46, "name": "v2v_general_porpuse_ISCSI_DC", "selfLink": "providers/vsphere/01278af6-e1e4-4799-b01b-d5ccc8dd0201/datastores/datastore-11" }, { "id": "datastore-730", "parent": { "kind": "Folder", "id": "group-s5" }, "path": "/Datacenter/datastore/f01-h27-640-SSD_2", "revision": 46, "name": "f01-h27-640-SSD_2", "selfLink": "providers/vsphere/01278af6-e1e4-4799-b01b-d5ccc8dd0201/datastores/datastore-730" }, ...
In this example, the moRef of the datastore v2v_general_porpuse_ISCSI_DC is datastore-11 and the moRef of the datastore f01-h27-640-SSD_2 is datastore-730.
Migrating virtual machines with shared disks
You can migrate VMware virtual machines (VMs) with shared disks by using the Forklift. This functionality is available only for cold migrations and is not available for shared boot disks.
Shared disks are disks that are attached to more than one VM and that use the multi-writer option. As a result of these characteristics, shared disks are difficult to migrate.
In certain situations, applications in VMs require shared disks. Databases and clustered file systems are the primary use cases for shared disks.
Forklift version 2.7.11 or later includes a parameter named migrateSharedDisks in Plan custom resources (CRs) that instructs Forklift to either migrate shared disks or to skip them during migration, as follows:
-
If set to
true, Forklift migrates the shared disks. Forklift uses the regular cold migration flow usingvirt-v2vand labeling the shared persistent volume claims (PVCs). -
If set to
false, Forklift skips the shared disks. Forklift uses the KubeVirt Containerized-Data-Importer (CDI) for disk transfer.
After the disk transfer, Forklift automatically attempts to locate the already shared PVCs and the already migrated shared disks and attach them to the VMs.
By default, migrateSharedDisks is set to true.
To successfully migrate VMs with shared disks, create two Plan CRs as follows:
-
In the first, set
migrateSharedDiskstotrue.Forklift migrates the following:
-
All shared disks.
-
For each shared disk, one of the VMs that is attached to it. If possible, choose VMs so that the plan does not contain any shared disks that are connected to more than one VM. See the following figures for further guidance.
-
All unshared disks attached to the VMs you choose for this plan.
-
-
In the second, set
migrateSharedDiskstofalse.Forklift migrates the following:
-
All other VMs.
-
The unshared disks of the VMs in the second
PlanCR.
-
When Forklift migrates a VM that has a shared disk to it, it does not check if it has already migrated that shared disk. Therefore, it is important to allocate the VMs in each of the two so that each shared disk is migrated once and only once.
To understand how to assign VMs and shared disks to each of the Plan CRs, consider the two figures that follow. In both, migrateSharedDisks is set to true for plan1 and set to false for plan2.
In the first figure, the VMs and shared disks are assigned correctly:
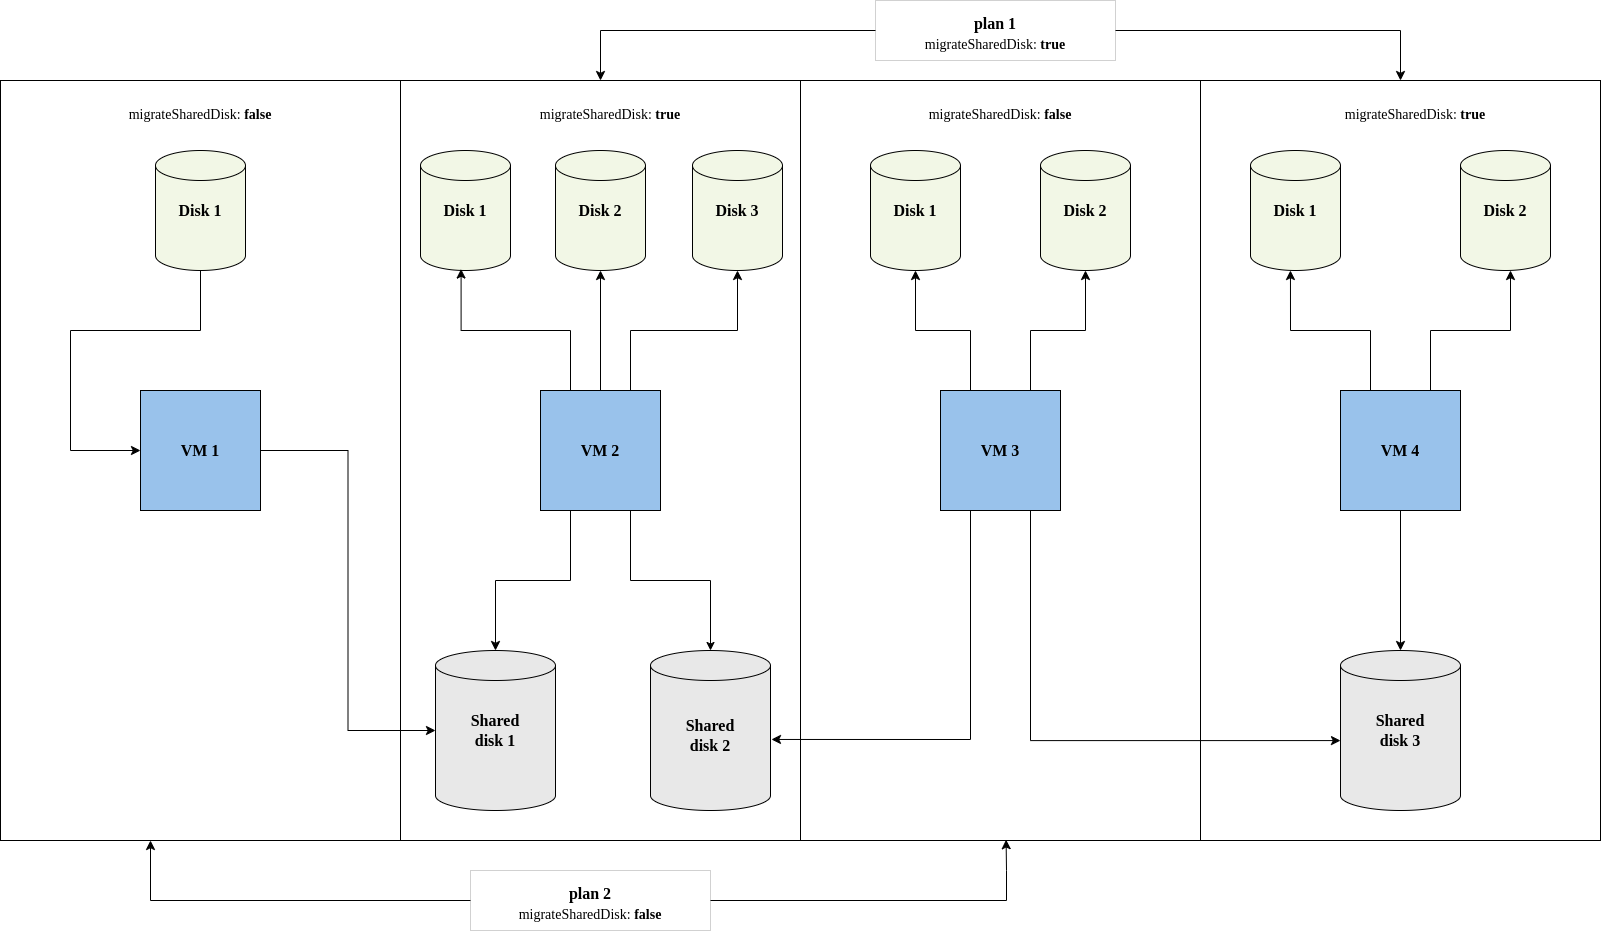
plan1 migrates VMs 2 and 4, shared disks 1, 2, and 3, and the non-shared disks of VMs 2 and 4. VMs 2 and 4 are included in this plan, because they connect to all the shared disks once each.
plan2 migrates VMs 1 and 3 and their non-shared disks. plan2 does not migrate the shared disks connected to VMs 1 and 3 because migrateSharedDisks is set to false.
Forklift migrates each VMs and its disks as follows:
-
From
plan1:-
VM 3, shared disks 1 and 2, and the non-shared disks attached to VM 3.
-
VM 4, shared disk 3, and the non-shared disks attached to VM 4.
-
-
From
plan2:-
VM 1 and the non-shared disks attached to it.
-
VM 2 and the non-shared disks attached to it.
-
The result is that VMs 2 and 4, all the shared disks, and all the non-shared disks are migrated, but only once. Forklift is able to reattach all VMs to their disks, including the shared disks.
In second figure, the VMs and shared disks are not assigned correctly:
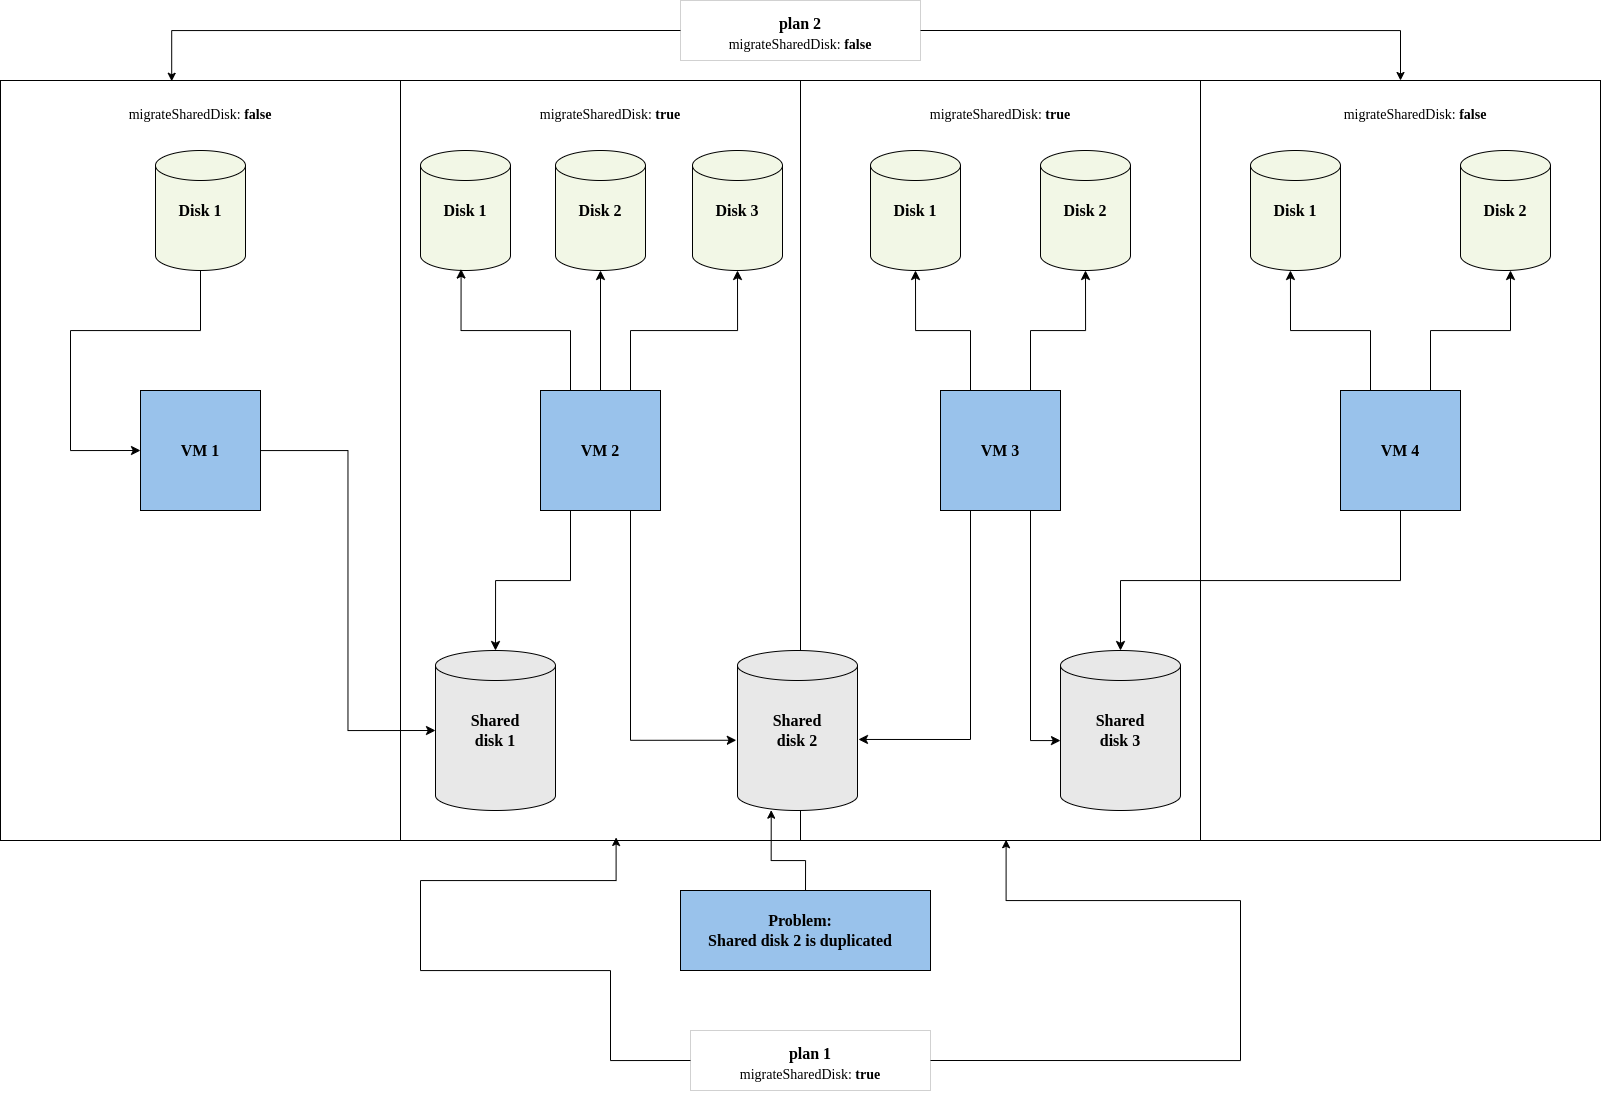
In this case, Forklift migrates each VMs and its disks as follows:
-
From
plan1:-
VM 2, shared disks 1 and 2, and the non-shared disks attached to VM 2.
-
VM 3, shared disks 2 and 3, and the non-shared disks attached to VM 3.
-
-
From
plan2:-
VM 1 and the non-shared disks attached to it.
-
VM 4 and the non-shared disks attached to it.
-
This migration "succeeds", but it results in a problem: Shared disk 2 is migrated twice by the first Plan CR. You can resolve this problem by using one of the two workarounds that are discussed in the Known issues section, which follows the procedure.
-
In Forklift, create a migration plan for the shared disks, the minimum number of VMs connected to them, and the unshared disk of those VMs.
-
On the VMware cluster, power off all VMs attached to the shared disks.
-
In the OKD web console, click Migration > Plans for virtualization.
-
Select the desired plan.
The Plan details page opens.
-
Click the YAML tab of the plan.
-
Verify that
migrateSharedDisksis set totrue.Example Plan CR withmigrateSharedDisksset to trueapiVersion: forklift.konveyor.io/v1beta1 kind: Plan name: transfer-shared-disks namespace: openshift-mtv spec: map: network: apiVersion: forklift.konveyor.io/v1beta1 kind: NetworkMap name: vsphere-7gxbs namespace: openshift-mtv uid: a3c83db3-1cf7-446a-b996-84c618946362 storage: apiVersion: forklift.konveyor.io/v1beta1 kind: StorageMap name: vsphere-mqp7b namespace: openshift-mtv uid: 20b43d4f-ded4-4798-b836-7c0330d552a0 migrateSharedDisks: true provider: destination: apiVersion: forklift.konveyor.io/v1beta1 kind: Provider name: host namespace: openshift-mtv uid: abf4509f-1d5f-4ff6-b1f2-18206136922a source: apiVersion: forklift.konveyor.io/v1beta1 kind: Provider name: vsphere namespace: openshift-mtv uid: be4dc7ab-fedd-460a-acae-a850f6b9543f targetNamespace: openshift-mtv vms: - id: vm-69 name: vm-1-with-shared-disks -
Start the migration of the first plan and wait for it to finish.
-
Create a second
PlanCR to migrate all the other VMs and their unshared disks to the same target namespace as the first. -
In the Plans for virtualization page of the OKD web console, select the new plan.
The Plan details page opens.
-
Click the YAML tab of the plan.
-
Set
migrateSharedDiskstofalse.Example Plan CR withmigrateSharedDisksset to falseapiVersion: forklift.konveyor.io/v1beta1 kind: Plan name: skip-shared-disks namespace: openshift-mtv spec: map: network: apiVersion: forklift.konveyor.io/v1beta1 kind: NetworkMap name: vsphere-7gxbs namespace: openshift-mtv uid: a3c83db3-1cf7-446a-b996-84c618946362 storage: apiVersion: forklift.konveyor.io/v1beta1 kind: StorageMap name: vsphere-mqp7b namespace: openshift-mtv uid: 20b43d4f-ded4-4798-b836-7c0330d552a0 migrateSharedDisks: false provider: destination: apiVersion: forklift.konveyor.io/v1beta1 kind: Provider name: host namespace: openshift-mtv uid: abf4509f-1d5f-4ff6-b1f2-18206136922a source: apiVersion: forklift.konveyor.io/v1beta1 kind: Provider name: vsphere namespace: openshift-mtv uid: be4dc7ab-fedd-460a-acae-a850f6b9543f targetNamespace: openshift-mtv vms: - id: vm-71 name: vm-2-with-shared-disks -
Start the migration of the second plan and wait for it to finish.
-
Verify that all shared disks are attached to the same VMs as they were before migration and that none are duplicated. In case of problems, see the discussion of known issues that follows.
Known issue: Cyclic shared disk dependencies
A known issue for migrating shared disks is that virtual machines (VMs) with cyclic shared disk dependencies cannot be migrated successfully.
-
Explanation: When
migrateSharedDisksis set totrue, Forklift migrates each VM in the plan, one by one, and any shared disks attached to it, without determining if a shared disk was already migrated.
In the case of 2 VMs sharing one disk, there is no problem. Forklift transfers the shared disk and attaches the 2 VMs to the shared disk after the migration.
However, if there is a cyclic dependency of shared disks between 3 or more VMs, Forklift either duplicates or omits one of the shared disks. The figure that follows illustrates the simplest version of this problem.
In this case, the VMs and shared disks cannot be migrated in the same Plan CR. Although this problem could be solved using migrateSharedDisks and 2 Plan CRs, it illustrates the basic issue that must be avoided in migrating VMs with shared disks.
Workarounds for VMs with shared disk dependencies
As discussed previously, it is important to try to create 2 Plan CRs in which each shared disk is migrated once. However, if your migration does result in a shared disk either being duplicated or not being transferred, you can use one of the following workarounds:
-
Duplicate one of the shared disks
-
"Remove" one of the shared disks
Duplicate a shared disk
In the figure that follows, VMs 2 and 3 are migrated with the shared disks in the first plan, and VM 1 is migrated in the second plan. This eliminates the cyclic dependencies, but there is a disadvantage to this workaround: it duplicates shared disk 3. The solution is to remove the duplicated PV and migrate VM 1 again.
Advantage: The source VMs are not affected.
Disadvantage: One shared disk gets transferred twice, so you need to manually delete the duplicate disk and reconnect VM 3 to shared disk 3 in Red Hat OpenShift after the migration.
"Remove" a shared disk
The figure that follows shows an alternative solution: Remove the link to one of the shared disks from one source VM. Doing this breaks the cyclic dependencies. Note that in the current VMware UI, removing the link is referred to as "removing" the disk.
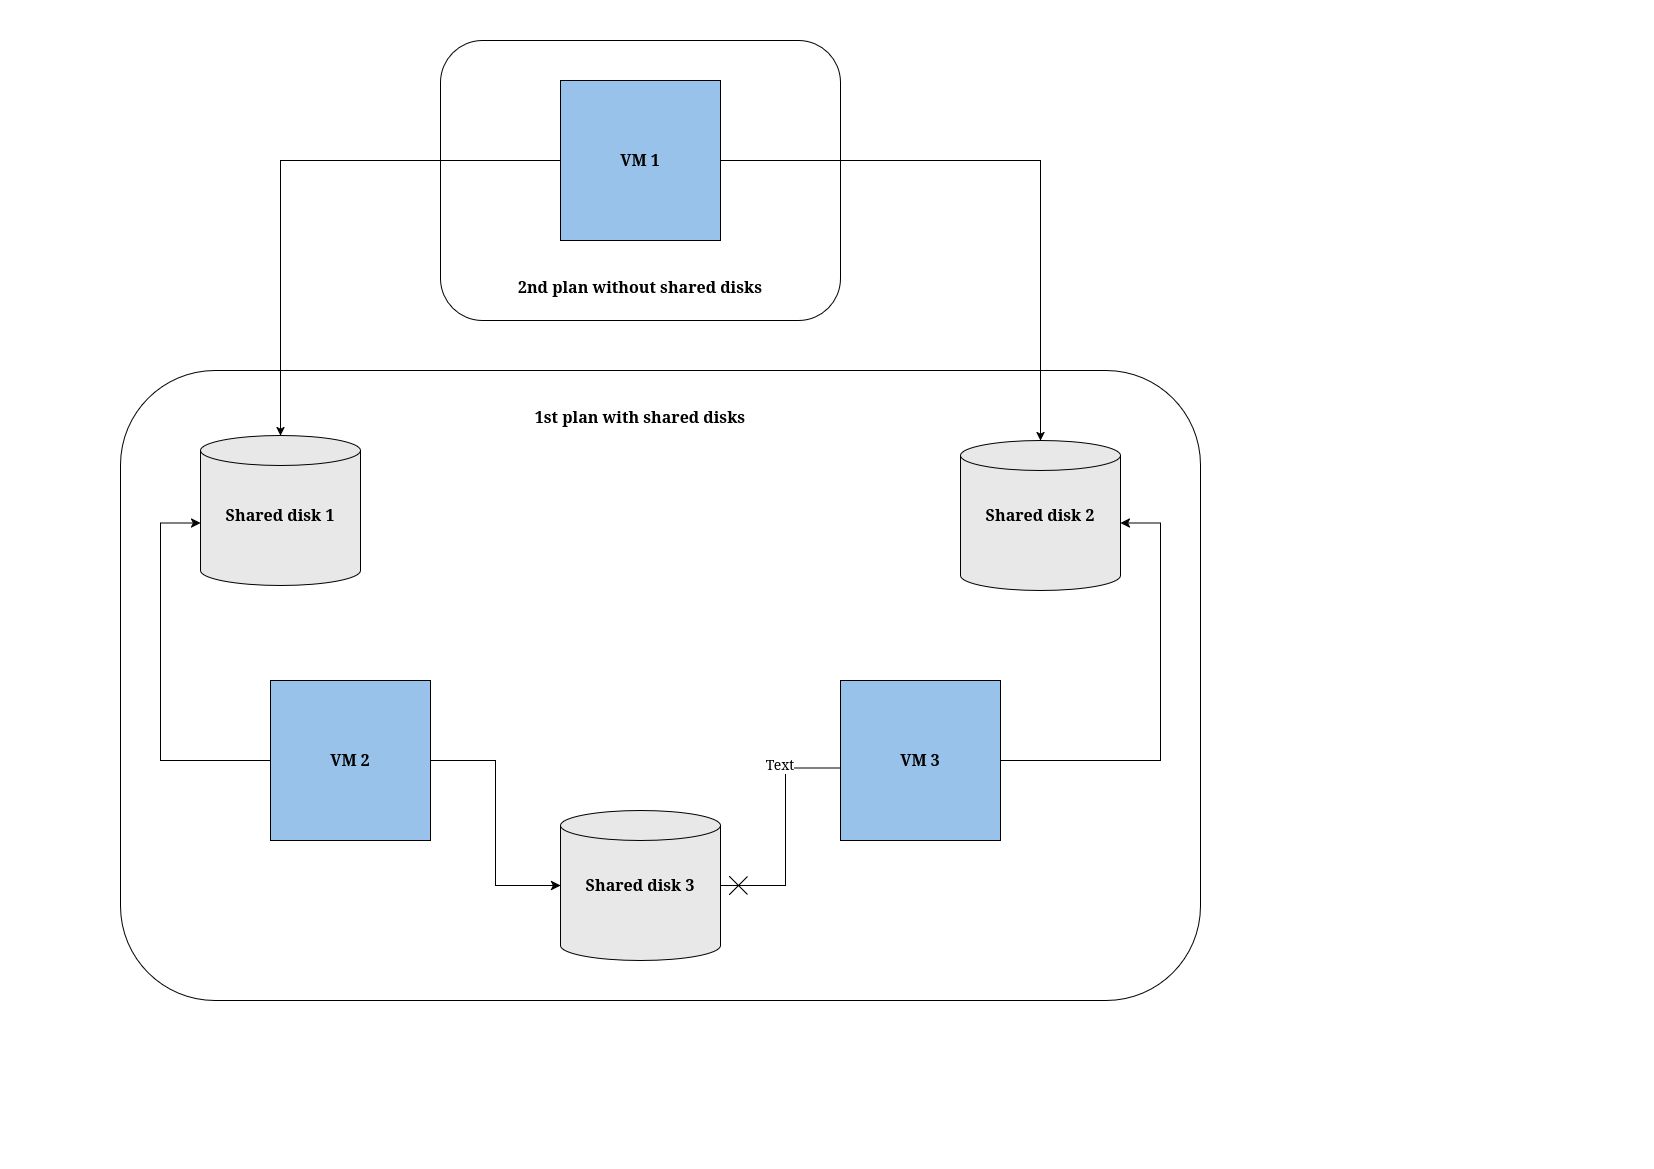
In this case, VM 2 and 3 are migrated with the shared disks in the first plan, but the link between VM 3 and shared disk 3 is removed. As before, VM 1 is migrated in the second plan.
Doing this breaks the cyclic dependencies, but this workaround has a drawback: VM 3 is disconnected from shared disk 3 and remains disconnected after the migration. The solution is to manually reattach shared disk 3 to VM 3 after the migration finishes.
Advantage: No disks are duplicated.
Disadvantage: You need to modify VM 3 by removing its link to shared disk 3 before the migration, and you need to manually reconnect VM 3 to shared disk 3 in OKD after the migration.
Canceling a migration from the command-line interface
You can use the command-line interface (CLI) to cancel either an entire migration or the migration of specific virtual machines (VMs) while a migration is in progress.
Canceling an entire migration from the command-line interface
You can use the command-line interface (CLI) to cancel an entire migration while a migration is in progress.
-
Delete the
MigrationCR:$ kubectl delete migration <migration> -n <namespace> (1)1 Specify the name of the MigrationCR.
Canceling the migration of specific VMs from the command-line interface
You can use the command-line interface (CLI) to cancel the migration of specific virtual machines (VMs) while a migration is in progress.
-
Add the specific VMs to the
spec.cancelblock of theMigrationmanifest, following this example:$ cat << EOF | kubectl apply -f - apiVersion: forklift.konveyor.io/v1beta1 kind: Migration metadata: name: <migration> namespace: <namespace> ... spec: cancel: - id: vm-102 (1) - id: vm-203 name: rhel8-vm EOF1 You can specify a VM by using the idkey or thenamekey.The value of the
idkey is the managed object reference, for a VMware VM, or the VM UUID, for a oVirt VM. -
Retrieve the
Migrationcustom resource (CR) to monitor the progress of the remaining VMs, following this example:$ kubectl get migration/<migration> -n <namespace> -o yaml
Running a oVirt migration from the command-line
You can migrate from a oVirt source provider by using the command-line interface (CLI).
-
If you are using a user-defined network (UDN), note the name of its namespace as defined in KubeVirt.
-
If you are migrating a virtual machine with a direct LUN disk, ensure that the nodes in the KubeVirt destination cluster can access the backend storage.
|
-
Create a
Secretmanifest for the source provider credentials:$ cat << EOF | kubectl apply -f - apiVersion: v1 kind: Secret metadata: name: <secret> namespace: <namespace> ownerReferences: (1) - apiVersion: forklift.konveyor.io/v1beta1 kind: Provider name: <provider_name> uid: <provider_uid> labels: createdForProviderType: ovirt createdForResourceType: providers type: Opaque stringData: user: <user> (2) password: <password> (3) insecureSkipVerify: <"true"/"false"> (4) cacert: | (5) <ca_certificate> url: <api_end_point> (6) EOF1 The ownerReferencessection is optional.2 Specify the oVirt Engine user. 3 Specify the user password. 4 Specify "true"to skip certificate verification, and specify"false"to verify the certificate. Defaults to"false"if not specified. Skipping certificate verification proceeds with an insecure migration and then the certificate is not required. Insecure migration means that the transferred data is sent over an insecure connection and potentially sensitive data could be exposed.5 Enter the Engine CA certificate, unless it was replaced by a third-party certificate, in which case, enter the Engine Apache CA certificate. You can retrieve the Engine CA certificate at https://<engine_host>/ovirt-engine/services/pki-resource?resource=ca-certificate&format=X509-PEM-CA. 6 Specify the API endpoint URL, for example, https://<engine_host>/ovirt-engine/api.
-
Create a
Providermanifest for the source provider:$ cat << EOF | kubectl apply -f - apiVersion: forklift.konveyor.io/v1beta1 kind: Provider metadata: name: <source_provider> namespace: <namespace> spec: type: ovirt url: <api_end_point> (1) secret: name: <secret> (2) namespace: <namespace> EOF1 Specify the URL of the API endpoint, for example, https://<engine_host>/ovirt-engine/api.2 Specify the name of provider SecretCR.
-
Create a
NetworkMapmanifest to map the source and destination networks:$ cat << EOF | kubectl apply -f - apiVersion: forklift.konveyor.io/v1beta1 kind: NetworkMap metadata: name: <network_map> namespace: <namespace> spec: map: - destination: name: <network_name> type: pod (1) source: (2) id: <source_network_id> name: <source_network_name> - destination: name: <network_attachment_definition> (3) namespace: <network_attachment_definition_namespace> (4) type: multus source: id: <source_network_id> name: <source_network_name> provider: source: name: <source_provider> namespace: <namespace> destination: name: <destination_provider> namespace: <namespace> (5) EOF1 Allowed values are podandmultus.2 You can use either the idor thenameparameter to specify the source network. Forid, specify the oVirt network Universal Unique ID (UUID).3 Specify a network attachment definition for each additional KubeVirt network. 4 Required only when typeismultus. Specify the namespace of the KubeVirt network attachment definition.5 If you are using a user-defined network (UDN), its namespace is defined in KubeVirt.
-
Create a
StorageMapmanifest to map source and destination storage:$ cat << EOF | kubectl apply -f - apiVersion: forklift.konveyor.io/v1beta1 kind: StorageMap metadata: name: <storage_map> namespace: <namespace> spec: map: - destination: storageClass: <storage_class> accessMode: <access_mode> (1) source: id: <source_storage_domain> (2) provider: source: name: <source_provider> namespace: <namespace> destination: name: <destination_provider> namespace: <namespace> EOF1 Allowed values are ReadWriteOnceandReadWriteMany.2 Specify the oVirt storage domain UUID. For example, f2737930-b567-451a-9ceb-2887f6207009. -
Optional: Create a
Hookmanifest to run custom code on a VM during the phase specified in thePlanCR:$ cat << EOF | kubectl apply -f - apiVersion: forklift.konveyor.io/v1beta1 kind: Hook metadata: name: <hook> namespace: <namespace> spec: image: quay.io/kubev2v/hook-runner serviceAccount:<service account> (1) playbook: | LS0tCi0gbm... (2) EOF1 Optional: OKD service account. Use the serviceAccountparameter to modify any cluster resources.2 Base64-encoded Ansible Playbook. If you specify a playbook, the imagemust include anansible-runner.You can use the default
hook-runnerimage or specify a custom image. If you specify a custom image, you do not have to specify a playbook.
-
Enter the following command to create the network attachment definition (NAD) of the transfer network used for Forklift migrations.
You use this definition to configure an IP address for the interface, either from the Dynamic Host Configuration Protocol (DHCP) or statically.
Configuring the IP address enables the interface to reach the configured gateway.
$ oc edit NetworkAttachmentDefinitions <name_of_the_NAD_to_edit> apiVersion: k8s.cni.cncf.io/v1 kind: NetworkAttachmentDefinition metadata: name: <name_of_transfer_network> namespace: <namespace> annotations: forklift.konveyor.io/route: <IP_address> -
Create a
Planmanifest for the migration:$ cat << EOF | kubectl apply -f - apiVersion: forklift.konveyor.io/v1beta1 kind: Plan metadata: name: <plan> (1) namespace: <namespace> preserveClusterCpuModel: true (2) spec: warm: false (3) provider: source: name: <source_provider> namespace: <namespace> destination: name: <destination_provider> namespace: <namespace> map: (4) network: (5) name: <network_map> (6) namespace: <namespace> storage: (7) name: <storage_map> (8) namespace: <namespace> targetNamespace: <target_namespace> vms: (9) - id: <source_vm1> (10) - name: <source_vm2> hooks: (11) - hook: namespace: <namespace> name: <hook> (12) step: <step> (13) EOF1 Specify the name of the PlanCR.2 See note below. 3 Specify whether the migration is warm or cold. If you specify a warm migration without specifying a value for the cutoverparameter in theMigrationmanifest, only the precopy stage will run.4 Specify only one network map and one storage map per plan. 5 Specify a network mapping even if the VMs to be migrated are not assigned to a network. The mapping can be empty in this case. 6 Specify the name of the NetworkMapCR.7 Specify a storage mapping even if the VMs to be migrated are not assigned with disk images. The mapping can be empty in this case. 8 Specify the name of the StorageMapCR.9 You can use either the idor thenameparameter to specify the source VMs. If you are using a UDN, verify that the IP address of the provider is outside the subnet of the UDN. If the IP address is within the subnet of the UDN, the migration fails.10 Specify the oVirt VM UUID. 11 Optional: Specify up to two hooks for a VM. Each hook must run during a separate migration step. 12 Specify the name of the HookCR.13 Allowed values are PreHook, before the migration plan starts, orPostHook, after the migration is complete.-
If the migrated machine is set with a custom CPU model, it will be set with that CPU model in the destination cluster, regardless of the setting of
preserveClusterCpuModel. -
If the migrated machine is not set with a custom CPU model:
-
If
preserveClusterCpuModelis set to 'true`, Forklift checks the CPU model of the VM when it runs in oVirt, based on the cluster’s configuration, and then sets the migrated VM with that CPU model. -
If
preserveClusterCpuModelis set to 'false`, Forklift does not set a CPU type and the VM is set with the default CPU model of the destination cluster.
-
-
-
Create a
Migrationmanifest to run thePlanCR:$ cat << EOF | kubectl apply -f - apiVersion: forklift.konveyor.io/v1beta1 kind: Migration metadata: name: <name_of_migration_cr> namespace: <namespace> spec: plan: name: <name_of_plan_cr> namespace: <namespace> cutover: <optional_cutover_time> EOFIf you specify a cutover time, use the ISO 8601 format with the UTC time offset, for example,
2024-04-04T01:23:45.678+09:00.
Canceling a migration from the command-line interface
You can use the command-line interface (CLI) to cancel either an entire migration or the migration of specific virtual machines (VMs) while a migration is in progress.
Canceling an entire migration from the command-line interface
You can use the command-line interface (CLI) to cancel an entire migration while a migration is in progress.
-
Delete the
MigrationCR:$ kubectl delete migration <migration> -n <namespace> (1)1 Specify the name of the MigrationCR.
Canceling the migration of specific VMs from the command-line interface
You can use the command-line interface (CLI) to cancel the migration of specific virtual machines (VMs) while a migration is in progress.
-
Add the specific VMs to the
spec.cancelblock of theMigrationmanifest, following this example:$ cat << EOF | kubectl apply -f - apiVersion: forklift.konveyor.io/v1beta1 kind: Migration metadata: name: <migration> namespace: <namespace> ... spec: cancel: - id: vm-102 (1) - id: vm-203 name: rhel8-vm EOF1 You can specify a VM by using the idkey or thenamekey.The value of the
idkey is the managed object reference, for a VMware VM, or the VM UUID, for a oVirt VM. -
Retrieve the
Migrationcustom resource (CR) to monitor the progress of the remaining VMs, following this example:$ kubectl get migration/<migration> -n <namespace> -o yaml
Running an OpenStack migration from the command-line
You can migrate from an OpenStack source provider by using the command-line interface (CLI).
-
If you are using a user-defined network (UDN), note the name of the its namespace as defined in KubeVirt.
-
Create a
Secretmanifest for the source provider credentials:$ cat << EOF | kubectl apply -f - apiVersion: v1 kind: Secret metadata: name: <secret> namespace: <namespace> ownerReferences: (1) - apiVersion: forklift.konveyor.io/v1beta1 kind: Provider name: <provider_name> uid: <provider_uid> labels: createdForProviderType: openstack createdForResourceType: providers type: Opaque stringData: user: <user> (2) password: <password> (3) insecureSkipVerify: <"true"/"false"> (4) domainName: <domain_name> projectName: <project_name> regionName: <region_name> cacert: | (5) <ca_certificate> url: <api_end_point> (6) EOF1 The ownerReferencessection is optional.2 Specify the OpenStack user. 3 Specify the user OpenStack password. 4 Specify "true"to skip certificate verification, and specify"false"to verify the certificate. Defaults to"false"if not specified. Skipping certificate verification proceeds with an insecure migration and then the certificate is not required. Insecure migration means that the transferred data is sent over an insecure connection and potentially sensitive data could be exposed.5 When this field is not set and skip certificate verification is disabled, Forklift attempts to use the system CA. 6 Specify the API endpoint URL, for example, https://<identity_service>/v3.
-
Create a
Providermanifest for the source provider:$ cat << EOF | kubectl apply -f - apiVersion: forklift.konveyor.io/v1beta1 kind: Provider metadata: name: <source_provider> namespace: <namespace> spec: type: openstack url: <api_end_point> (1) secret: name: <secret> (2) namespace: <namespace> EOF1 Specify the URL of the API endpoint. 2 Specify the name of provider SecretCR.
-
Create a
NetworkMapmanifest to map the source and destination networks:$ cat << EOF | kubectl apply -f - apiVersion: forklift.konveyor.io/v1beta1 kind: NetworkMap metadata: name: <network_map> namespace: <namespace> spec: map: - destination: name: <network_name> type: pod (1) source:(2) id: <source_network_id> name: <source_network_name> - destination: name: <network_attachment_definition> (3) namespace: <network_attachment_definition_namespace> (4) type: multus source: id: <source_network_id> name: <source_network_name> provider: source: name: <source_provider> namespace: <namespace> destination: name: <destination_provider> namespace: <namespace> (5) EOF1 Allowed values are podandmultus.2 You can use either the idor thenameparameter to specify the source network. Forid, specify the OpenStack network UUID.3 Specify a network attachment definition for each additional KubeVirt network. 4 Required only when typeismultus. Specify the namespace of the KubeVirt network attachment definition.5 If you are using a user-defined network (UDN), its namespace is defined in KubeVirt.
-
Create a
StorageMapmanifest to map source and destination storage:$ cat << EOF | kubectl apply -f - apiVersion: forklift.konveyor.io/v1beta1 kind: StorageMap metadata: name: <storage_map> namespace: <namespace> spec: map: - destination: storageClass: <storage_class> accessMode: <access_mode> (1) source: id: <source_volume_type> (2) provider: source: name: <source_provider> namespace: <namespace> destination: name: <destination_provider> namespace: <namespace> EOF1 Allowed values are ReadWriteOnceandReadWriteMany.2 Specify the OpenStack volume_typeUUID. For example,f2737930-b567-451a-9ceb-2887f6207009. -
Optional: Create a
Hookmanifest to run custom code on a VM during the phase specified in thePlanCR:$ cat << EOF | kubectl apply -f - apiVersion: forklift.konveyor.io/v1beta1 kind: Hook metadata: name: <hook> namespace: <namespace> spec: image: quay.io/kubev2v/hook-runner serviceAccount:<service account> (1) playbook: | LS0tCi0gbm... (2) EOF1 Optional: OKD service account. Use the serviceAccountparameter to modify any cluster resources.2 Base64-encoded Ansible Playbook. If you specify a playbook, the imagemust include anansible-runner.You can use the default
hook-runnerimage or specify a custom image. If you specify a custom image, you do not have to specify a playbook.
-
Enter the following command to create the network attachment definition (NAD) of the transfer network used for Forklift migrations.
You use this definition to configure an IP address for the interface, either from the Dynamic Host Configuration Protocol (DHCP) or statically.
Configuring the IP address enables the interface to reach the configured gateway.
$ oc edit NetworkAttachmentDefinitions <name_of_the_NAD_to_edit> apiVersion: k8s.cni.cncf.io/v1 kind: NetworkAttachmentDefinition metadata: name: <name_of_transfer_network> namespace: <namespace> annotations: forklift.konveyor.io/route: <IP_address> -
Create a
Planmanifest for the migration:$ cat << EOF | kubectl apply -f - apiVersion: forklift.konveyor.io/v1beta1 kind: Plan metadata: name: <plan> (1) namespace: <namespace> spec: provider: source: name: <source_provider> namespace: <namespace> destination: name: <destination_provider> namespace: <namespace> map: (2) network: (3) name: <network_map> (4) namespace: <namespace> storage: (5) name: <storage_map> (6) namespace: <namespace> targetNamespace: <target_namespace> vms: (7) - id: <source_vm1> (8) - name: <source_vm2> hooks: (9) - hook: namespace: <namespace> name: <hook> (10) step: <step> (11) EOF1 Specify the name of the PlanCR.2 Specify only one network map and one storage map per plan. 3 Specify a network mapping, even if the VMs to be migrated are not assigned to a network. The mapping can be empty in this case. 4 Specify the name of the NetworkMapCR.5 Specify a storage mapping, even if the VMs to be migrated are not assigned with disk images. The mapping can be empty in this case. 6 Specify the name of the StorageMapCR.7 You can use either the idor thenameparameter to specify the source VMs. If you are using a UDN, verify that the IP address of the provider is outside the subnet of the UDN. If the IP address is within the subnet of the UDN, the migration fails.8 Specify the OpenStack VM UUID. 9 Optional: Specify up to two hooks for a VM. Each hook must run during a separate migration step. 10 Specify the name of the HookCR.11 Allowed values are PreHook, before the migration plan starts, orPostHook, after the migration is complete. -
Create a
Migrationmanifest to run thePlanCR:$ cat << EOF | kubectl apply -f - apiVersion: forklift.konveyor.io/v1beta1 kind: Migration metadata: name: <name_of_migration_cr> namespace: <namespace> spec: plan: name: <name_of_plan_cr> namespace: <namespace> cutover: <optional_cutover_time> EOFIf you specify a cutover time, use the ISO 8601 format with the UTC time offset, for example,
2024-04-04T01:23:45.678+09:00.
Canceling a migration from the command-line interface
You can use the command-line interface (CLI) to cancel either an entire migration or the migration of specific virtual machines (VMs) while a migration is in progress.
Canceling an entire migration from the command-line interface
You can use the command-line interface (CLI) to cancel an entire migration while a migration is in progress.
-
Delete the
MigrationCR:$ kubectl delete migration <migration> -n <namespace> (1)1 Specify the name of the MigrationCR.
Canceling the migration of specific VMs from the command-line interface
You can use the command-line interface (CLI) to cancel the migration of specific virtual machines (VMs) while a migration is in progress.
-
Add the specific VMs to the
spec.cancelblock of theMigrationmanifest, following this example:$ cat << EOF | kubectl apply -f - apiVersion: forklift.konveyor.io/v1beta1 kind: Migration metadata: name: <migration> namespace: <namespace> ... spec: cancel: - id: vm-102 (1) - id: vm-203 name: rhel8-vm EOF1 You can specify a VM by using the idkey or thenamekey.The value of the
idkey is the managed object reference, for a VMware VM, or the VM UUID, for a oVirt VM. -
Retrieve the
Migrationcustom resource (CR) to monitor the progress of the remaining VMs, following this example:$ kubectl get migration/<migration> -n <namespace> -o yaml
Running an Open Virtual Appliance (OVA) migration from the command-line
You can migrate from Open Virtual Appliance (OVA) files that were created by VMware vSphere as a source provider by using the command-line interface (CLI).
-
If you are using a user-defined network (UDN), note the name of its namespace as defined in KubeVirt.
-
Create a
Secretmanifest for the source provider credentials:$ cat << EOF | kubectl apply -f - apiVersion: v1 kind: Secret metadata: name: <secret> namespace: <namespace> ownerReferences: (1) - apiVersion: forklift.konveyor.io/v1beta1 kind: Provider name: <provider_name> uid: <provider_uid> labels: createdForProviderType: ova createdForResourceType: providers type: Opaque stringData: url: <nfs_server:/nfs_path> (2) EOF1 The ownerReferencessection is optional.2 where: nfs_serveris an IP or hostname of the server where the share was created andnfs_pathis the path on the server where the OVA files are stored.
-
Create a
Providermanifest for the source provider:$ cat << EOF | kubectl apply -f - apiVersion: forklift.konveyor.io/v1beta1 kind: Provider metadata: name: <source_provider> namespace: <namespace> spec: type: ova url: <nfs_server:/nfs_path> (1) secret: name: <secret> (2) namespace: <namespace> EOF1 where: nfs_serveris an IP or hostname of the server where the share was created andnfs_pathis the path on the server where the OVA files are stored.2 Specify the name of provider SecretCR.
-
Create a
NetworkMapmanifest to map the source and destination networks:$ cat << EOF | kubectl apply -f - apiVersion: forklift.konveyor.io/v1beta1 kind: NetworkMap metadata: name: <network_map> namespace: <namespace> spec: map: - destination: name: <network_name> type: pod (1) source: id: <source_network_id> (2) - destination: name: <network_attachment_definition> (3) namespace: <network_attachment_definition_namespace> (4) type: multus source: id: <source_network_id> provider: source: name: <source_provider> namespace: <namespace> destination: name: <destination_provider> namespace: <namespace> (5) EOF1 Allowed values are podandmultus.2 Specify the OVA network Universal Unique ID (UUID). 3 Specify a network attachment definition for each additional KubeVirt network. 4 Required only when typeismultus. Specify the namespace of the KubeVirt network attachment definition.5 If you are using a user-defined network (UDN), its namespace is defined in KubeVirt.
-
Create a
StorageMapmanifest to map source and destination storage:$ cat << EOF | kubectl apply -f - apiVersion: forklift.konveyor.io/v1beta1 kind: StorageMap metadata: name: <storage_map> namespace: <namespace> spec: map: - destination: storageClass: <storage_class> accessMode: <access_mode> (1) source: name: Dummy storage for source provider <provider_name> (2) provider: source: name: <source_provider> namespace: <namespace> destination: name: <destination_provider> namespace: <namespace> EOF1 Allowed values are ReadWriteOnceandReadWriteMany.2 For OVA, the StorageMapcan map only a single storage, which all the disks from the OVA are associated with, to a storage class at the destination. For this reason, the storage is referred to in the UI as "Dummy storage for source provider <provider_name>". In the YAML, write the phrase as it appears above, without the quotation marks and replacing <provider_name> with the actual name of the provider. -
Optional: Create a
Hookmanifest to run custom code on a VM during the phase specified in thePlanCR:$ cat << EOF | kubectl apply -f - apiVersion: forklift.konveyor.io/v1beta1 kind: Hook metadata: name: <hook> namespace: <namespace> spec: image: quay.io/kubev2v/hook-runner serviceAccount:<service account> (1) playbook: | LS0tCi0gbm... (2) EOF1 Optional: OKD service account. Use the serviceAccountparameter to modify any cluster resources.2 Base64-encoded Ansible Playbook. If you specify a playbook, the imagemust include anansible-runner.You can use the default
hook-runnerimage or specify a custom image. If you specify a custom image, you do not have to specify a playbook.
-
Enter the following command to create the network attachment definition (NAD) of the transfer network used for Forklift migrations.
You use this definition to configure an IP address for the interface, either from the Dynamic Host Configuration Protocol (DHCP) or statically.
Configuring the IP address enables the interface to reach the configured gateway.
$ oc edit NetworkAttachmentDefinitions <name_of_the_NAD_to_edit> apiVersion: k8s.cni.cncf.io/v1 kind: NetworkAttachmentDefinition metadata: name: <name_of_transfer_network> namespace: <namespace> annotations: forklift.konveyor.io/route: <IP_address> -
Create a
Planmanifest for the migration:$ cat << EOF | kubectl apply -f - apiVersion: forklift.konveyor.io/v1beta1 kind: Plan metadata: name: <plan> (1) namespace: <namespace> spec: provider: source: name: <source_provider> namespace: <namespace> destination: name: <destination_provider> namespace: <namespace> map: (2) network: (3) name: <network_map> (4) namespace: <namespace> storage: (5) name: <storage_map> (6) namespace: <namespace> targetNamespace: <target_namespace> vms: (7) - id: <source_vm1> (8) - name: <source_vm2> hooks: (9) - hook: namespace: <namespace> name: <hook> (10) step: <step> (11) EOF1 Specify the name of the PlanCR.2 Specify only one network map and one storage map per plan. 3 Specify a network mapping, even if the VMs to be migrated are not assigned to a network. The mapping can be empty in this case. 4 Specify the name of the NetworkMapCR.5 Specify a storage mapping even if the VMs to be migrated are not assigned with disk images. The mapping can be empty in this case. 6 Specify the name of the StorageMapCR.7 You can use either the idor thenameparameter to specify the source VMs. If you are using a UDN, verify that the IP address of the provider is outside the subnet of the UDN. If the IP address is within the subnet of the UDN, the migration fails.8 Specify the OVA VM UUID. 9 Optional: You can specify up to two hooks for a VM. Each hook must run during a separate migration step. 10 Specify the name of the HookCR.11 Allowed values are PreHook, before the migration plan starts, orPostHook, after the migration is complete. -
Create a
Migrationmanifest to run thePlanCR:$ cat << EOF | kubectl apply -f - apiVersion: forklift.konveyor.io/v1beta1 kind: Migration metadata: name: <name_of_migration_cr> namespace: <namespace> spec: plan: name: <name_of_plan_cr> namespace: <namespace> cutover: <optional_cutover_time> EOFIf you specify a cutover time, use the ISO 8601 format with the UTC time offset, for example,
2024-04-04T01:23:45.678+09:00.
Canceling a migration from the command-line interface
You can use the command-line interface (CLI) to cancel either an entire migration or the migration of specific virtual machines (VMs) while a migration is in progress.
Canceling an entire migration from the command-line interface
You can use the command-line interface (CLI) to cancel an entire migration while a migration is in progress.
-
Delete the
MigrationCR:$ kubectl delete migration <migration> -n <namespace> (1)1 Specify the name of the MigrationCR.
Canceling the migration of specific VMs from the command-line interface
You can use the command-line interface (CLI) to cancel the migration of specific virtual machines (VMs) while a migration is in progress.
-
Add the specific VMs to the
spec.cancelblock of theMigrationmanifest, following this example:$ cat << EOF | kubectl apply -f - apiVersion: forklift.konveyor.io/v1beta1 kind: Migration metadata: name: <migration> namespace: <namespace> ... spec: cancel: - id: vm-102 (1) - id: vm-203 name: rhel8-vm EOF1 You can specify a VM by using the idkey or thenamekey.The value of the
idkey is the managed object reference, for a VMware VM, or the VM UUID, for a oVirt VM. -
Retrieve the
Migrationcustom resource (CR) to monitor the progress of the remaining VMs, following this example:$ kubectl get migration/<migration> -n <namespace> -o yaml
Advanced migration options
Changing precopy intervals for warm migration
You can change the snapshot interval by patching the ForkliftController custom resource (CR).
-
Patch the
ForkliftControllerCR:$ kubectl patch forkliftcontroller/<forklift-controller> -n konveyor-forklift -p '{"spec": {"controller_precopy_interval": <60>}}' --type=merge (1)1 Specify the precopy interval in minutes. The default value is 60.You do not need to restart the
forklift-controllerpod.
Creating custom rules for the Validation service
The Validation service uses Open Policy Agent (OPA) policy rules to check the suitability of each virtual machine (VM) for migration. The Validation service generates a list of concerns for each VM, which are stored in the Provider Inventory service as VM attributes. The web console displays the concerns for each VM in the provider inventory.
You can create custom rules to extend the default ruleset of the Validation service. For example, you can create a rule that checks whether a VM has multiple disks.
About Rego files
Validation rules are written in Rego, the Open Policy Agent (OPA) native query language. The rules are stored as .rego files in the /usr/share/opa/policies/io/konveyor/forklift/<provider> directory of the Validation pod.
Each validation rule is defined in a separate .rego file and tests for a specific condition. If the condition evaluates as true, the rule adds a {“category”, “label”, “assessment”} hash to the concerns. The concerns content is added to the concerns key in the inventory record of the VM. The web console displays the content of the concerns key for each VM in the provider inventory.
The following .rego file example checks for distributed resource scheduling enabled in the cluster of a VMware VM:
package io.konveyor.forklift.vmware (1)
has_drs_enabled {
input.host.cluster.drsEnabled (2)
}
concerns[flag] {
has_drs_enabled
flag := {
"category": "Information",
"label": "VM running in a DRS-enabled cluster",
"assessment": "Distributed resource scheduling is not currently supported by OpenShift Virtualization. The VM can be migrated but it will not have this feature in the target environment."
}
}| 1 | Each validation rule is defined within a package. The package namespaces are io.konveyor.forklift.vmware for VMware and io.konveyor.forklift.ovirt for oVirt. |
| 2 | Query parameters are based on the input key of the Validation service JSON. |
Checking the default validation rules
Before you create a custom rule, you must check the default rules of the Validation service to ensure that you do not create a rule that redefines an existing default value.
Example: If a default rule contains the line default valid_input = false and you create a custom rule that contains the line default valid_input = true, the Validation service will not start.
-
Connect to the terminal of the
Validationpod:$ kubectl rsh <validation_pod> -
Go to the OPA policies directory for your provider:
$ cd /usr/share/opa/policies/io/konveyor/forklift/<provider> (1)1 Specify vmwareorovirt. -
Search for the default policies:
$ grep -R "default" *
Creating a validation rule
You create a validation rule by applying a config map custom resource (CR) containing the rule to the Validation service.
|
Validation rules are based on virtual machine (VM) attributes collected by the Provider Inventory service.
For example, the VMware API uses this path to check whether a VMware VM has NUMA node affinity configured: MOR:VirtualMachine.config.extraConfig["numa.nodeAffinity"].
The Provider Inventory service simplifies this configuration and returns a testable attribute with a list value:
"numaNodeAffinity": [
"0",
"1"
],You create a Rego query, based on this attribute, and add it to the forklift-validation-config config map:
`count(input.numaNodeAffinity) != 0`-
Create a config map CR according to the following example:
$ cat << EOF | kubectl apply -f - apiVersion: v1 kind: ConfigMap metadata: name: <forklift-validation-config> namespace: konveyor-forklift data: vmware_multiple_disks.rego: |- package <provider_package> (1) has_multiple_disks { (2) count(input.disks) > 1 } concerns[flag] { has_multiple_disks (3) flag := { "category": "<Information>", (4) "label": "Multiple disks detected", "assessment": "Multiple disks detected on this VM." } } EOF1 Specify the provider package name. Allowed values are io.konveyor.forklift.vmwarefor VMware andio.konveyor.forklift.ovirtfor oVirt.2 Specify the concernsname and Rego query.3 Specify the concernsname andflagparameter values.4 Allowed values are Critical,Warning, andInformation. -
Stop the
Validationpod by scaling theforklift-controllerdeployment to0:$ kubectl scale -n konveyor-forklift --replicas=0 deployment/forklift-controller -
Start the
Validationpod by scaling theforklift-controllerdeployment to1:$ kubectl scale -n konveyor-forklift --replicas=1 deployment/forklift-controller -
Check the
Validationpod log to verify that the pod started:$ kubectl logs -f <validation_pod>If the custom rule conflicts with a default rule, the
Validationpod will not start. -
Remove the source provider:
$ kubectl delete provider <provider> -n konveyor-forklift -
Add the source provider to apply the new rule:
$ cat << EOF | kubectl apply -f - apiVersion: forklift.konveyor.io/v1beta1 kind: Provider metadata: name: <provider> namespace: konveyor-forklift spec: type: <provider_type> (1) url: <api_end_point> (2) secret: name: <secret> (3) namespace: konveyor-forklift EOF1 Allowed values are ovirt,vsphere, andopenstack.2 Specify the API end point URL, for example, https://<vCenter_host>/sdkfor vSphere,https://<engine_host>/ovirt-engine/apifor oVirt, orhttps://<identity_service>/v3for OpenStack.3 Specify the name of the provider SecretCR.
You must update the rules version after creating a custom rule so that the Inventory service detects the changes and validates the VMs.
Updating the inventory rules version
You must update the inventory rules version each time you update the rules so that the Provider Inventory service detects the changes and triggers the Validation service.
The rules version is recorded in a rules_version.rego file for each provider.
-
Retrieve the current rules version:
$ GET https://forklift-validation/v1/data/io/konveyor/forklift/<provider>/rules_version (1)Example output{ "result": { "rules_version": 5 } } -
Connect to the terminal of the
Validationpod:$ kubectl rsh <validation_pod> -
Update the rules version in the
/usr/share/opa/policies/io/konveyor/forklift/<provider>/rules_version.regofile. -
Log out of the
Validationpod terminal. -
Verify the updated rules version:
$ GET https://forklift-validation/v1/data/io/konveyor/forklift/<provider>/rules_version (1)Example output{ "result": { "rules_version": 6 } }
Retrieving the Inventory service JSON
You retrieve the Inventory service JSON by sending an Inventory service query to a virtual machine (VM). The output contains an "input" key, which contains the inventory attributes that are queried by the Validation service rules.
You can create a validation rule based on any attribute in the "input" key, for example, input.snapshot.kind.
-
Retrieve the routes for the project:
oc get route -n openshift-mtv -
Retrieve the
Inventoryservice route:$ kubectl get route <inventory_service> -n konveyor-forklift -
Retrieve the access token:
$ TOKEN=$(oc whoami -t) -
Trigger an HTTP GET request (for example, using Curl):
$ curl -H "Authorization: Bearer $TOKEN" https://<inventory_service_route>/providers -k -
Retrieve the
UUIDof a provider:$ curl -H "Authorization: Bearer $TOKEN" https://<inventory_service_route>/providers/<provider> -k (1)1 Allowed values for the provider are vsphere,ovirt, andopenstack. -
Retrieve the VMs of a provider:
$ curl -H "Authorization: Bearer $TOKEN" https://<inventory_service_route>/providers/<provider>/<UUID>/vms -k -
Retrieve the details of a VM:
$ curl -H "Authorization: Bearer $TOKEN" https://<inventory_service_route>/providers/<provider>/<UUID>/workloads/<vm> -kExample output{ "input": { "selfLink": "providers/vsphere/c872d364-d62b-46f0-bd42-16799f40324e/workloads/vm-431", "id": "vm-431", "parent": { "kind": "Folder", "id": "group-v22" }, "revision": 1, "name": "iscsi-target", "revisionValidated": 1, "isTemplate": false, "networks": [ { "kind": "Network", "id": "network-31" }, { "kind": "Network", "id": "network-33" } ], "disks": [ { "key": 2000, "file": "[iSCSI_Datastore] iscsi-target/iscsi-target-000001.vmdk", "datastore": { "kind": "Datastore", "id": "datastore-63" }, "capacity": 17179869184, "shared": false, "rdm": false }, { "key": 2001, "file": "[iSCSI_Datastore] iscsi-target/iscsi-target_1-000001.vmdk", "datastore": { "kind": "Datastore", "id": "datastore-63" }, "capacity": 10737418240, "shared": false, "rdm": false } ], "concerns": [], "policyVersion": 5, "uuid": "42256329-8c3a-2a82-54fd-01d845a8bf49", "firmware": "bios", "powerState": "poweredOn", "connectionState": "connected", "snapshot": { "kind": "VirtualMachineSnapshot", "id": "snapshot-3034" }, "changeTrackingEnabled": false, "cpuAffinity": [ 0, 2 ], "cpuHotAddEnabled": true, "cpuHotRemoveEnabled": false, "memoryHotAddEnabled": false, "faultToleranceEnabled": false, "cpuCount": 2, "coresPerSocket": 1, "memoryMB": 2048, "guestName": "Red Hat Enterprise Linux 7 (64-bit)", "balloonedMemory": 0, "ipAddress": "10.19.2.96", "storageUsed": 30436770129, "numaNodeAffinity": [ "0", "1" ], "devices": [ { "kind": "RealUSBController" } ], "host": { "id": "host-29", "parent": { "kind": "Cluster", "id": "domain-c26" }, "revision": 1, "name": "IP address or host name of the vCenter host or oVirt Engine host", "selfLink": "providers/vsphere/c872d364-d62b-46f0-bd42-16799f40324e/hosts/host-29", "status": "green", "inMaintenance": false, "managementServerIp": "10.19.2.96", "thumbprint": <thumbprint>, "timezone": "UTC", "cpuSockets": 2, "cpuCores": 16, "productName": "VMware ESXi", "productVersion": "6.5.0", "networking": { "pNICs": [ { "key": "key-vim.host.PhysicalNic-vmnic0", "linkSpeed": 10000 }, { "key": "key-vim.host.PhysicalNic-vmnic1", "linkSpeed": 10000 }, { "key": "key-vim.host.PhysicalNic-vmnic2", "linkSpeed": 10000 }, { "key": "key-vim.host.PhysicalNic-vmnic3", "linkSpeed": 10000 } ], "vNICs": [ { "key": "key-vim.host.VirtualNic-vmk2", "portGroup": "VM_Migration", "dPortGroup": "", "ipAddress": "192.168.79.13", "subnetMask": "255.255.255.0", "mtu": 9000 }, { "key": "key-vim.host.VirtualNic-vmk0", "portGroup": "Management Network", "dPortGroup": "", "ipAddress": "10.19.2.13", "subnetMask": "255.255.255.128", "mtu": 1500 }, { "key": "key-vim.host.VirtualNic-vmk1", "portGroup": "Storage Network", "dPortGroup": "", "ipAddress": "172.31.2.13", "subnetMask": "255.255.0.0", "mtu": 1500 }, { "key": "key-vim.host.VirtualNic-vmk3", "portGroup": "", "dPortGroup": "dvportgroup-48", "ipAddress": "192.168.61.13", "subnetMask": "255.255.255.0", "mtu": 1500 }, { "key": "key-vim.host.VirtualNic-vmk4", "portGroup": "VM_DHCP_Network", "dPortGroup": "", "ipAddress": "10.19.2.231", "subnetMask": "255.255.255.128", "mtu": 1500 } ], "portGroups": [ { "key": "key-vim.host.PortGroup-VM Network", "name": "VM Network", "vSwitch": "key-vim.host.VirtualSwitch-vSwitch0" }, { "key": "key-vim.host.PortGroup-Management Network", "name": "Management Network", "vSwitch": "key-vim.host.VirtualSwitch-vSwitch0" }, { "key": "key-vim.host.PortGroup-VM_10G_Network", "name": "VM_10G_Network", "vSwitch": "key-vim.host.VirtualSwitch-vSwitch1" }, { "key": "key-vim.host.PortGroup-VM_Storage", "name": "VM_Storage", "vSwitch": "key-vim.host.VirtualSwitch-vSwitch1" }, { "key": "key-vim.host.PortGroup-VM_DHCP_Network", "name": "VM_DHCP_Network", "vSwitch": "key-vim.host.VirtualSwitch-vSwitch1" }, { "key": "key-vim.host.PortGroup-Storage Network", "name": "Storage Network", "vSwitch": "key-vim.host.VirtualSwitch-vSwitch1" }, { "key": "key-vim.host.PortGroup-VM_Isolated_67", "name": "VM_Isolated_67", "vSwitch": "key-vim.host.VirtualSwitch-vSwitch2" }, { "key": "key-vim.host.PortGroup-VM_Migration", "name": "VM_Migration", "vSwitch": "key-vim.host.VirtualSwitch-vSwitch2" } ], "switches": [ { "key": "key-vim.host.VirtualSwitch-vSwitch0", "name": "vSwitch0", "portGroups": [ "key-vim.host.PortGroup-VM Network", "key-vim.host.PortGroup-Management Network" ], "pNICs": [ "key-vim.host.PhysicalNic-vmnic4" ] }, { "key": "key-vim.host.VirtualSwitch-vSwitch1", "name": "vSwitch1", "portGroups": [ "key-vim.host.PortGroup-VM_10G_Network", "key-vim.host.PortGroup-VM_Storage", "key-vim.host.PortGroup-VM_DHCP_Network", "key-vim.host.PortGroup-Storage Network" ], "pNICs": [ "key-vim.host.PhysicalNic-vmnic2", "key-vim.host.PhysicalNic-vmnic0" ] }, { "key": "key-vim.host.VirtualSwitch-vSwitch2", "name": "vSwitch2", "portGroups": [ "key-vim.host.PortGroup-VM_Isolated_67", "key-vim.host.PortGroup-VM_Migration" ], "pNICs": [ "key-vim.host.PhysicalNic-vmnic3", "key-vim.host.PhysicalNic-vmnic1" ] } ] }, "networks": [ { "kind": "Network", "id": "network-31" }, { "kind": "Network", "id": "network-34" }, { "kind": "Network", "id": "network-57" }, { "kind": "Network", "id": "network-33" }, { "kind": "Network", "id": "dvportgroup-47" } ], "datastores": [ { "kind": "Datastore", "id": "datastore-35" }, { "kind": "Datastore", "id": "datastore-63" } ], "vms": null, "networkAdapters": [], "cluster": { "id": "domain-c26", "parent": { "kind": "Folder", "id": "group-h23" }, "revision": 1, "name": "mycluster", "selfLink": "providers/vsphere/c872d364-d62b-46f0-bd42-16799f40324e/clusters/domain-c26", "folder": "group-h23", "networks": [ { "kind": "Network", "id": "network-31" }, { "kind": "Network", "id": "network-34" }, { "kind": "Network", "id": "network-57" }, { "kind": "Network", "id": "network-33" }, { "kind": "Network", "id": "dvportgroup-47" } ], "datastores": [ { "kind": "Datastore", "id": "datastore-35" }, { "kind": "Datastore", "id": "datastore-63" } ], "hosts": [ { "kind": "Host", "id": "host-44" }, { "kind": "Host", "id": "host-29" } ], "dasEnabled": false, "dasVms": [], "drsEnabled": true, "drsBehavior": "fullyAutomated", "drsVms": [], "datacenter": null } } } }
About hooks for Forklift migration plans
You can add hooks to an Forklift migration plan to perform automated operations on a VM, either before or after you migrate it.
You can add hooks to Forklift migration plans using either the Forklift CLI or the Forklift user interface, which is located in the OKD web console.
-
Pre-migration hooks are hooks that perform operations on a VM that is located on a provider. This prepares the VM for migration.
-
Post-migration hooks are hooks that perform operations on a VM that has migrated to KubeVirt.
Default hook image
The default hook image for an Forklift hook is quay.io/kubev2v/hook-runner. The image is based on the Ansible Runner image with the addition of python-openshift to provide Ansible Kubernetes resources and a recent oc binary.
Hook execution
An Ansible Playbook that is provided as part of a migration hook is mounted into the hook container as a ConfigMap. The hook container is run as a job on the desired cluster in the openshift-mtv namespace using the ServiceAccount you choose.
When you add a hook, you must specify the namespace where the Hook CR is located, the name of the hook, and whether the hook is a pre-migration hook or a post-migration hook.
|
In order for a hook to run on a VM, the VM must be started and available using SSH. |
The illustration that follows shows the general process of using a migration hook. For specific procedures, see Adding a migration hook to a migration plan using the OKD web console and Adding a migration hook to a migration plan using the CLI.
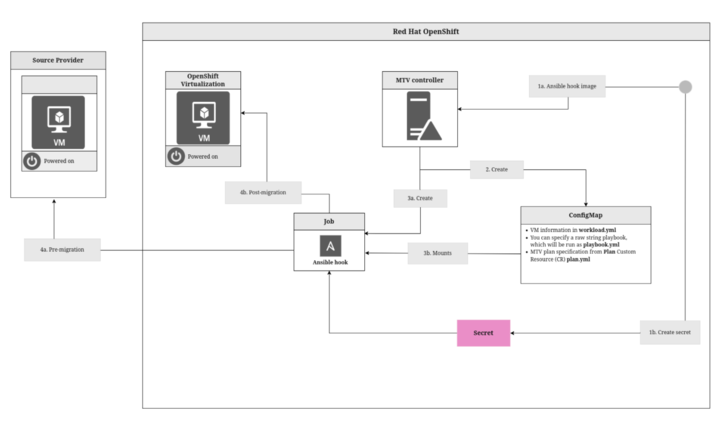
Process:
-
Input your Ansible hook and credentials.
-
Input an Ansible hook image to the Forklift controller using either the UI or the CLI.
-
In the UI, specify the
ansible-runnerand enter theplaybook.ymlthat contains the hook. -
In the CLI, input the hook image, which specifies the playbook that runs the hook.
-
-
If you need additional data to run the playbook inside the pod, such as SSH data, create a Secret that contains credentials for the VM. The Secret is not mounted to the pod, but is called by the playbook.
This Secret is not the same as the
SecretCR that contains the credentials of your source provider.
-
-
The Forklift controller creates the
ConfigMap, which contains:-
workload.yml, which contains information about the VMs. -
playbook.yml, the raw string playbook you want to run. -
plan.yml, which is thePlanCR.The
ConfigMapcontains the name of the VM and instructs the playbook what to do.
-
-
The Forklift controller creates a job that starts the user specified image.
-
Mounts the
ConfigMapto the container.The Ansible hook imports the Secret that the user previously entered.
-
-
The job runs a pre-migration hook or a post-migration hook as follows:
-
For a pre-migration hook, the job logs into the VMs on the source provider using SSH and runs the hook.
-
For a post-migration hook, the job logs into the VMs on KubeVirt using SSH and runs the hook.
-
Adding a migration hook to a migration plan using the OKD web console
You can add a migration hook to an existing migration plan by using the OKD web console.
|
You need to run one command in the Forklift CLI. |
For example, you can create a hook to install the cloud-init service on a VM and write a file before migration.
|
You can run one pre-migration hook, one post-migration hook, or one of each per migration plan. |
-
Migration plan
-
Migration hook file, whose contents you copy and paste into the web console
-
File containing the
Secretfor the source provider -
OKD service account called by the hook and that has at least write access for the namespace you are working in
-
SSH access for VMs you want to migrate with the public key installed on the VMs
-
VMs running on Microsoft Server only: Remote Execution enabled
For instructions for creating a service account, see Understanding and creating service accounts.
-
In the OKD web console, click Migration > Plans for virtualization and then click the migration plan you want to add the hook to.
-
Click Hooks.
-
For a pre-migration hook, perform the following steps:
-
In the Pre migration hook section, toggle the Enable hook switch to Enable pre migration hook.
-
Enter the Hook runner image. If you are specifying the
spec.playbook, you need to use an image that has anansible-runner. -
Paste your hook as a YAML file in the Ansible playbook text box.
-
-
For a post-migration hook, perform the following steps:
-
In the Post migration hook, toggle the Enable hook switch Enable post migration hook.
-
Enter the Hook runner image. If you are specifying the
spec.playbook, you need to use an image that has anansible-runner. -
Paste your hook as a YAML file in the Ansible playbook text box.
-
-
At the top of the tab, click Update hooks.
-
In a terminal, enter the following command to associate each hook with your OKD service account:
$ oc -n openshift-mtv patch hook <name_of_hook> \ -p '{"spec":{"serviceAccount":"<service_account>"}}' --type merge
The example migration hook that follows ensures that the VM can be accessed using SSH, creates an SSH key, and runs 2 tasks: stopping the Maria database and generating a text file.
- name: Main
hosts: localhost
vars_files:
- plan.yml
- workload.yml
tasks:
- k8s_info:
api_version: v1
kind: Secret
name: privkey
namespace: openshift-mtv
register: ssh_credentials
- name: Ensure SSH directory exists
file:
path: ~/.ssh
state: directory
mode: 0750
- name: Create SSH key
copy:
dest: ~/.ssh/id_rsa
content: "{{ ssh_credentials.resources[0].data.key | b64decode }}"
mode: 0600
- add_host:
name: "{{ vm.ipaddress }}" # ALT "{{ vm.guestnetworks[2].ip }}"
ansible_user: root
groups: vms
- hosts: vms
vars_files:
- plan.yml
- workload.yml
tasks:
- name: Stop MariaDB
service:
name: mariadb
state: stopped
- name: Create Test File
copy:
dest: /premigration.txt
content: "Migration from {{ provider.source.name }}
of {{ vm.vm1.vm0.id }} has finished\n"
mode: 0644Adding a migration hook to a migration plan using the CLI
You can use a Hook CR to add a pre-migration hook or a post-migration hook to an existing migration plan by using the Forklift CLI.
For example, you can create a Hook custom resource (CR) to install the cloud-init service on a VM and write a file before migration.
|
You can run one pre-migration hook, one post-migration hook, or one of each per migration plan. Each hook needs its own |
|
You can retrieve additional information stored in a secret or in a |
-
Migration plan
-
Migration hook image or the playbook containing the hook image
-
File containing the Secret for the source provider
-
OKD service account called by the hook and that has at least write access for the namespace you are working in
-
SSH access for VMs you want to migrate with the public key installed on the VMs
-
VMs running on Microsoft Server only: Remote Execution enabled
For instructions for creating a service account, see Understanding and creating service accounts.
-
If needed, create a Secret with an SSH private key for the VM.
-
Choose an existing key or generate a key pair.
-
Install the public key on the VM.
-
Encode the private key in the Secret to base64.
apiVersion: v1 data: key: VGhpcyB3YXMgZ2Vu... kind: Secret metadata: name: ssh-credentials namespace: openshift-mtv type: Opaque
-
-
Encode your playbook by concatenating a file and piping it for Base64 encoding, for example:
$ cat playbook.yml | base64 -w0 -
Create a Hook CR:
$  cat << EOF | kubectl apply -f -
apiVersion: forklift.konveyor.io/v1beta1
kind: Hook
metadata:
  name: <hook>
  namespace: <namespace>
spec:
  image: quay.io/kubev2v/hook-runner
  serviceAccount:<service account> (1)
  playbook: |
    LS0tCi0gbm... (2)
EOF
1 (Optional) OKD service account. The serviceAccountmust be provided if you want to manipulate any resources of the cluster.2 Base64-encoded Ansible Playbook. If you specify a playbook, the imagemust include anansible-runner.You can use the default
hook-runnerimage or specify a custom image. If you specify a custom image, you do not have to specify a playbook.To decode an attached playbook, retrieve the resource with custom output and pipe it to base64. For example:
$ oc get -n konveyor-forklift hook playbook -o \ go-template='{{ .spec.playbook }}' | base64 -d -
In the
PlanCR of the migration, for each VM, add the following section to the end of the CR:vms: - id: <vm_id> hooks: - hook: namespace: <namespace> name: <name_of_hook> step: <type_of_hook> (1)1 Options are PreHook, to run the hook before the migration, andPostHook, to run the hook after the migration.
|
In order for a PreHook to run on a VM, the VM must be started and available via SSH. |
The example migration hook that follows ensures that the VM can be accessed using SSH, creates an SSH key, and runs 2 tasks: stopping the Maria database and generating a text file.
- name: Main
  hosts: localhost
  vars_files:
    - plan.yml
    - workload.yml
  tasks:
  - k8s_info:
      api_version: v1
      kind: Secret
      name: privkey
      namespace: openshift-mtv
    register: ssh_credentials

  - name: Ensure SSH directory exists
    file:
      path: ~/.ssh
      state: directory
      mode: 0750

  - name: Create SSH key
    copy:
      dest: ~/.ssh/id_rsa
      content: "{{ ssh_credentials.resources[0].data.key | b64decode }}"
      mode: 0600

  - add_host:
      name: "{{ vm.ipaddress }}"  # ALT "{{ vm.guestnetworks[2].ip }}"
      ansible_user: root
      groups: vms

- hosts: vms
  vars_files:
    - plan.yml
    - workload.yml
  tasks:
  - name: Stop MariaDB
    service:
      name: mariadb
      state: stopped

  - name: Create Test File
    copy:
      dest: /premigration.txt
      content: "Migration from {{ provider.source.name }}
                of {{ vm.vm1.vm0.id }} has finished\n"
mode: 0644About user defined networks
Beginning with Forklift 2.10, you can use a user-defined network (UDN) as your default network for migrations from all providers, except for KubeVirt. This flexibility allows you to migrate virtual machines (VMs) to KubeVirt more consistently.
Forklift has been redesigned to make it easy for you to migrate VMs to UDN namespaces. Once you configure your UDN in KubeVirt, you can specify it as your default network in the migration plan mapping. Forklift is now able to distinguish a UDN from a conventional pod network.
You can use this feature for creating migration plans by using the OKD web console or by using the Forklift command-line interface. The procedures for creating migration plans have been updated to include the new feature.
Connecting a virtual machine to a primary user-defined network
Upgrading Forklift
You can upgrade the Forklift Operator by using the OKD web console to install the new version.
-
In the OKD web console, click Operators → Installed Operators → Migration Toolkit for Virtualization Operator → Subscription.
-
Change the update channel to the correct release.
See Changing update channel in the OKD documentation.
-
Confirm that Upgrade status changes from Up to date to Upgrade available. If it does not, restart the
CatalogSourcepod:-
Note the catalog source, for example,
redhat-operators. -
From the command line, retrieve the catalog source pod:
$ kubectl get pod -n openshift-marketplace | grep <catalog_source> -
Delete the pod:
$ kubectl delete pod -n openshift-marketplace <catalog_source_pod>Upgrade status changes from Up to date to Upgrade available.
If you set Update approval on the Subscriptions tab to Automatic, the upgrade starts automatically.
-
-
If you set Update approval on the Subscriptions tab to Manual, approve the upgrade.
See Manually approving a pending upgrade in the OKD documentation.
-
If you are upgrading from Forklift 2.2 and have defined VMware source providers, edit the VMware provider by adding a VDDK
initimage. Otherwise, the update will change the state of any VMware providers toCritical. For more information, see Adding a VMSphere source provider. -
If you mapped to NFS on the OKD destination provider in Forklift 2.2, edit the
AccessModesandVolumeModeparameters in the NFS storage profile. Otherwise, the upgrade will invalidate the NFS mapping. For more information, see Customizing the storage profile.
Uninstalling Forklift
You can uninstall Forklift by using the OKD web console or the command-line interface (CLI).
Uninstalling Forklift by using the OKD web console
You can uninstall Forklift by using the OKD web console.
-
You must be logged in as a user with
cluster-adminprivileges.
-
In the OKD web console, click Operators > Installed Operators.
-
Click Forklift Operator.
The Operator Details page opens in the Details tab.
-
Click the ForkliftController tab.
-
Click Actions and select Delete ForkLiftController.
A confirmation window opens.
-
Click Delete.
The controller is removed.
-
Open the Details tab.
The Create ForkliftController button appears instead of the controller you deleted. There is no need to click it.
-
On the upper-right side of the page, click Actions and select Uninstall Operator.
A confirmation window opens, displaying any operand instances.
-
To delete all instances, select the Delete all operand instances for this operator checkbox. By default, the checkbox is cleared.
If your Operator configured off-cluster resources, these will continue to run and will require manual cleanup.
-
Click Uninstall.
The Installed Operators page opens, and the Forklift Operator is removed from the list of installed Operators.
-
Click Home > Overview.
-
In the Status section of the page, click Dynamic Plugins.
The Dynamic Plugins pop-up opens, listing forklift-console-plugin as a failed plugin. If the forklift-console-plugin does not appear as a failed plugin, refresh the web console.
-
Click forklift-console-plugin.
The ConsolePlugin details page opens in the Details tab.
-
On the upper right side of the page, click Actions and select Delete ConsolePlugin from the list.
A confirmation window opens.
-
Click Delete.
The plugin is removed from the list of Dynamic plugins on the Overview page. If the plugin still appears, restart the Overview page.
Uninstalling Forklift from the command line
You can uninstall Forklift from the command line.
|
This action does not remove resources managed by the Forklift Operator, including custom resource definitions (CRDs) and custom resources (CRs). To remove these after uninstalling the Forklift Operator, you might need to manually delete the Forklift Operator CRDs. |
-
You must be logged in as a user with
cluster-adminprivileges.
-
Delete the
forkliftcontroller by running the following command:$ oc delete ForkliftController --all -n openshift-mtv -
Delete the subscription to the Forklift Operator by running the following command:
$ oc get subscription -o name|grep 'mtv-operator'| xargs oc delete -
Delete the
clusterserviceversionfor the Forklift Operator by running the following command:$ oc get clusterserviceversion -o name|grep 'mtv-operator'| xargs oc delete -
Delete the plugin console CR by running the following command:
$ oc delete ConsolePlugin forklift-console-plugin -
Optional: Delete the custom resource definitions (CRDs) by running the following command:
kubectl get crd -o name | grep 'forklift.konveyor.io' | xargs kubectl delete -
Optional: Perform cleanup by deleting the Forklift project by running the following command:
oc delete project openshift-mtv
Forklift performance recommendations
The purpose of this section is to share recommendations for efficient and effective migration of virtual machines (VMs) using Forklift, based on findings observed through testing.
The data provided here was collected from testing in Red Hat labs and is provided for reference only.
Overall, these numbers should be considered to show the best-case scenarios.
The observed performance of migration can differ from these results and depends on several factors.
Ensure fast storage and network speeds
Ensure fast storage and network speeds, both for VMware and OKD (OCP) environments.
-
To perform fast migrations, VMware must have fast read access to datastores. Networking between VMware ESXi hosts should be fast, ensure a 10 GiB network connection, and avoid network bottlenecks.
-
Extend the VMware network to the OCP Workers Interface network environment.
-
It is important to ensure that the VMware network offers high throughput (10 Gigabit Ethernet) and rapid networking to guarantee that the reception rates align with the read rate of the ESXi datastore.
-
Be aware that the migration process uses significant network bandwidth and that the migration network is utilized. If other services use that network, it might have an impact on those services and their migration rates.
-
For example, 200 to 325 MiB/s was the average network transfer rate from the
vmnicfor each ESXi host associated with transferring data to the OCP interface.
-
Ensure fast datastore read speeds to ensure efficient and performant migrations
Datastores read rates impact the total transfer times, so it is essential to ensure fast reads are possible from the ESXi datastore to the ESXi host.
Example in numbers: 200 to 300 MiB/s was the average read rate for both vSphere and ESXi endpoints for a single ESXi server. When multiple ESXi servers are used, higher datastore read rates are possible.
Endpoint types
Forklift 2.6 allows for the following vSphere provider options:
-
ESXi endpoint (inventory and disk transfers from ESXi), introduced in Forklift 2.6
-
vCenter Server endpoint; no networks for the ESXi host (inventory and disk transfers from vCenter)
-
vCenter endpoint and ESXi networks are available (inventory from vCenter, disk transfers from ESXi).
When transferring many VMs that are registered to multiple ESXi hosts, using the vCenter endpoint and ESXi network is suggested.
|
As of vSphere 7.0, ESXi hosts can label which network to use for Network Block Device (NBD) transport. This is accomplished by tagging the desired virtual network interface card (NIC) with the appropriate For more details, see: (Forklift-1230) |
You can use the following ESXi command, which designates interface vmk2 for NBD backup:
esxcli network ip interface tag add -t vSphereBackupNFC -i vmk2Set ESXi hosts BIOS profile and ESXi Host Power Management for High Performance
Where possible, ensure that hosts used to perform migrations are set with BIOS profiles related to maximum performance. Hosts which use Host Power Management controlled within vSphere should check that High Performance is set.
Testing showed that when transferring more than 10 VMs with both BIOS and host power management set accordingly, migrations had an increase of 15 MiB in the average datastore read rate.
Avoid additional network load on VMware networks
You can reduce the network load on VMware networks by selecting the migration network when using the ESXi endpoint.
By incorporating a virtualization provider, Forklift enables the selection of a specific network, which is accessible on the ESXi hosts, for the purpose of migrating virtual machines to OKD. Selecting this migration network from the ESXi host in the Forklift UI ensures that the transfer is performed using the selected network as an ESXi endpoint.
It is imperative to ensure that the network selected has connectivity to the OCP interface, has adequate bandwidth for migrations, and that the network interface is not saturated.
In environments with fast networks, such as 10GbE networks, migration network impacts can be expected to match the rate of ESXi datastore reads.
Control maximum concurrent disk migrations per ESXi host
Set the MAX_VM_INFLIGHT MTV variable to control the maximum number of concurrent VMs transfers allowed for the ESXi host.
Forklift allows for concurrency to be controlled using this variable; by default, it is set to 20.
When setting MAX_VM_INFLIGHT, consider the number of maximum concurrent VMs transfers are required for ESXi hosts. It is important to consider the type of migration to be transferred concurrently. Warm migrations, which are defined by migrations of a running VM that will be migrated over a scheduled time.
Warm migrations use snapshots to compare and migrate only the differences between previous snapshots of the disk. The migration of the differences between snapshots happens over specific intervals before a final cut-over of the running VM to OKD occurs.
In Forklift 2.6, MAX_VM_INFLIGHT reserves one transfer slot per VM, regardless of current migration activity for a specific snapshot or the number of disks that belong to a single VM. The total set by MAX_VM_INFLIGHT is used to indicate how many concurrent VM tranfers per ESXi host is allowed.
-
MAX_VM_INFLIGHT = 20and 2 ESXi hosts defined in the provider mean each host can transfer 20 VMs.
Migrations are completed faster when migrating multiple VMs concurrently
When multiple VMs from a specific ESXi host are to be migrated, starting concurrent migrations for multiple VMs leads to faster migration times.
Testing demonstrated that migrating 10 VMs (each containing 35 GiB of data, with a total size of 50 GiB) from a single host is significantly faster than migrating the same number of VMs sequentially, one after another.
It is possible to increase concurrent migration to more than 10 virtual machines from a single host, but it does not show a significant improvement.
-
1 single disk VMs took 6 minutes, with migration rate of 100 MiB/s
-
10 single disk VMs took 22 minutes, with migration rate of 272 MiB/s
-
20 single disk VMs took 42 minutes, with migration rate of 284 MiB/s
|
From the aforementioned examples, it is evident that the migration of 10 virtual machines simultaneously is three times faster than the migration of identical virtual machines in a sequential manner. The migration rate was almost the same when moving 10 or 20 virtual machines simultaneously. |
Migrations complete faster using multiple hosts
Using multiple hosts with registered VMs equally distributed among the ESXi hosts used for migrations leads to faster migration times.
Testing showed that when transferring more than 10 single disk VMS, each containing 35 GiB of data out of a total of 50G total, using an additional host can reduce migration time.
-
80 single disk VMs, containing 35 GiB of data each, using a single host took 2 hours and 43 minutes, with a migration rate of 294 MiB/s.
-
80 single disk VMs, containing 35 GiB of data each, using 8 ESXi hosts took 41 minutes, with a migration rate of 1,173 MiB/s.
|
From the aforementioned examples, it is evident that migrating 80 VMs from 8 ESXi hosts, 10 from each host, concurrently is four times faster than running the same VMs from a single ESXi host. Migrating a larger number of VMs from more than 8 ESXi hosts concurrently could potentially show increased performance. However, it was not tested and therefore not recommended. |
Multiple migration plans compared to a single large migration plan
The maximum number of disks that can be referenced by a single migration plan is 500. For more details, see (MTV-1203).
When attempting to migrate many VMs in a single migration plan, it can take some time for all migrations to start. By breaking up one migration plan into several migration plans, it is possible to start them at the same time.
Comparing migrations of:
-
500 VMs using 8 ESXi hosts in 1 plan,
max_vm_inflight=100, took 5 hours and 10 minutes. -
800 VMs using 8 ESXi hosts with 8 plans,
max_vm_inflight=100, took 57 minutes.
Testing showed that by breaking one single large plan into multiple moderately sized plans, for example, by using 100 VMs per plan, the total migration time can be reduced.
Maximum values tested for cold migrations
-
Maximum number of ESXi hosts tested: 8
-
Maximum number of VMs in a single migration plan: 500
-
Maximum number of VMs migrated in a single test: 5000
-
Maximum number of migration plans performed concurrently: 40
-
Maximum single disk size migrated: 6 TB disk, which contained 3 TB of data
-
Maximum number of disks on a single VM migrated: 50
-
Highest observed single datastore read rate from a single ESXi server: 312 MiB/second
-
Highest observed multi-datastore read rate using eight ESXi servers and two datastores: 1,242 MiB/second
-
Highest observed virtual NIC transfer rate to an OpenShift worker: 327 MiB/second
-
Maximum migration transfer rate of a single disk: 162 MiB/second (rate observed when transferring nonconcurrent migration of 1.5 TB utilized data)
-
Maximum cold migration transfer rate of the multiple VMs (single disk) from a single ESXi host: 294 MiB/s (concurrent migration of 30 VMs, 35/50 GiB used, from Single ESXi)
-
Maximum cold migration transfer rate of the multiple VMs (single disk) from multiple ESXi hosts: 1173MB/s (concurrent migration of 80 VMs, 35/50 GiB used, from 8 ESXi servers, 10 VMs from each ESXi)
Warm migration recommendations
The following recommendations are specific to warm migrations:
-
Migrate up to 400 disks in parallel
Testing involved migrating 200 VMs in parallel, with 2 disks each using 8 ESXi hosts, for a total of 400 disks. No tests were run on migration plans migrating over 400 disks in parallel, so it is not recommended to migrate over this number of disks in parallel.
-
Migrate up to 200 disks in parallel for the fastest rate
Testing was successfully performed on parallel disk migrations with 200, 300, and 400 disks. There was a decrease in the precopy migration rate, approximately 25%, between the tests migrating 200 disks and those migrating 300 and 400 disks.
Therefore, it is recommended to perform parallel disk migrations in groups of 200 or fewer, instead of 300 to 400 disks, unless a decline of 25% in precopy speed does not affect your cutover planning.
-
When possible, set cutover time to be immediately after a migration plan starts
To reduce the overall time of warm migrations, it is recommended to set the cutover to occur immediately after the migration plan is started. This causes Forklift to run only one precopy per VM. This recommendation is valid, no matter how many VMs are in the migration plan.
-
Increase precopy intervals between snapshots
If you are creating many migration plans with a single VM and have enough time between the migration start and the cutover, increase the value of the controller_precopy_interval parameter to between 120 and 240 minutes, inclusive. The longer setting will reduce the total number of snapshots and disk transfers per VM before the cutover.
Maximum values tested for warm migrations
-
Maximum number of ESXi hosts tested: 8
-
Maximum number of worker nodes: 12
-
Maximum number of VMs in a single migration plan: 200
-
Maximum number of total parallel disk transfers: 400, with 200 VMs, 6 ESXis, and a transfer rate of 667 MB/s
-
Maximum single disk size migrated: 6 TB disk, which contained 3 TB of data
-
Maximum number of disks on a single VM migrated: 3
-
Maximum number of parallel disk transfers per ESXi host: 68
-
Maximum transfer rate observed of a single disk with no concurrent migrations: 76.5 MB/s
-
Maximum transfer rate observed of multiple disks from a single ESXi host: 253 MB/s (concurrent migration of 10 VMs, 1 disk each, 35/50 GiB used per disk)
-
Total transfer rate observed of multiple disks (210) from 8 ESXi hosts: 802 MB/s (concurrent migration of 70 VMs, 3 disks each, 35/50 GiB used per disk)
Recommendations for migrating VMs with large disks
The following recommendations are suggested for VMs with data on disk totaling to 1 TB or greater for each individual disk:
-
Schedule appropriate maintenance windows for migrating large disk virtual machines (VMs). Such migrations are sensitive operations and might require careful planning of maintenance windows and downtime, especially during periods of lower storage and network activity.
-
Check that no other migration activities or other heavy network or storage activities are run during those large virtual machine (VM) migrations. You should treat these large virtual machine migrations as a special case. During those migrations, prioritize Forklift activities. Plan to migrate those VMs to a time when there are fewer activities on those VMs and related datastore.
-
For large VMs with a high churn rate, which means data is frequently changed in amounts of 100 GB or more between snapshots, consider reducing the warm migration
controller_precopy_intervalfrom the default, which is 60 minutes. It is important to ensure that this process is started at least 24 hours before the scheduled cutover to allow for multiple successful precopy snapshots to complete. When scheduling the cutover, ensure that the maintenance window allows for enough time for the last snapshot of changes to be copied over and that the cutover process begins at the beginning of that maintenance window. -
In cases of particularly large single-disk VMs, where some downtime is possible, select cold migrations rather than warm migrations, especially in the case of large VM snapshots.
-
Consider splitting data on particularly large disks to multiple disks, which enables parallel disk migration with Forklift when warm migration is used.
-
If you have large database disks with continuous writes of large amounts of data, where downtime and VM snapshots are not possible, it might be necessary to consider database vendor-specific replication options of the database data to target these specific migrations outside Forklift. Consult the vendor-specific options of your database if this case applies.
Increasing AIO sizes and buffer counts for NBD transport mode
You can change Network Block Device (NBD) transport network file copy (NFC) parameters to increase migration performance when you use Asynchronous Input/Output (AIO) buffering with the Forklift.
|
Using AIO buffering is only suitable for cold migration use cases. Disable AIO settings before initializing warm migrations. For more details, see Disabling AIO Buffer Configuration. |
Key findings
-
The best migration performance was achieved by migrating multiple (10) virtual machines (VMs) on a single ESXi host with the following values:
-
VixDiskLib.nfcAio.Session.BufSizeIn64KB=16 -
vixDiskLib.nfcAio.Session.BufCount=4
-
-
The following improvements were noted when using AIO buffer settings (asynchronous buffer counts):
-
Migration time was reduced by 31.1%, from 0:24:32 to 0:16:54.
-
Read rate was increased from 347.83 MB/s to 504.93 MB/s.
-
-
There was no significant improvement observed when using AIO buffer settings with a single VM.
-
There was no significant improvement observed when using AIO buffer settings with multiple VMs from multiple hosts.
Key requirements for support for AIO sizes and buffer counts
Support is based upon tests performed using the following versions:
-
vSphere 7.0.3
-
VDDK 7.0.3
Enabling and configuring AIO buffering
You can enable and configure Asynchronous Input/Output (AIO) buffering for use with the Forklift.
-
Ensure that the
forklift-controllerpod in theopenshift-mtvnamespace supports the AIO buffer values. Since the pod name prefix is dynamic, check the pod name by running the following command:oc get pods -n openshift-mtv | grep forklift-controller | awk '{print $1}'For example, the output if the pod name prefix is "forklift-controller-667f57c8f8-qllnx" would be:
forklift-controller-667f57c8f8-qllnx -
Check the environment variables of the pod by running the following command:
oc get pod forklift-controller-667f57c8f8-qllnx -n openshift-mtv -o yaml -
Check for the following lines in the output:
... \- name: VIRT\_V2V\_EXTRA\_ARGS \- name: VIRT\_V2V\_EXTRA\_CONF\_CONFIG\_MAP ... -
In the
openshift-mtv namespace, edit theForkliftControllercustom resource (CR) by performing the following steps:-
Access the
ForkliftControllerCR for editing by running the following command:oc edit forkliftcontroller -n openshift-mtv -
Add the following lines to the
specsection of theForkliftControllerCR:virt_v2v_extra_args: "--vddk-config /mnt/extra-v2v-conf/input.conf" virt_v2v_extra_conf_config_map: "perf"
-
-
Create the required config map
perfby running the following command:oc -n openshift-mtv create cm perf -
Convert the desired buffer configuration values to Base64. For example, for 16/4, run the following command:
echo -e "VixDiskLib.nfcAio.Session.BufSizeIn64KB=16\nvixDiskLib.nfcAio.Session.BufCount=4" | base64The output will be similar to the following:
Vml4RGlza0xpYi5uZmNBaW8uU2Vzc2lvbi5CdWZTaXplSW42NEtCPTE2CnZpeERpc2tMaWIubmZjQWlvLlNlc3Npb24uQnVmQ291bnQ9NAo= -
In the config map
perf, enter the Base64 string in thebinaryDatasection, for example:apiVersion: v1 kind: ConfigMap binaryData: input.conf: Vml4RGlza0xpYi5uZmNBaW8uU2Vzc2lvbi5CdWZTaXplSW42NEtCPTE2CnZpeERpc2tMaWIubmZjQWlvLlNlc3Npb24uQnVmQ291bnQ9NAo= metadata: name: perf namespace: openshift-mtv -
Restart the
forklift-controllerpod to apply the new configuration. -
Ensure the
VIRT_V2V_EXTRA_ARGSenvironment variable reflects the updated settings. -
Run a migration plan and check the logs of the migration pod. Confirm that the AIO buffer settings are passed as parameters, particularly the
--vddk-configvalue.For example, if you run the following command:
exec: /usr/bin/virt-v2v … --vddk-config /mnt/extra-v2v-conf/input.confThe logs include a section similar to the following, if
debug_level = 4:Buffer size calc for 16 value: (16 * 64 * 1024 = 1048576) nbdkit: vddk[1]: debug: [NFC VERBOSE] NfcAio_OpenSession: Opening an AIO session. nbdkit: vddk[1]: debug: [NFC INFO] NfcAioInitSession: Disabling read-ahead buffer since the AIO buffer size of 1048576 is >= the read-ahead buffer size of 65536. Explicitly setting flag '`NFC_AIO_SESSION_NO_NET_READ_AHEAD`' nbdkit: vddk[1]: debug: [NFC VERBOSE] NfcAioInitSession: AIO Buffer Size is 1048576 nbdkit: vddk[1]: debug: [NFC VERBOSE] NfcAioInitSession: AIO Buffer Count is 4 -
Verify that the correct config map values are in the migration pod. Do this by logging into the migration pod and running the following command:
cat /mnt/extra-v2v-conf/input.confExample output is as follows:
VixDiskLib.nfcAio.Session.BufSizeIn64KB=16 vixDiskLib.nfcAio.Session.BufCount=4 -
Optional: Enable debug logs by running the following command. The command converts the configuration to Base64, including a high log level:
echo -e
"`VixDiskLib.nfcAio.Session.BufSizeIn64KB=16\nVixDiskLib.nfcAio.Session.BufCount=4\nVixDiskLib.nfc.LogLevel=4`"
| base64
Adding a high log level reduces performance and is for debugging purposes only.
Disabling AIO buffering
You can disable AIO buffering for a cold migration using Forklift. You must disable AIO buffering for a warm migration using Forklift.
|
The procedure that follows assumes the AIO buffering was enabled and configured according to the procedure in Enabling and configuring AIO buffering. |
-
In the
openshift-mtv namespace, edit theForkliftControllercustom resource (CR) by performing the following steps:-
Access the
ForkliftControllerCR for editing by running the following command:oc edit forkliftcontroller -n openshift-mtv -
Remove the following lines from the
specsection of theForkliftControllerCR:virt_v2v_extra_args: "`–vddk-config /mnt/extra-v2v-conf/input.conf`" virt_v2v_extra_conf_config_map: "`perf`"
-
-
Delete the config map named
perf:oc delete cm perf -n openshift-mtv -
Optional: Restart the
forklift-controllerpod to ensure that the changes took effect.
Troubleshooting
This section provides information for troubleshooting common migration issues.
Error messages
This section describes error messages and how to resolve them.
warm import retry limit reached
The warm import retry limit reached error message is displayed during a warm migration if a VMware virtual machine (VM) has reached the maximum number (28) of changed block tracking (CBT) snapshots during the precopy stage.
To resolve this problem, delete some of the CBT snapshots from the VM and restart the migration plan.
Unable to resize disk image to required size
The Unable to resize disk image to required size error message is displayed when migration fails because a virtual machine on the target provider uses persistent volumes with an EXT4 file system on block storage. The problem occurs because the default overhead that is assumed by CDI does not completely include the reserved place for the root partition.
To resolve this problem, increase the file system overhead in CDI to more than 10%.
Using the must-gather tool
You can collect logs and information about Forklift custom resources (CRs) by using the must-gather tool. You must attach a must-gather data file to all customer cases.
You can gather data for a specific namespace, migration plan, or virtual machine (VM) by using the filtering options.
|
If you specify a non-existent resource in the filtered |
-
You must be logged in to the KubeVirt cluster as a user with the
cluster-adminrole. -
You must have the OKD CLI (
oc) installed.
-
Navigate to the directory where you want to store the
must-gatherdata. -
Run the
oc adm must-gathercommand:$ oc adm must-gather --image=quay.io/kubev2v/forklift-must-gather:latestThe data is saved as
/must-gather/must-gather.tar.gz. You can upload this file to a support case on the Red Hat Customer Portal. -
Optional: Run the
oc adm must-gathercommand with the following options to gather filtered data:-
Namespace:
$ oc adm must-gather --image=quay.io/kubev2v/forklift-must-gather:latest \ -- NS=<namespace> /usr/bin/targeted -
Migration plan:
$ oc adm must-gather --image=quay.io/kubev2v/forklift-must-gather:latest \ -- PLAN=<migration_plan> /usr/bin/targeted -
Virtual machine:
$ oc adm must-gather --image=quay.io/kubev2v/forklift-must-gather:latest \
  -- VM=<vm_id> NS=<namespace> /usr/bin/targeted (1)
1 Specify the VM ID as it appears in the PlanCR.
-
Architecture
This section describes Forklift custom resources, services, and workflows.
Forklift custom resources and services
Forklift is provided as an OKD Operator. It creates and manages the following custom resources (CRs) and services.
Forklift custom resources
-
ProviderCR stores attributes that enable Forklift to connect to and interact with the source and target providers. -
NetworkMappingCR maps the networks of the source and target providers. -
StorageMappingCR maps the storage of the source and target providers. -
PlanCR contains a list of VMs with the same migration parameters and associated network and storage mappings. -
MigrationCR runs a migration plan.Only one
MigrationCR per migration plan can run at a given time. You can create multipleMigrationCRs for a singlePlanCR.
Forklift services
-
The
Inventoryservice performs the following actions:-
Connects to the source and target providers.
-
Maintains a local inventory for mappings and plans.
-
Stores VM configurations.
-
Runs the
Validationservice if a VM configuration change is detected.
-
-
The
Validationservice checks the suitability of a VM for migration by applying rules. -
The
Migration Controllerservice orchestrates migrations.When you create a migration plan, the
Migration Controllerservice validates the plan and adds a status label. If the plan fails validation, the plan status isNot readyand the plan cannot be used to perform a migration. If the plan passes validation, the plan status isReadyand it can be used to perform a migration. After a successful migration, theMigration Controllerservice changes the plan status toCompleted. -
The
Populator Controllerservice orchestrates disk transfers using Volume Populators. -
The
Kubevirt ControllerandContainerized Data Import (CDI) Controllerservices handle most technical operations.
High-level migration workflow
The high-level workflow shows the migration process from the point of view of the user:
-
You create a source provider, a target provider, a network mapping, and a storage mapping.
-
You create a
Plancustom resource (CR) that includes the following resources:-
Source provider
-
Target provider, if Forklift is not installed on the target cluster
-
Network mapping
-
Storage mapping
-
One or more virtual machines (VMs)
-
-
You run a migration plan by creating a
MigrationCR that references thePlanCR.If you cannot migrate all the VMs for any reason, you can create multiple
MigrationCRs for the samePlanCR until all VMs are migrated. -
For each VM in the
PlanCR, theMigration Controllerservice records the VM migration progress in theMigrationCR. -
Once the data transfer for each VM in the
PlanCR completes, theMigration Controllerservice creates aVirtualMachineCR.When all VMs have been migrated, the
Migration Controllerservice updates the status of thePlanCR toCompleted. The power state of each source VM is maintained after migration.
Detailed migration workflow
You can use the detailed migration workflow to troubleshoot a failed migration.
The workflow describes the following steps:
Warm Migration or migration to a remote OpenShift cluster:
-
When you create the
Migrationcustom resource (CR) to run a migration plan, theMigration Controllerservice creates aDataVolumeCR for each source VM disk.For each VM disk:
-
The
Containerized Data Importer (CDI) Controllerservice creates a persistent volume claim (PVC) based on the parameters specified in theDataVolumeCR. -
If the
StorageClasshas a dynamic provisioner, the persistent volume (PV) is dynamically provisioned by theStorageClassprovisioner. -
The
CDI Controllerservice creates animporterpod. -
The
importerpod streams the VM disk to the PV.After the VM disks are transferred:
-
The
Migration Controllerservice creates aconversionpod with the PVCs attached to it when importing from VMware.The
conversionpod runsvirt-v2v, which installs and configures device drivers on the PVCs of the target VM. -
The
Migration Controllerservice creates aVirtualMachineCR for each source virtual machine (VM), connected to the PVCs. -
If the VM ran on the source environment, the
Migration Controllerpowers on the VM, theKubeVirt Controllerservice creates avirt-launcherpod and aVirtualMachineInstanceCR.The
virt-launcherpod runsQEMU-KVMwith the PVCs attached as VM disks.
Cold migration from oVirt or OpenStack to the local OpenShift cluster:
-
When you create a
Migrationcustom resource (CR) to run a migration plan, theMigration Controllerservice creates for each source VM disk aPersistentVolumeClaimCR, and anOvirtVolumePopulatorwhen the source is oVirt, or anOpenstackVolumePopulatorCR when the source is OpenStack.For each VM disk:
-
The
Populator Controllerservice creates a temporarily persistent volume claim (PVC). -
If the
StorageClasshas a dynamic provisioner, the persistent volume (PV) is dynamically provisioned by theStorageClassprovisioner.-
The
Migration Controllerservice creates a dummy pod to bind all PVCs. The name of the pod containspvcinit.
-
-
The
Populator Controllerservice creates apopulatorpod. -
The
populatorpod transfers the disk data to the PV.After the VM disks are transferred:
-
The temporary PVC is deleted, and the initial PVC points to the PV with the data.
-
The
Migration Controllerservice creates aVirtualMachineCR for each source virtual machine (VM), connected to the PVCs. -
If the VM ran on the source environment, the
Migration Controllerpowers on the VM, theKubeVirt Controllerservice creates avirt-launcherpod and aVirtualMachineInstanceCR.The
virt-launcherpod runsQEMU-KVMwith the PVCs attached as VM disks.
Cold migration from VMware to the local OpenShift cluster:
-
When you create a
Migrationcustom resource (CR) to run a migration plan, theMigration Controllerservice creates aDataVolumeCR for each source VM disk.For each VM disk:
-
The
Containerized Data Importer (CDI) Controllerservice creates a blank persistent volume claim (PVC) based on the parameters specified in theDataVolumeCR. -
If the
StorageClasshas a dynamic provisioner, the persistent volume (PV) is dynamically provisioned by theStorageClassprovisioner.
For all VM disks:
-
The
Migration Controllerservice creates a dummy pod to bind all PVCs. The name of the pod containspvcinit. -
The
Migration Controllerservice creates aconversionpod for all PVCs. -
The
conversionpod runsvirt-v2v, which converts the VM to the KVM hypervisor and transfers the disks' data to their corresponding PVs.After the VM disks are transferred:
-
The
Migration Controllerservice creates aVirtualMachineCR for each source virtual machine (VM), connected to the PVCs. -
If the VM ran on the source environment, the
Migration Controllerpowers on the VM, theKubeVirt Controllerservice creates avirt-launcherpod and aVirtualMachineInstanceCR.The
virt-launcherpod runsQEMU-KVMwith the PVCs attached as VM disks.
How MTV uses the virt-v2v tool
The Forklift uses the virt-v2v tool to convert the disk image of a virtual machine (VM) into a format compatible with KubeVirt. The tool makes migrations easier because it automatically performs the tasks needed to make your VMs work with KubeVirt. For example, enabling paravirtualized VirtIO drivers in the converted VM, if possible, and installing the QEMU guest agent.
virt-v2v is included in Red Hat Enterprise Linux (RHEL) versions 7 and later.
Main functions of virt-v2v in MTV migrations
During migration, Forklift uses virt-v2v to collect metadata about VMs, make necessary changes to VM disks, and copy the disks containing the VMs to KubeVirt.
virt-v2v makes the following changes to VM disks to prepare them for migration:
-
Additions:
-
Injection of VirtIO drivers, for example, network or disk drivers.
-
Preparation of hypervisor-specific tools or agents, for example, a QEMU guest agent installation.
-
Modification of boot configuration, for example, updated bootloader or boot entries.
-
-
Removals:
-
Unnecessary or former hypervisor-specific files, for example, VMware tools or VirtualBox additions.
-
Old network driver configurations, for example, removing VMware-specific NIC drivers.
-
Configuration settings that are incompatible with the target system, for example, old boot settings.
-
If you are migrating from VMware or from Open Virtual Appliances (OVA) files, virt-v2v also sets their IP addresses either during the migration or during the first reboot of the VMs after migration.
s
|
You can also run predefined Ansible hooks before or after a migration using Forklift. For more information, see Adding hooks to an MTV migration plan. These hooks do not necessarily use |
Customizing, removing, and installing files
Forklift uses virt-v2v to perform additional guest customizations during the conversion, such as the following actions:
-
Customization to preserve IP addresses
-
Customization to preserve drive letters
|
For Red Hat Enterprise Linux (RHEL)-based guests, |
For more information, see the man reference pages:
Permissions and virt-v2v
virt-v2v does not require permissions or access credentials for the guest operating system itself because virt-v2v is not run against a running VM, but only against the disks of a VM.
Raw copy mode
In regular cold and warm migrations, Forklift uses a program called virt-v2v to prepare virtual machines (VMs) for migration to KubeVirt after the VMs have been copied from their source provider.
The main function of virt-v2v is to convert the disk image of a VM into a format compatible with KubeVirt. This program is described in detail in How Forklift uses the virt-v2v tool. What is important to note here is that although virt-v2v is compatible with major operating systems such as recent versions of Red Hat Enterprise Linux, Windows, and Windows Server, it is not compatible with macOS and some other operating systems.
|
For a list of the operating systems that |
As a workaround for migrating VMs that use an operating system that virt-v2v does not support, Forklift includes a feature called raw copy mode. Raw copy mode copies VMs without applying any tool to convert them for use with KubeVirt. The migrated VMs use emulated devices.
This enables more robust migrations, enabling a wider range of operating systems and configurations. Examples are VMs with uncommon file systems, VMs with uncommon encryption technologies or without access to keys.
However, VMs migrated using raw copy mode might not boot on KubeVirt or perform as well as VMs migrated in the regular way. VMs migrated using raw copy mode might not boot on KubeVirt or perform as well as VMs migrated in the regular way.
Therefore, using raw copy mode is a tradeoff between being a more versatile migration option compared to increasing the risk of problems following migration.
Because of this risk, users are asked to request that Red Hat support perform raw copy mode migrations.
Logs and custom resources
You can download logs and custom resource (CR) information for troubleshooting. For more information, see the detailed migration workflow.
Collected logs and custom resource information
You can download logs and custom resource (CR) yaml files for the following targets by using the OKD web console or the command-line interface (CLI):
-
Migration plan: Web console or CLI.
-
Virtual machine: Web console or CLI.
-
Namespace: CLI only.
The must-gather tool collects the following logs and CR files in an archive file:
-
CRs:
-
DataVolumeCR: Represents a disk mounted on a migrated VM. -
VirtualMachineCR: Represents a migrated VM. -
PlanCR: Defines the VMs and storage and network mapping. -
JobCR: Optional: Represents a pre-migration hook, a post-migration hook, or both.
-
-
Logs:
-
importerpod: Disk-to-data-volume conversion log. Theimporterpod naming convention isimporter-<migration_plan>-<vm_id><5_char_id>, for example,importer-mig-plan-ed90dfc6-9a17-4a8btnfh, whereed90dfc6-9a17-4a8is a truncated oVirt VM ID andbtnfhis the generated 5-character ID. -
conversionpod: VM conversion log. Theconversionpod runsvirt-v2v, which installs and configures device drivers on the PVCs of the VM. Theconversionpod naming convention is<migration_plan>-<vm_id><5_char_id>. -
virt-launcherpod: VM launcher log. When a migrated VM is powered on, thevirt-launcherpod runsQEMU-KVMwith the PVCs attached as VM disks. -
forklift-controllerpod: The log is filtered for the migration plan, virtual machine, or namespace specified by themust-gathercommand. -
forklift-must-gather-apipod: The log is filtered for the migration plan, virtual machine, or namespace specified by themust-gathercommand. -
hook-jobpod: The log is filtered for hook jobs. Thehook-jobnaming convention is<migration_plan>-<vm_id><5_char_id>, for example,plan2j-vm-3696-posthook-4mx85orplan2j-vm-3696-prehook-mwqnl.Empty or excluded log files are not included in the
must-gatherarchive file.
-
must-gather
└── namespaces
    ├── target-vm-ns
    │   ├── crs
    │   │   ├── datavolume
    │   │   │   ├── mig-plan-vm-7595-tkhdz.yaml
    │   │   │   ├── mig-plan-vm-7595-5qvqp.yaml
    │   │   │   └── mig-plan-vm-8325-xccfw.yaml
    │   │   └── virtualmachine
    │   │       ├── test-test-rhel8-2disks2nics.yaml
    │   │       └── test-x2019.yaml
    │   └── logs
    │       ├── importer-mig-plan-vm-7595-tkhdz
    │       │   └── current.log
    │       ├── importer-mig-plan-vm-7595-5qvqp
    │       │   └── current.log
    │       ├── importer-mig-plan-vm-8325-xccfw
    │       │   └── current.log
    │       ├── mig-plan-vm-7595-4glzd
    │       │   └── current.log
    │       └── mig-plan-vm-8325-4zw49
    │           └── current.log
    └── openshift-mtv
        ├── crs
        │   └── plan
        │       └── mig-plan-cold.yaml
        └── logs
            ├── forklift-controller-67656d574-w74md
            │   └── current.log
            └── forklift-must-gather-api-89fc7f4b6-hlwb6
                └── current.log
Downloading logs and custom resource information from the web console
You can download logs and information about custom resources (CRs) for a completed, failed, or canceled migration plan or for migrated virtual machines (VMs) from the OKD web console.
-
In the OKD web console, click Migration → Plans for virtualization.
-
Click Get logs beside a migration plan name.
-
In the Get logs window, click Get logs.
The logs are collected. A
Log collection completemessage is displayed. -
Click Download logs to download the archive file.
-
To download logs for a migrated VM, click a migration plan name and then click Get logs beside the VM.
Accessing logs and custom resource information from the command line
You can access logs and information about custom resources (CRs) from the command line by using the must-gather tool. You must attach a must-gather data file to all customer cases.
You can gather data for a specific namespace, a completed, failed, or canceled migration plan, or a migrated virtual machine (VM) by using the filtering options.
|
If you specify a non-existent resource in the filtered |
-
You must be logged in to the KubeVirt cluster as a user with the
cluster-adminrole. -
You must have the OKD CLI (
oc) installed.
-
Navigate to the directory where you want to store the
must-gatherdata. -
Run the
oc adm must-gathercommand:$ kubectl adm must-gather --image=quay.io/kubev2v/forklift-must-gather:latestThe data is saved as
/must-gather/must-gather.tar.gz. You can upload this file to a support case on the Red Hat Customer Portal. -
Optional: Run the
oc adm must-gathercommand with the following options to gather filtered data:-
Namespace:
$ kubectl adm must-gather --image=quay.io/kubev2v/forklift-must-gather:latest \ -- NS=<namespace> /usr/bin/targeted -
Migration plan:
$ kubectl adm must-gather --image=quay.io/kubev2v/forklift-must-gather:latest \ -- PLAN=<migration_plan> /usr/bin/targeted -
Virtual machine:
$ kubectl adm must-gather --image=quay.io/kubev2v/forklift-must-gather:latest \
  -- VM=<vm_name> NS=<namespace> /usr/bin/targeted (1)
1 You must specify the VM name, not the VM ID, as it appears in the PlanCR.
-
Telemetry
Telemetry
Red Hat uses telemetry to collect anonymous usage data from Forklift installations to help us improve the usability and efficiency of Forklift.
Forklift collects the following data:
-
Migration plan status: The number of migrations. Includes those that failed, succeeded, or were canceled.
-
Provider: The number of migrations per provider. Includes oVirt, vSphere, OpenStack, OVA, and KubeVirt providers.
-
Mode: The number of migrations by mode. Includes cold and warm migrations.
-
Target: The number of migrations by target. Includes local and remote migrations.
-
Plan ID: The ID number of the migration plan. The number is assigned by Forklift.
Metrics are calculated every 10 seconds and are reported per week, per month, and per year.
Additional information
Forklift performance addendum
The data provided here was collected from testing in Red Hat labs and is provided for reference only.
Overall, these numbers should be considered to show the best-case scenarios.
The observed performance of migration can differ from these results and depends on several factors.
ESXi performance
ESXi performance can be measured for a single ESXI host or for multiple ESXi hosts.
Single ESXi host performance
Test migration by using the same ESXi host.
In each iteration, the total VMs increase to display the impact of concurrent migration on the duration.
The results show that migration time is linear when increasing the total VMs (50 GiB disk, Utilization 70%).
The optimal number of VMs per ESXi is 10.
| Test Case Description | MTV | VDDK | max_vm inflight | Migration Type | Total Duration |
|---|---|---|---|---|---|
Cold migration, 10 VMs, Single ESXi, Private Network (non-management network) |
2.6 |
7.0.3 |
100 |
cold |
0:21:39 |
cold migration, 20 VMs, Single ESXi, Private Network |
2.6 |
7.0.3 |
100 |
cold |
0:41:16 |
Cold migration, 30 VMs, Single ESXi, Private Network |
2.6 |
7.0.3 |
100 |
cold |
1:00:59 |
Cold migration, 40 VMs, Single ESXi, Private Network |
2.6 |
7.0.3 |
100 |
cold |
1:23:02 |
Cold migration, 50 VMs, Single ESXi, Private Network |
2.6 |
7.0.3 |
100 |
cold |
1:46:24 |
Cold migration, 80 VMs, Single ESXi, Private Network |
2.6 |
7.0.3 |
100 |
cold |
2:42:49 |
Cold migration, 100 VMs, Single ESXi, Private Network |
2.6 |
7.0.3 |
100 |
cold |
3:25:15 |
Multiple ESXi hosts and a single data store
In each iteration, the number of ESXi hosts was increased, to show that increasing the number of ESXi hosts improves the migration time (50 GiB disk, Utilization 70%).
| Test Case Description | MTV | VDDK | max_vm inflight | Migration Type | Total Duration |
|---|---|---|---|---|---|
Cold migration, 100 VMs, Single ESXi, Private Network (non-management network) |
2.6 |
7.0.3 |
100 |
cold |
3:25:15 |
Cold migration, 100 VMs, 4 ESXs (25 VMs per ESX), Private Network |
2.6 |
7.0.3 |
100 |
cold |
1:22:27 |
Cold migration, 100 VMs, 5 ESXs (20 VMs per ESX), Private Network, 1 Data Store |
2.6 |
7.0.3 |
100 |
cold |
1:04:57 |
Performance using different migration networks
Each iteration the Migration Network was changed, by using the Provider, to find the fastest network for migration.
The results indicate that there is no degradation by using management compared to non-management networks when all interfaces and network speeds are the same.
| Test Case Description | MTV | VDDK | max_vm inflight | Migration Type | Total Duration |
|---|---|---|---|---|---|
Cold migration, 10 VMs, Single ESXi, MGMT Network |
2.6 |
7.0.3 |
100 |
cold |
0:21:30 |
Cold migration, 10 VMs, Single ESXi, Private Network (non-management network) |
2.6 |
7.0.3 |
20 |
cold |
0:21:20 |
Cold migration, 10 VMs, Single ESXi, Default Network |
2.6.2 |
7.0.3 |
20 |
cold |
0:21:30 |