Tutorial
How to Use Migration Assessment
This tutorial covers two methods to assess your VMware environment for migration to OpenShift Virtualization.
Choose your assessment method:
- RVTools Flow - Upload an existing RVTools Excel export for instant assessment
- Discovery Agent Flow - Deploy an OVA to vCenter for live discovery
RVTools Flow
Upload an existing RVTools export file for instant assessment. Watch the video tutorial below:
Prerequisites: RVTools File Requirements
Before uploading your RVTools export, ensure your Excel file meets the following requirements. The migration assessment tool validates your RVTools export and will report errors or warnings based on what’s present.
Hard Requirements (Errors)
If these are missing, the upload will fail. All of these reside in the vInfo sheet:
| Requirement | Why? |
|---|---|
| vInfo sheet must have at least 1 row | No VMs means there is no inventory to plan |
| Column VM ID must not be null/empty | Used as the primary unique identifier for VMs |
| Column VM (Name) must not be null/empty | Used to identify and display the VM |
Soft Requirements (Warnings)
The following sheets are checked, but if they are empty or missing, the tool will only issue a warning. The inventory will still be built, but specific data points will be blank:
| Sheet | Impact if Missing |
|---|---|
| vHost | Host-related info will be unavailable |
| vDatastore | Storage/datastore info will be missing |
| vNetwork | Network configuration details will be missing |
| vCPU | Detailed CPU metrics (like core counts) will be missing |
| vMemory | RAM allocation details will be missing |
| vDisk | Disk size and provisioning data will be missing |
| vNic | Network interface details (IPs/MACs) will be missing |
Export your RVTools data with all sheets enabled to ensure the most comprehensive migration assessment.
Go to console.redhat.com
1. Introduction
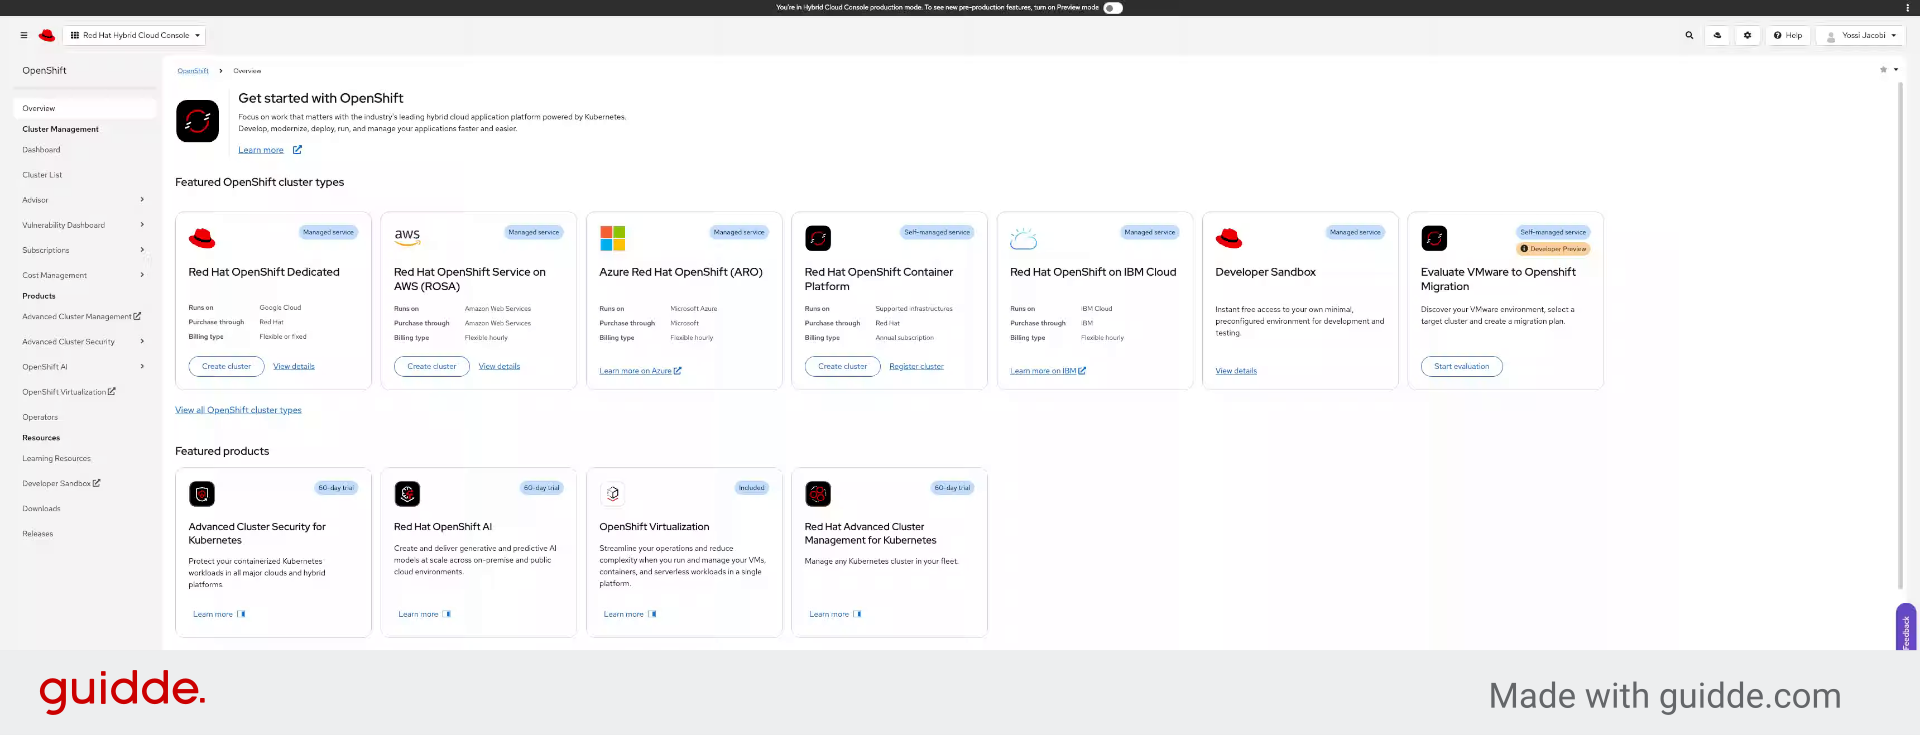
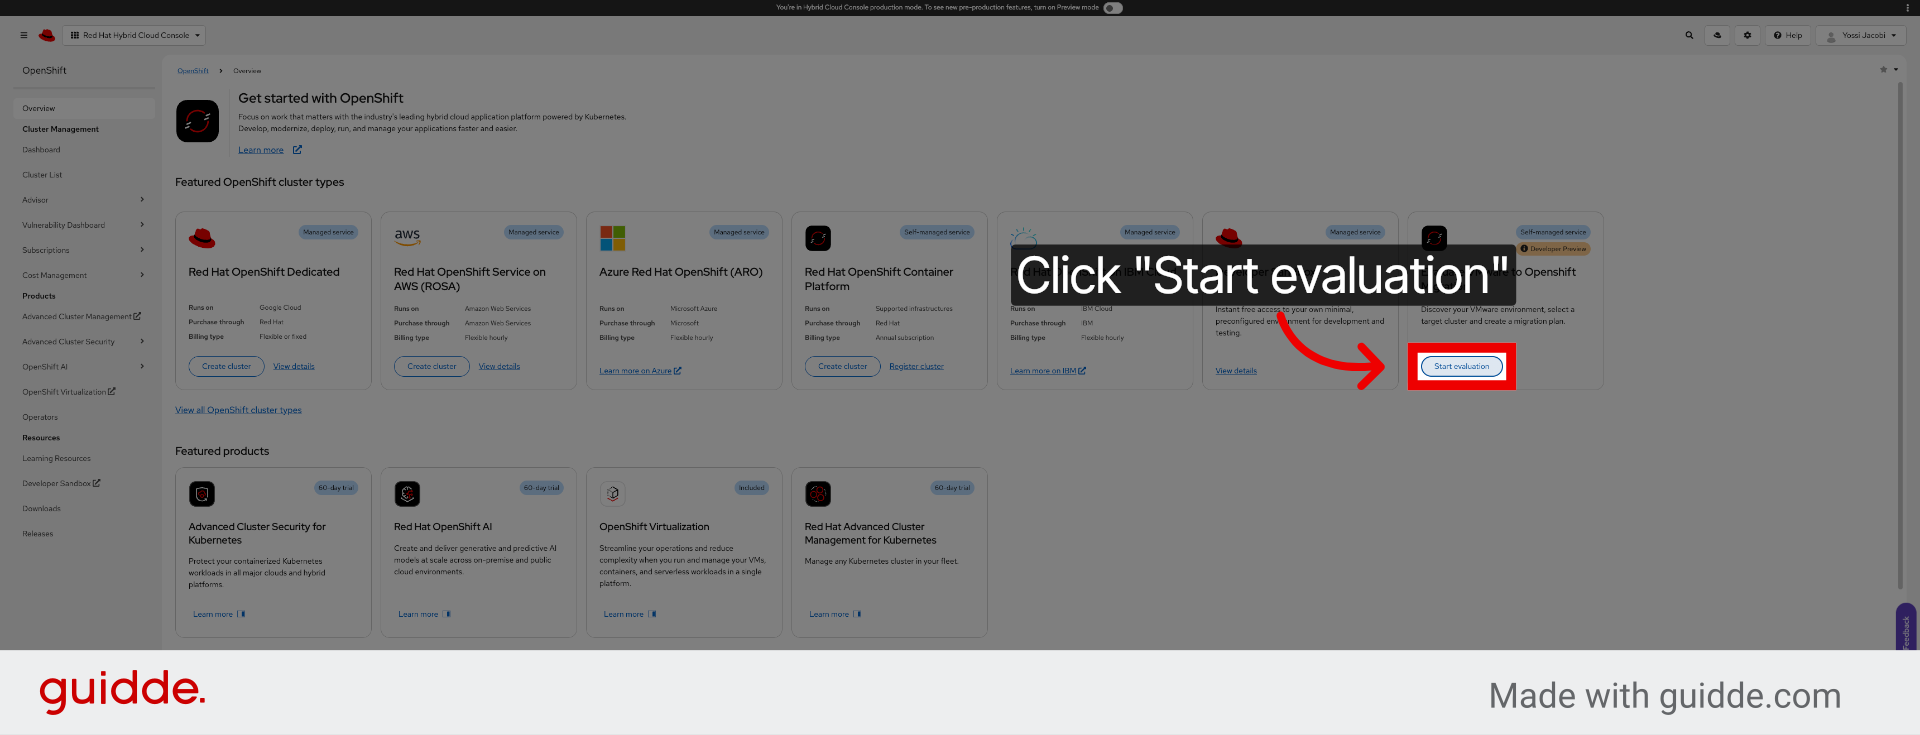
2. Click Start Evaluation

3. Introduction
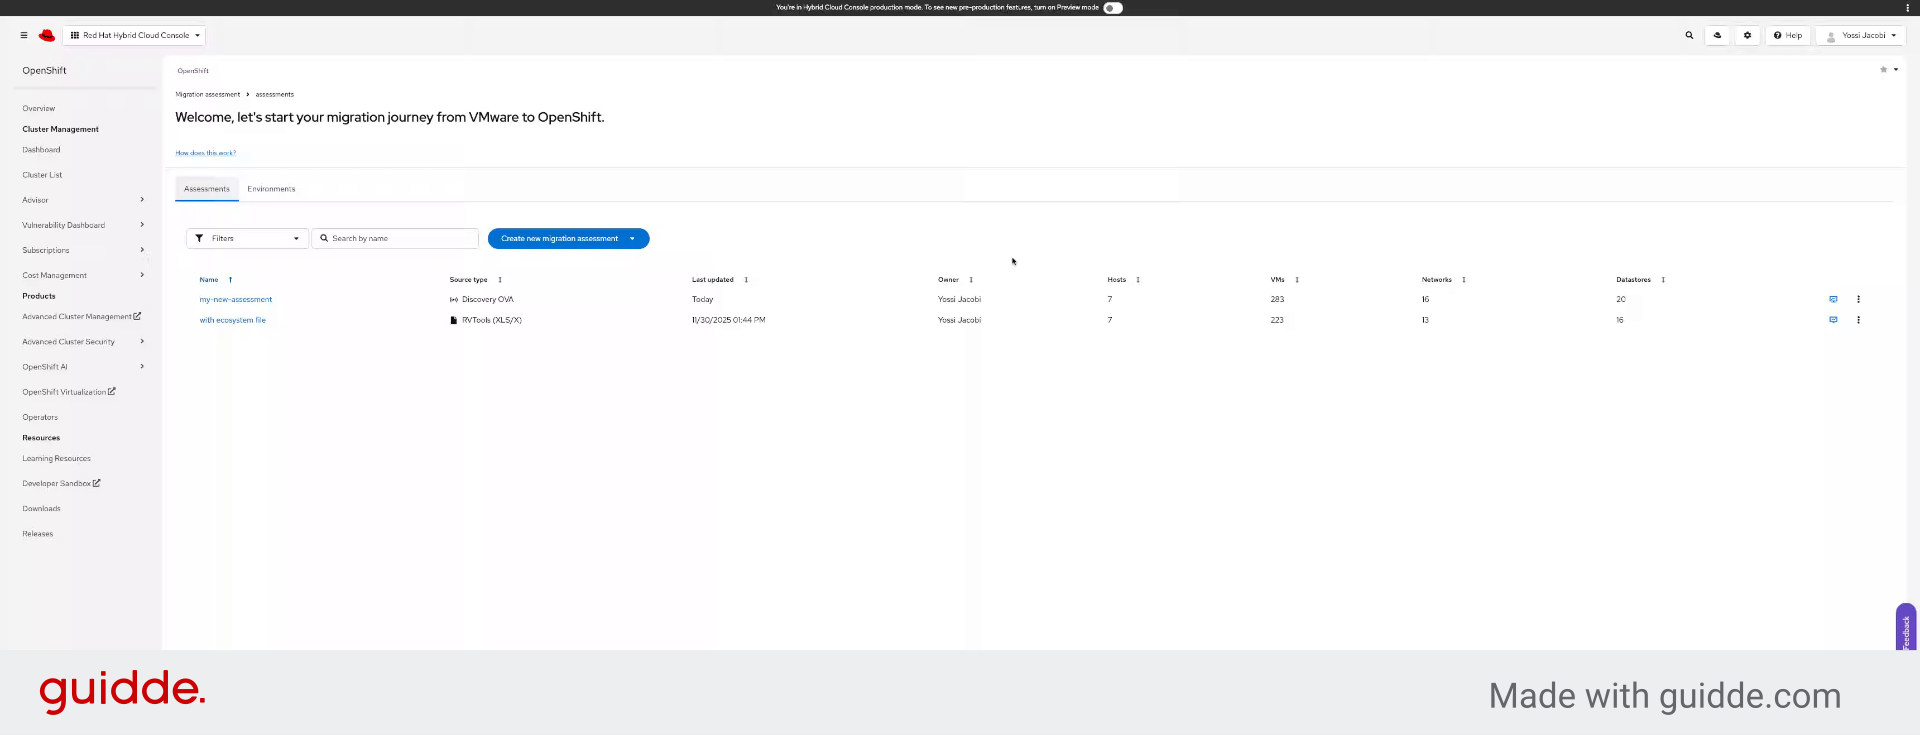
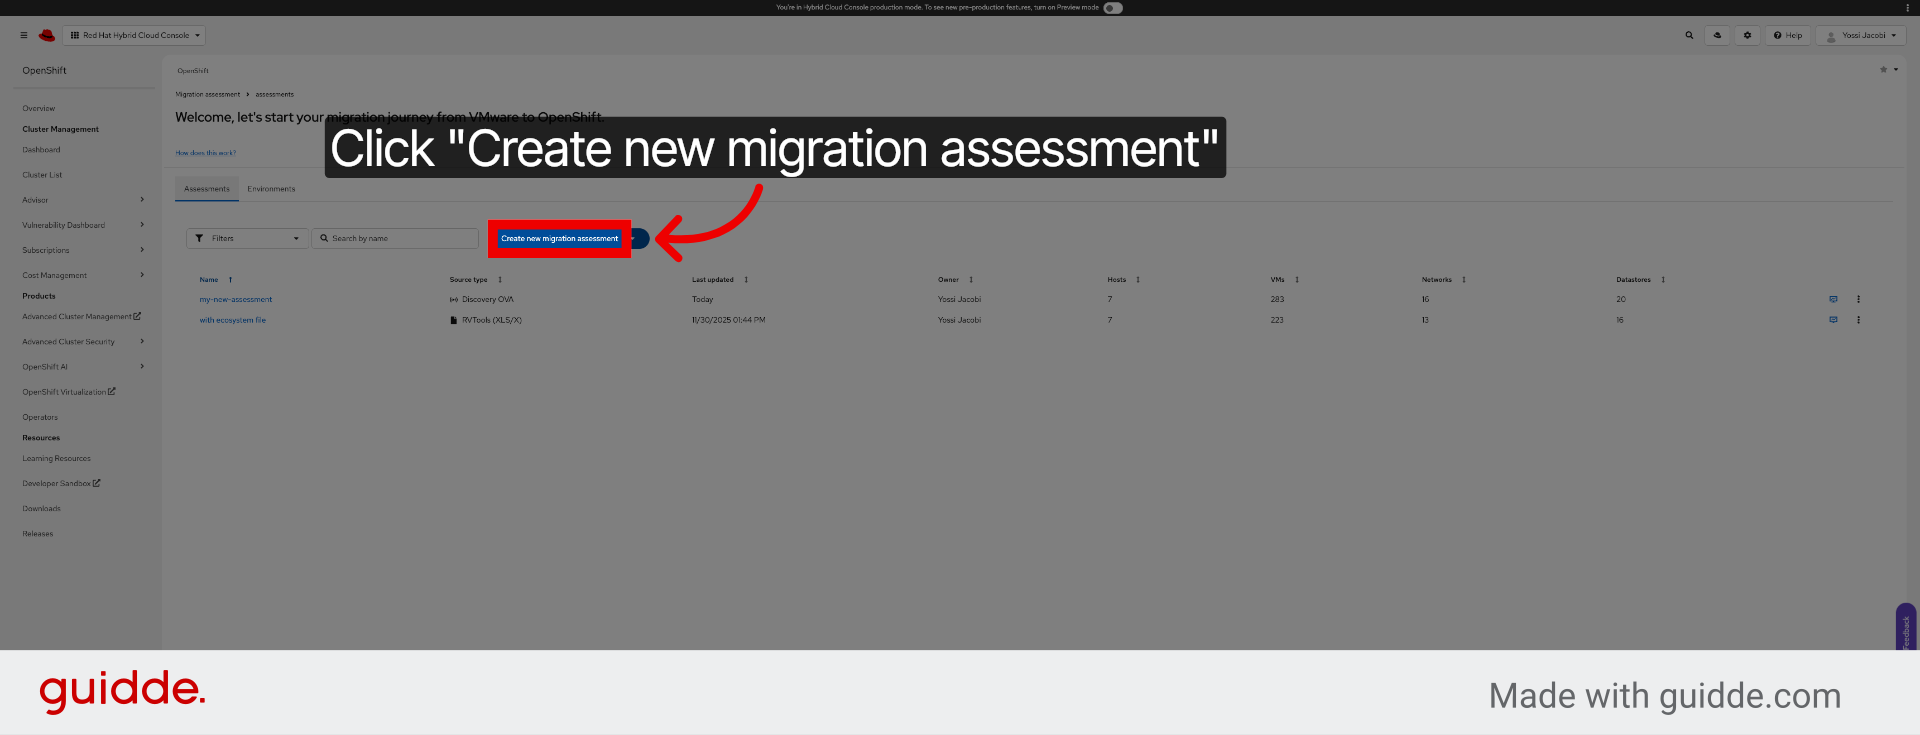
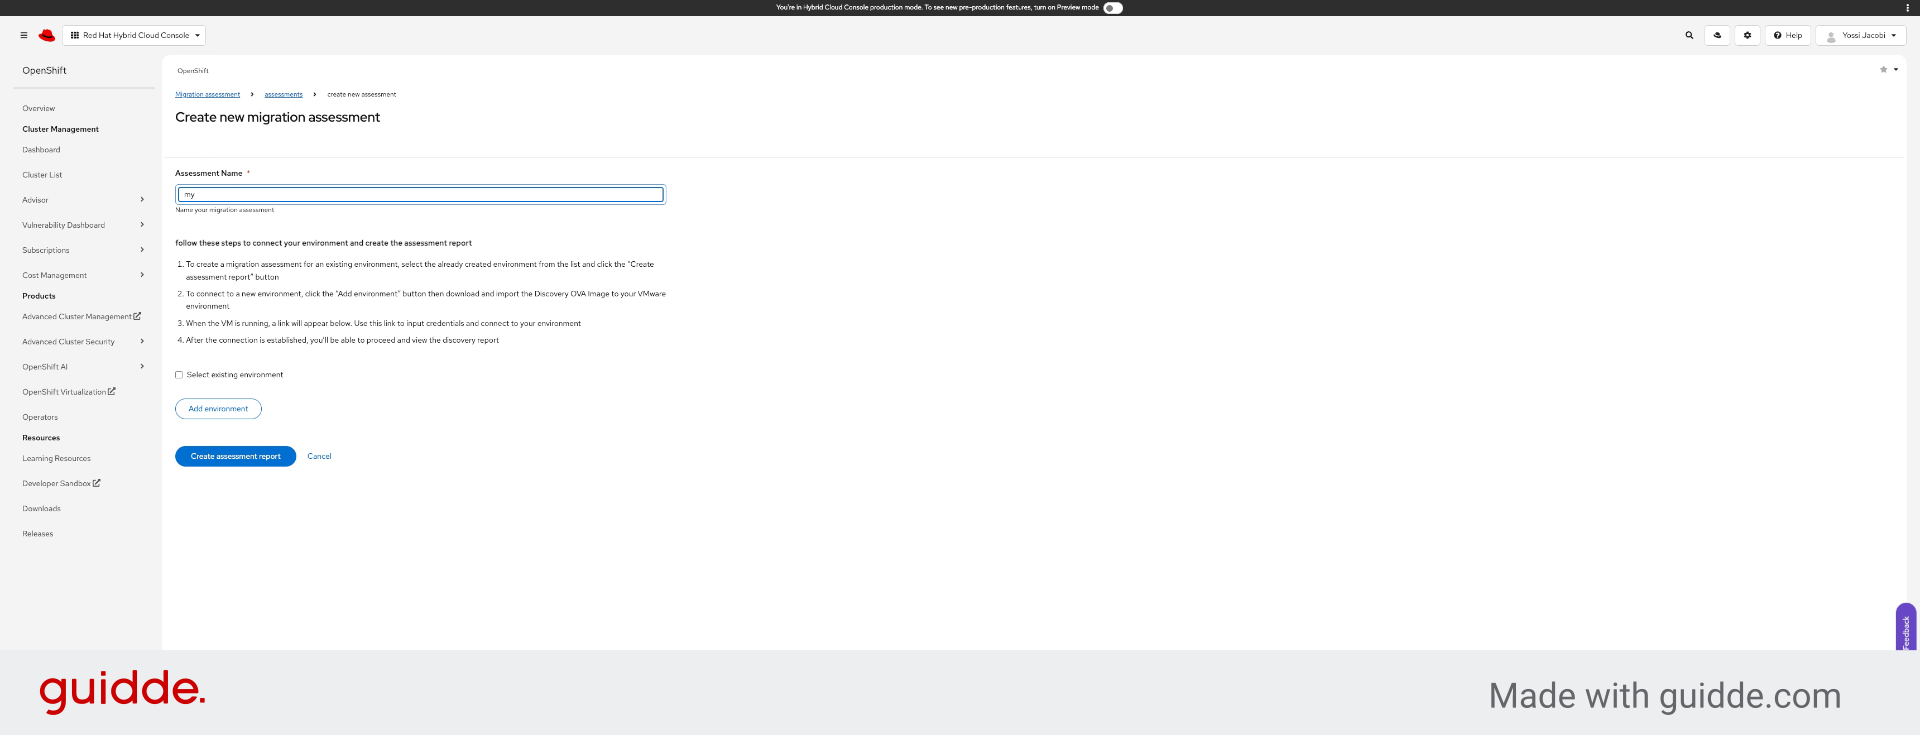
4. Click Create New Migration Assessment
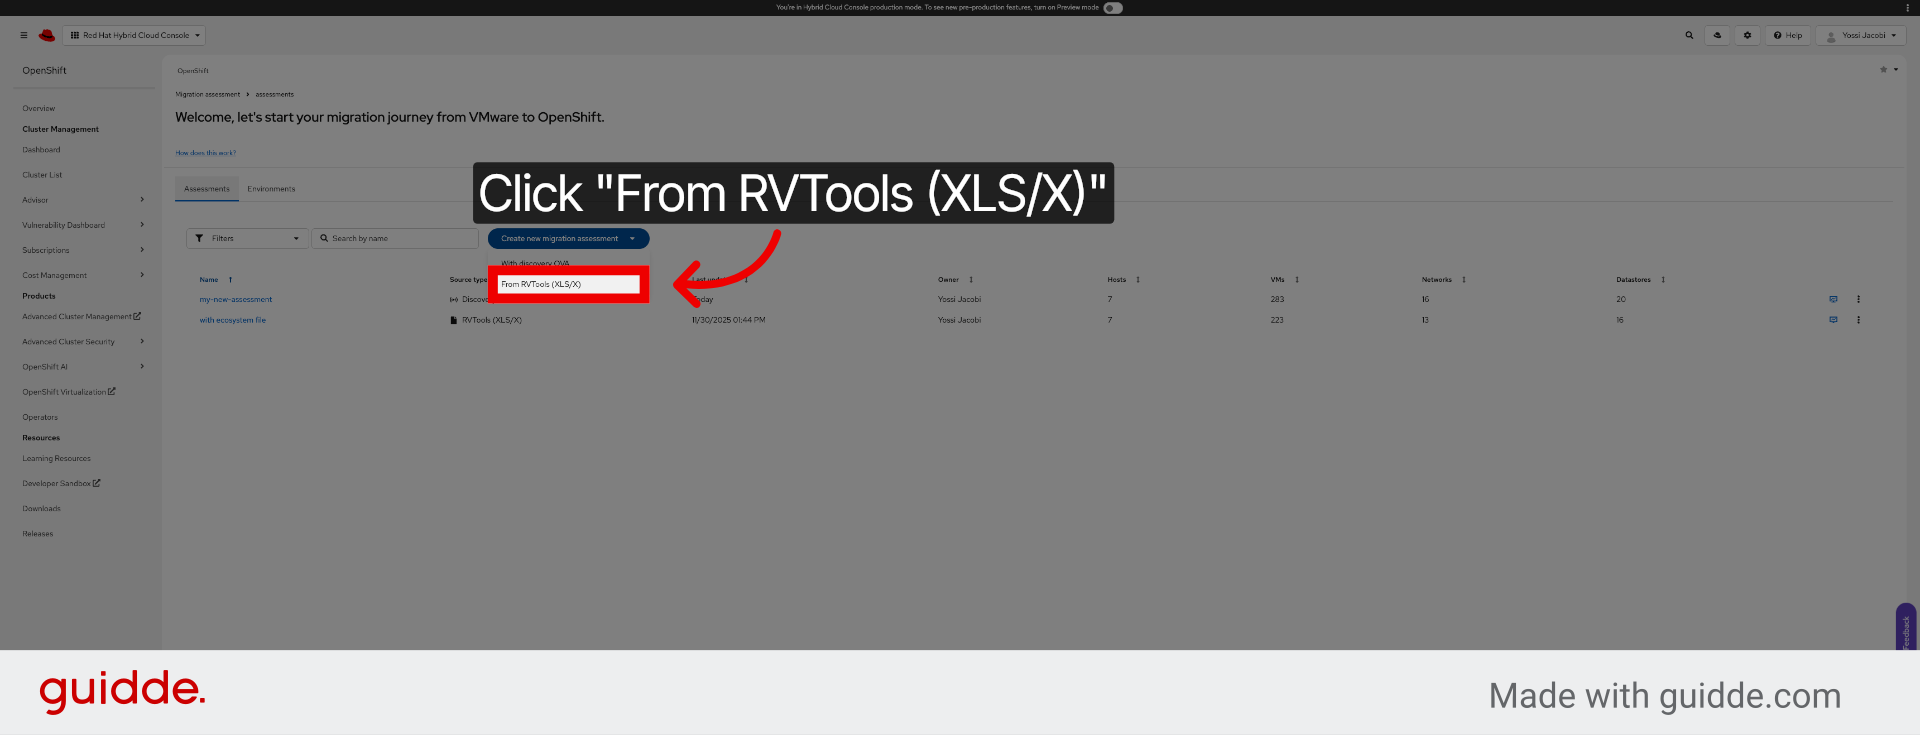
5. Select RVTools File Option
6. Access Assessment Name Field
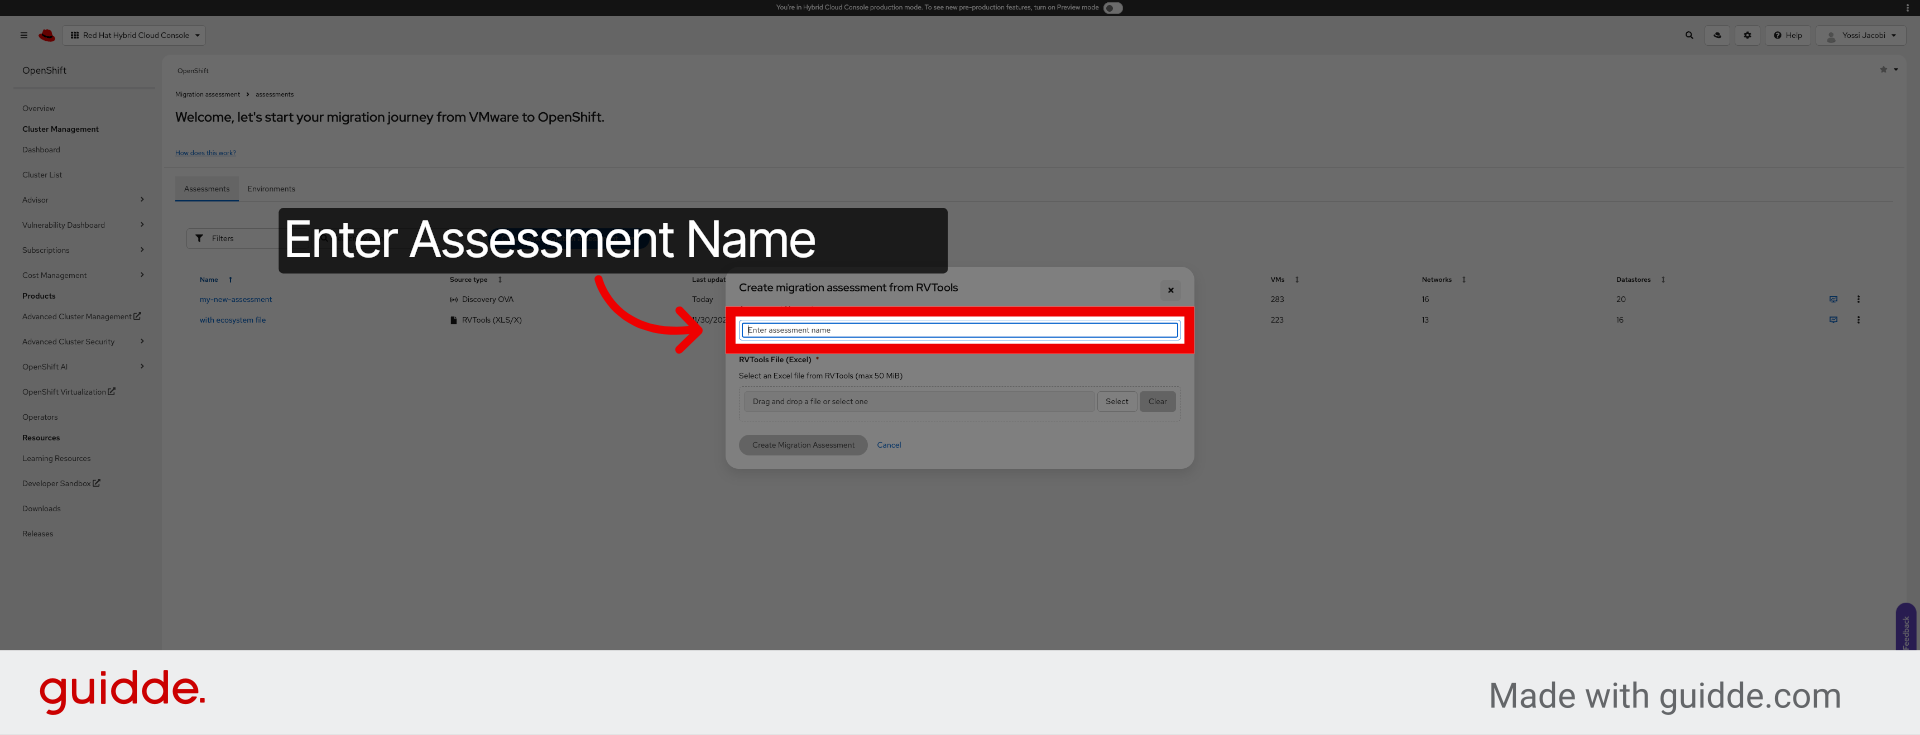
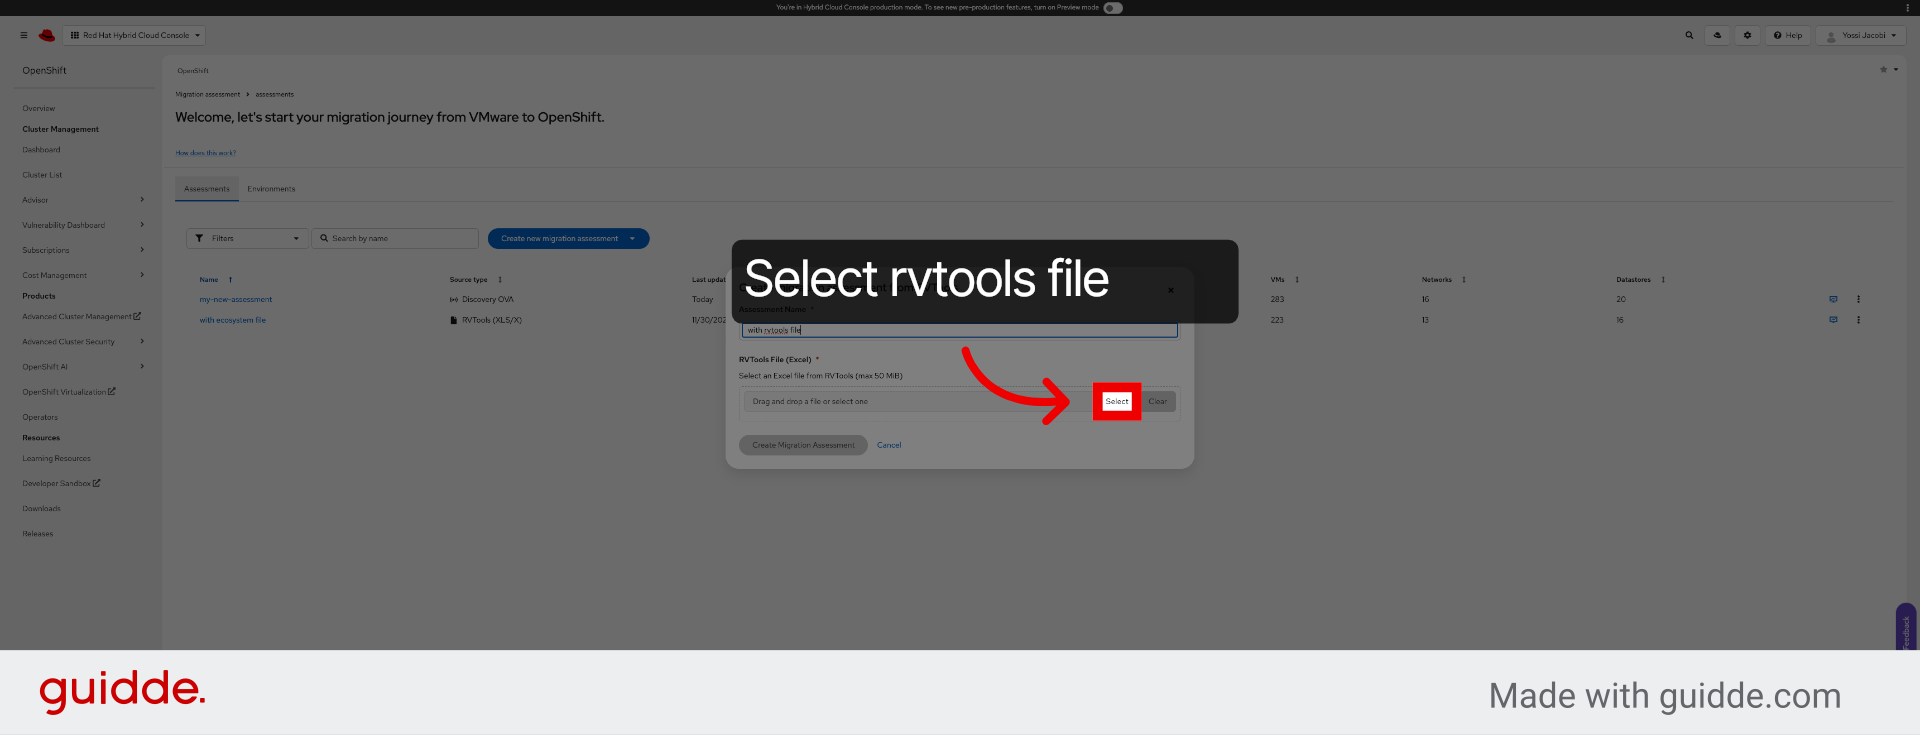
7. Click Select Button
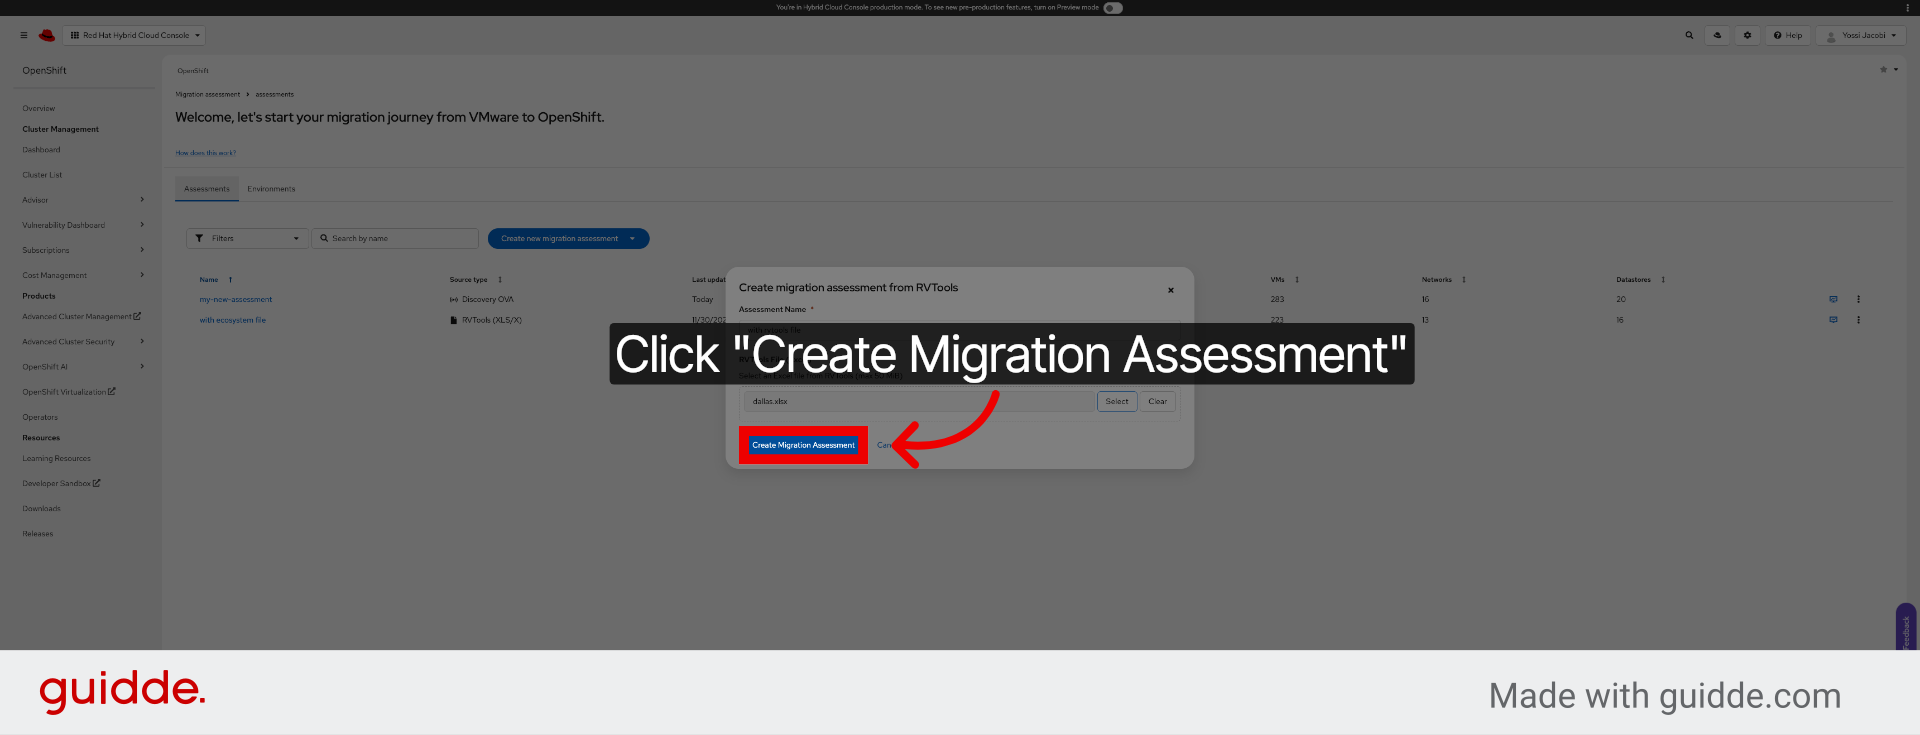
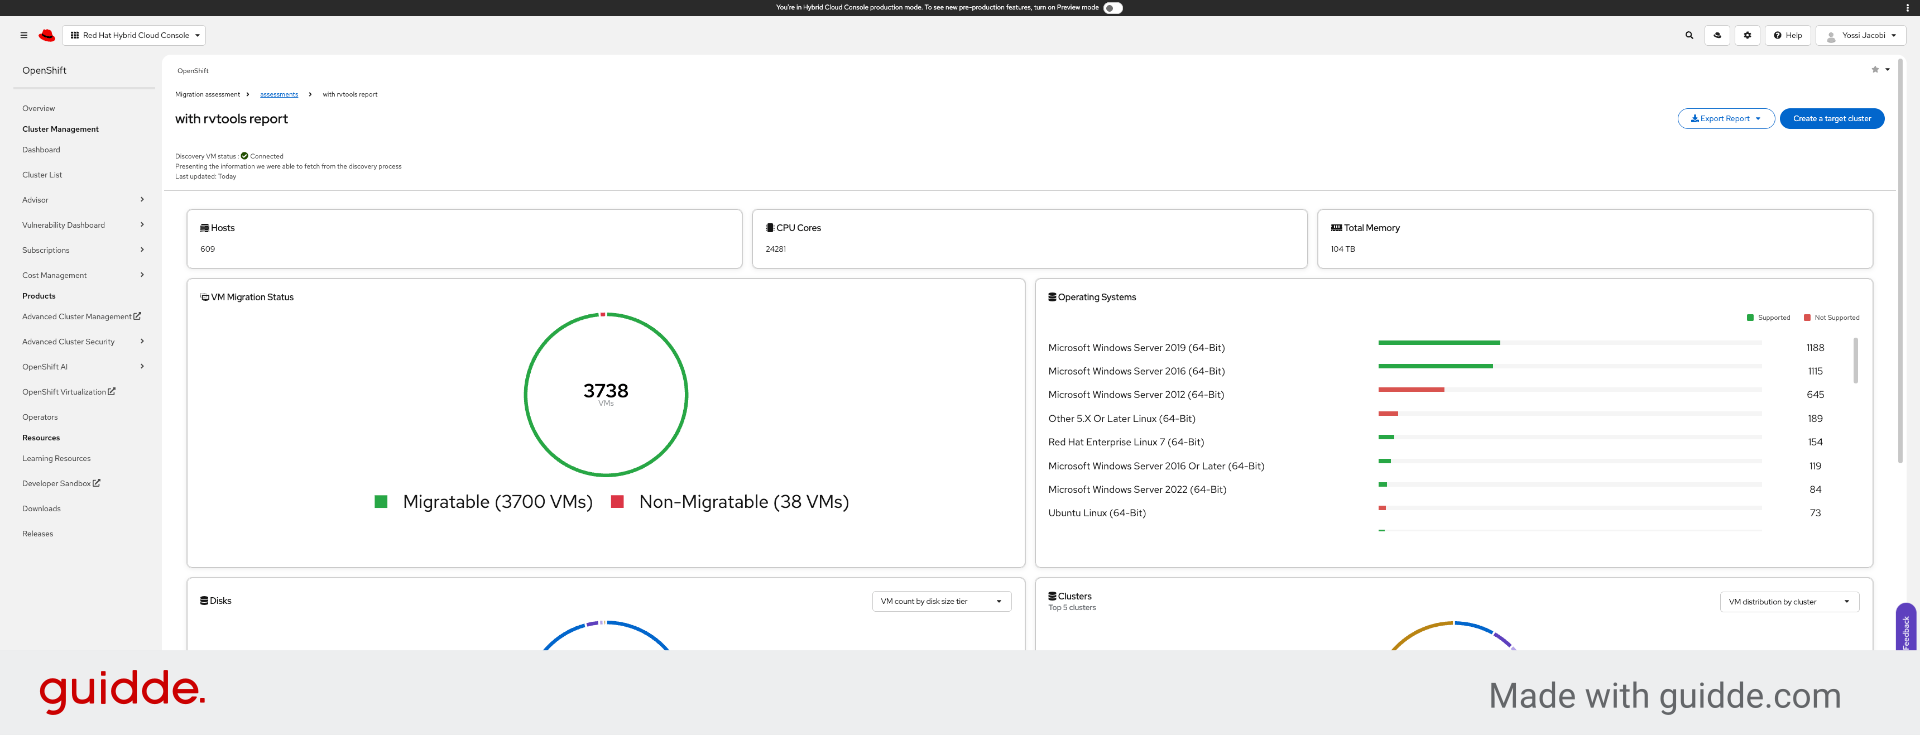
8. Create Migration Assessment
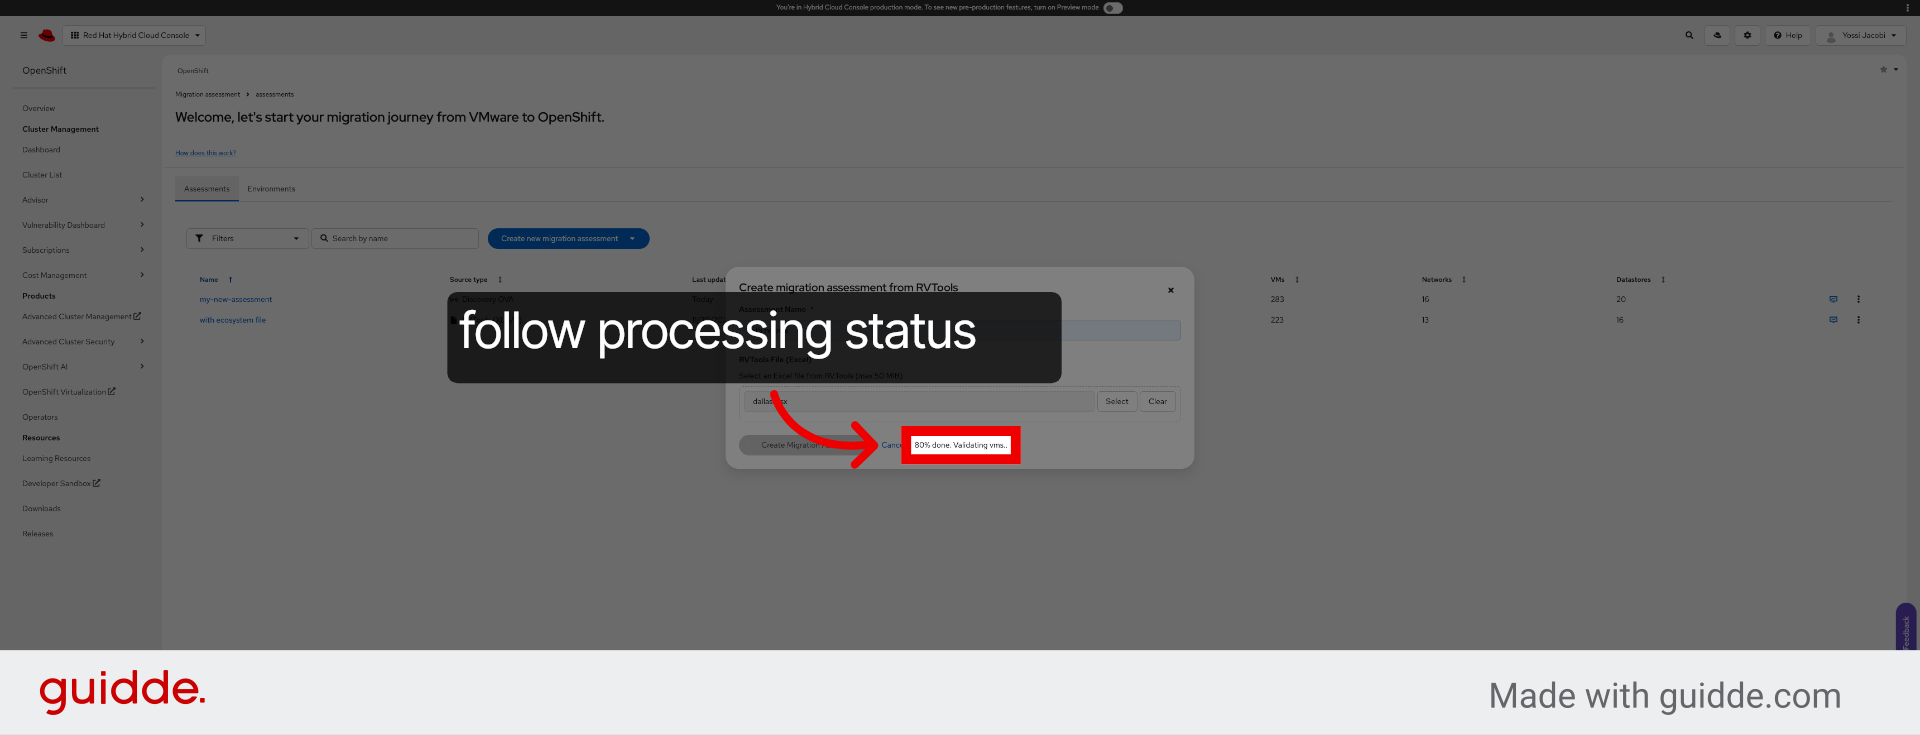
9. Validate Virtual Machines
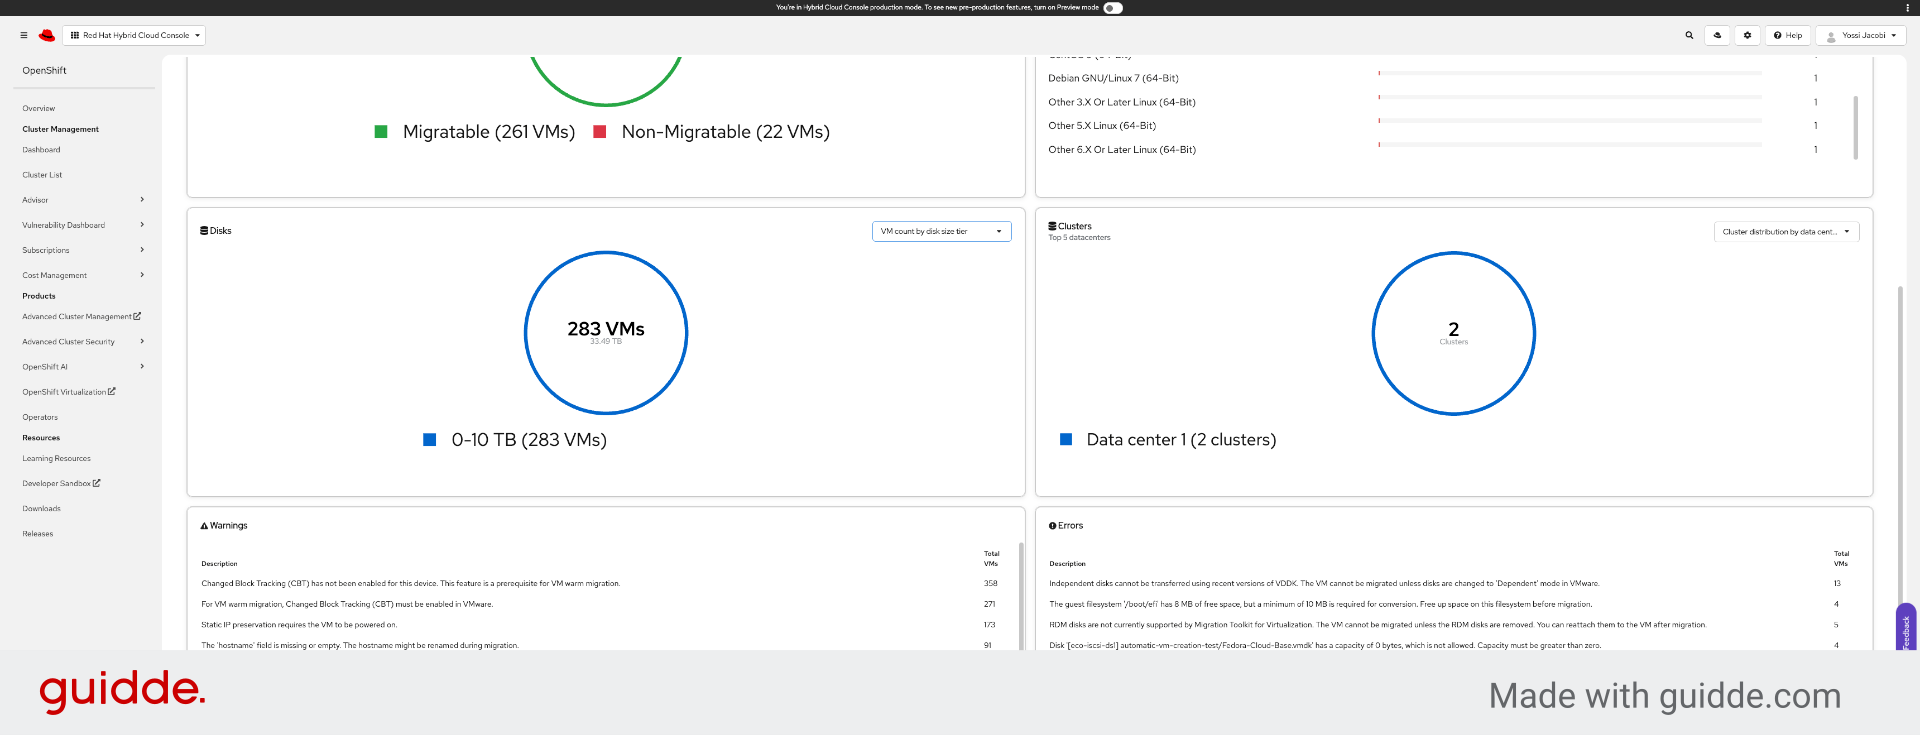
10. Review Migration Data Chart
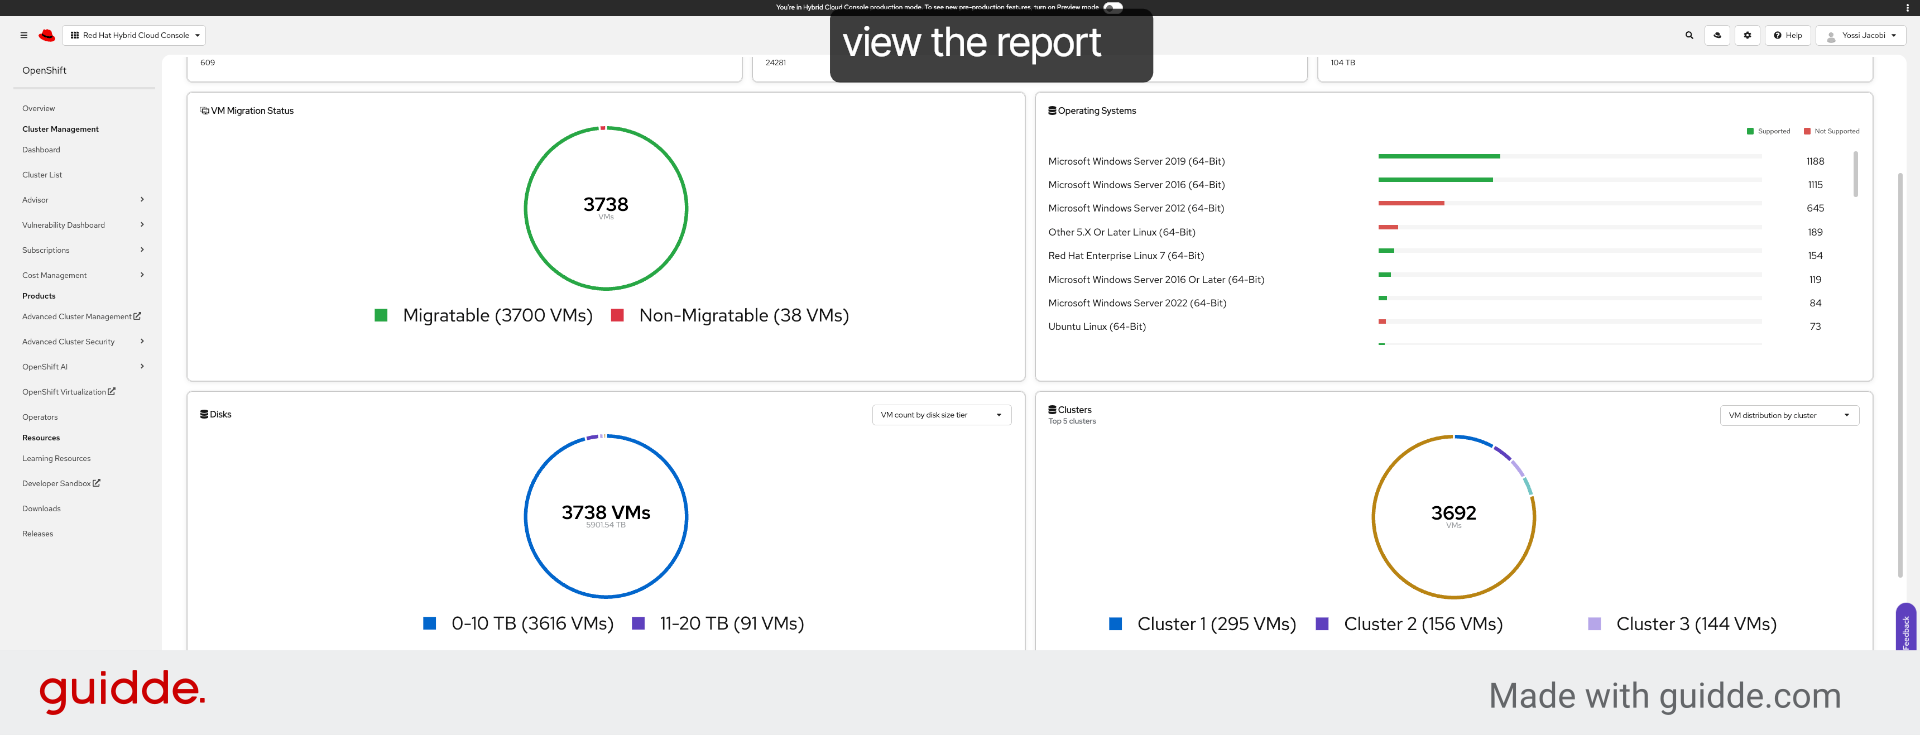
11. Check Changed Block Tracking Status
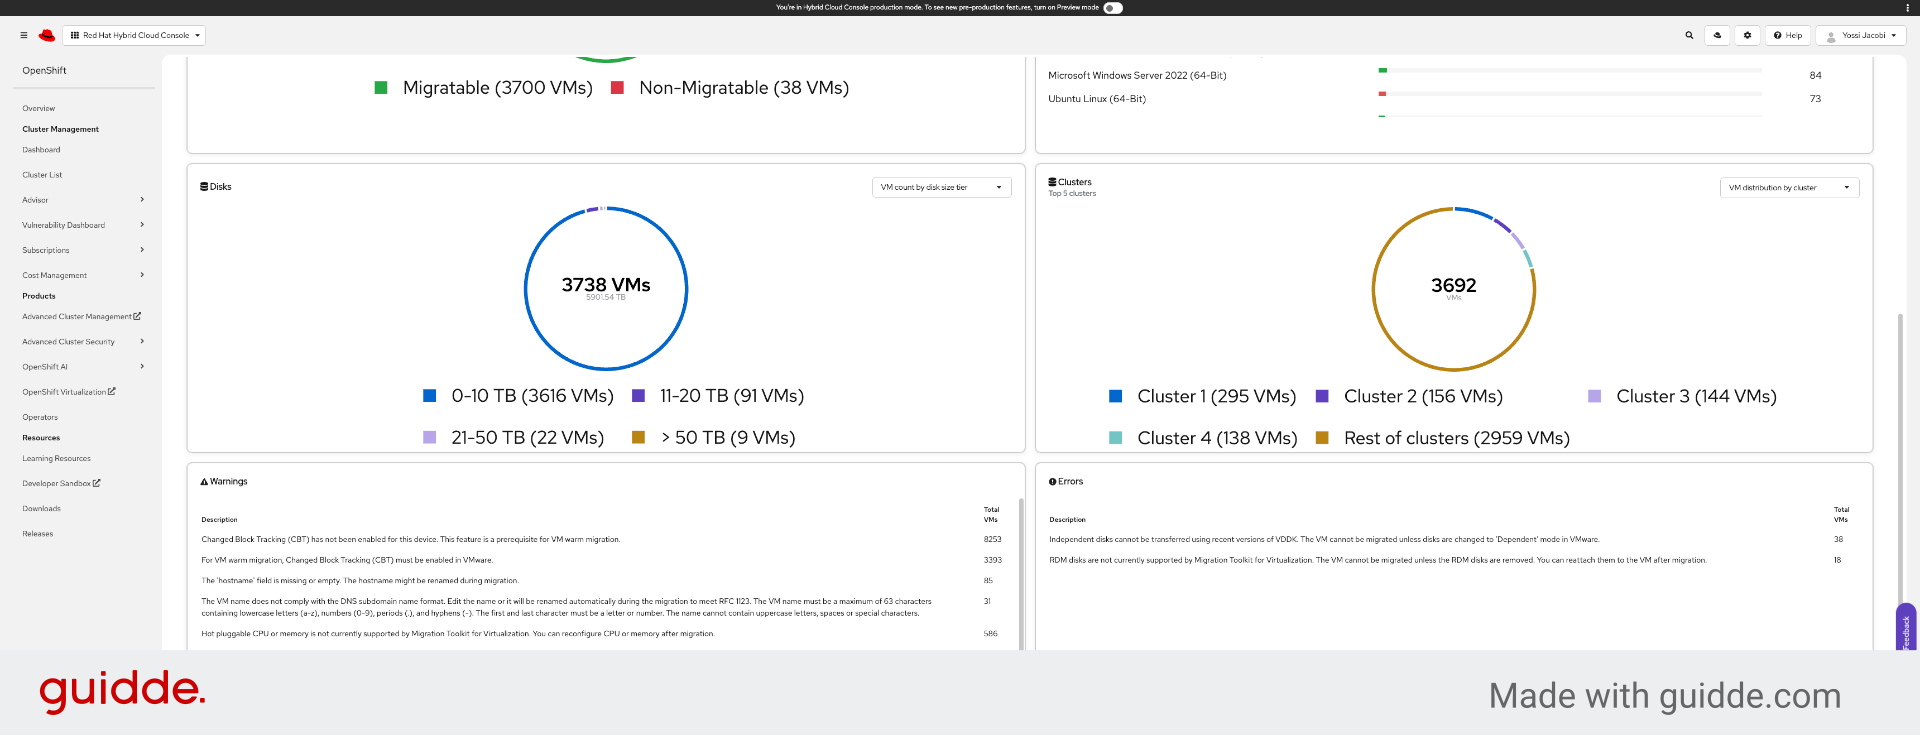
12. Analyze Migratable VM Data
Discovery Agent Flow
Deploy a discovery agent to your vCenter for live environment analysis. Watch the video tutorial below:
Go to console.redhat.com
1. Introduction

2. Click Start Evaluation
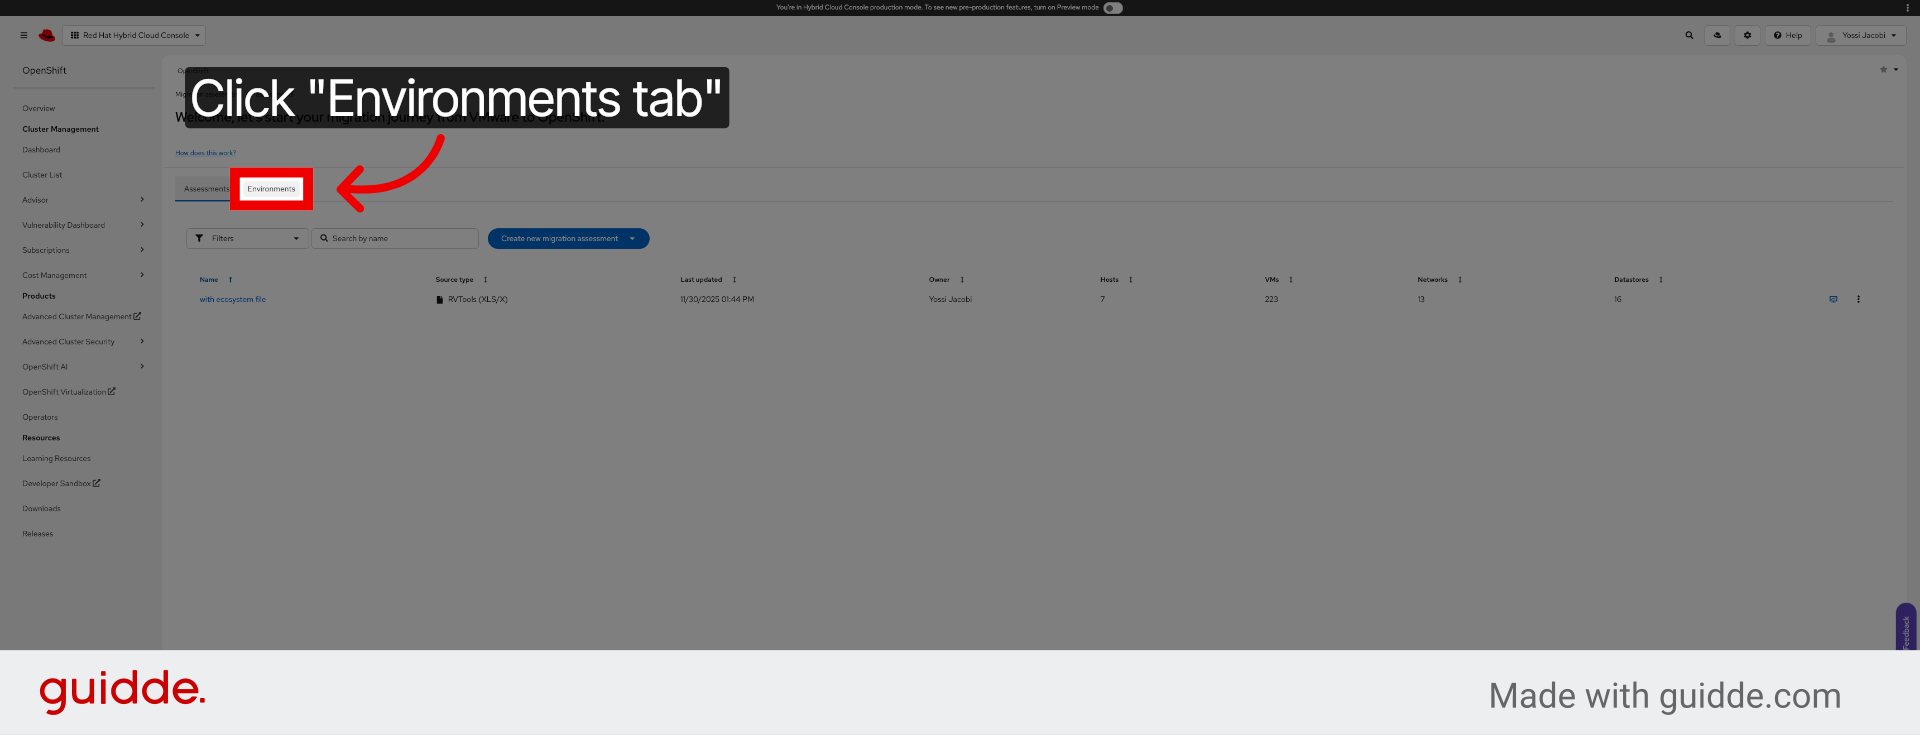
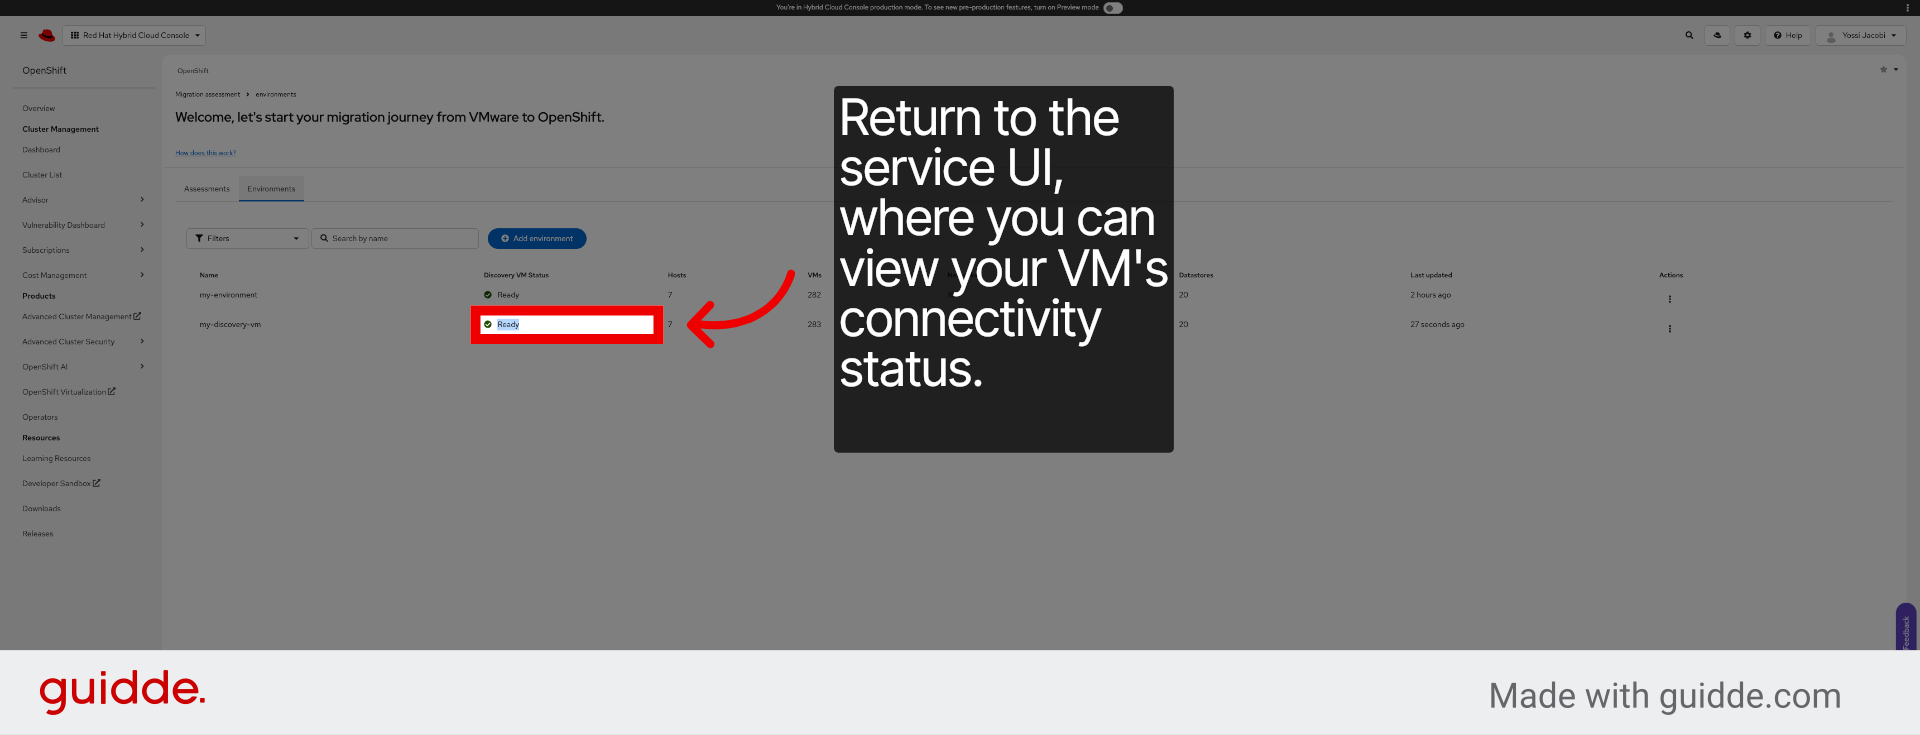
3. Navigate to Environments Tab
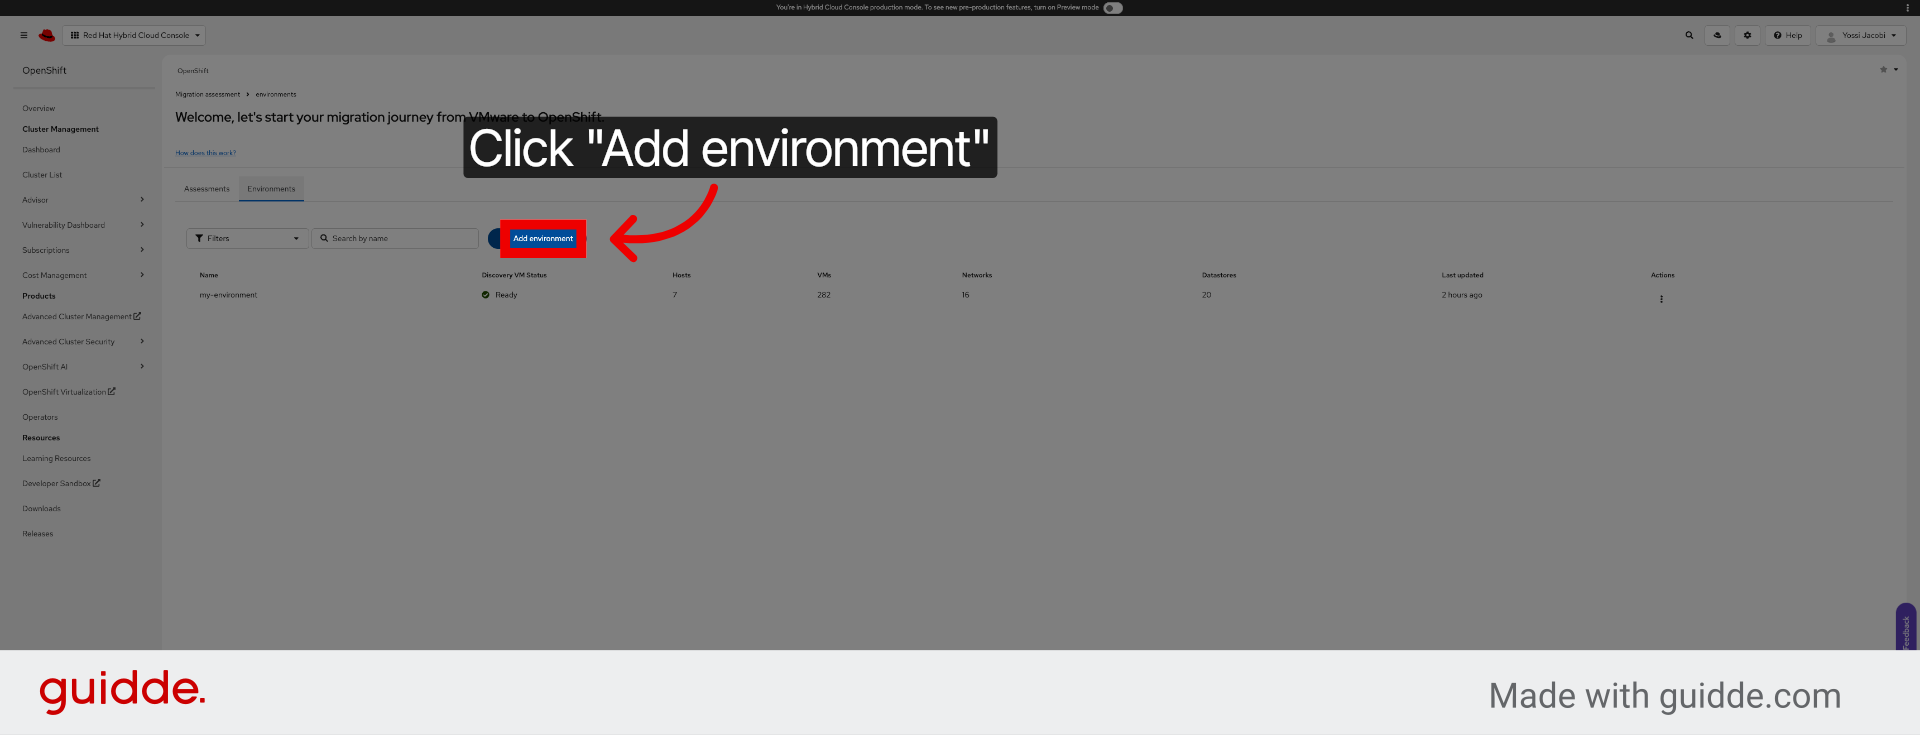
4. Add New Environment
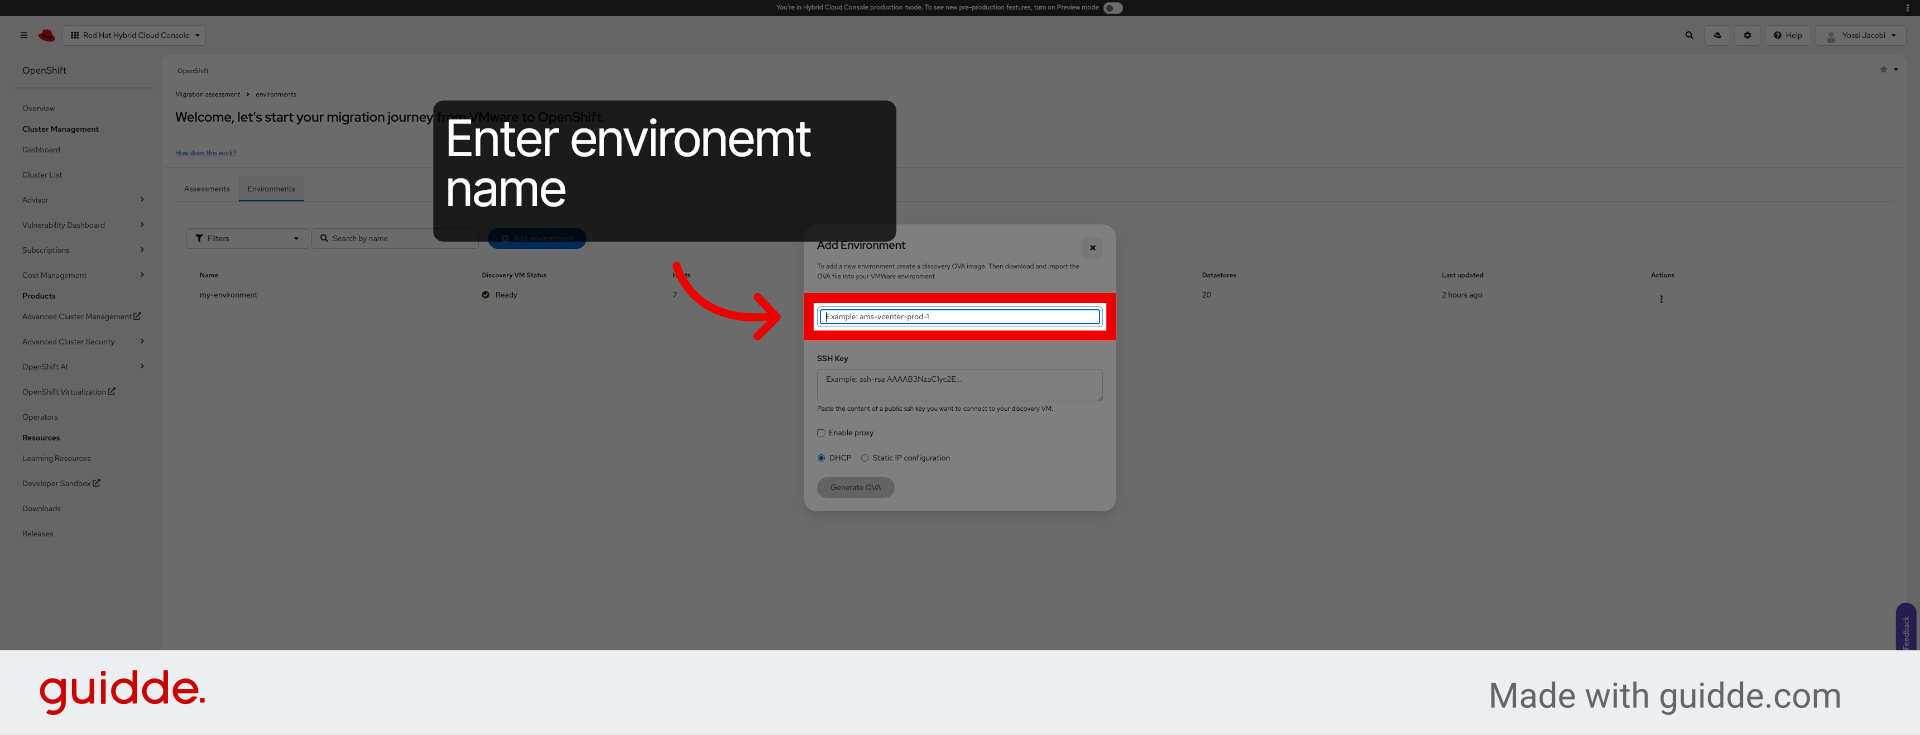
5. Select Name Field
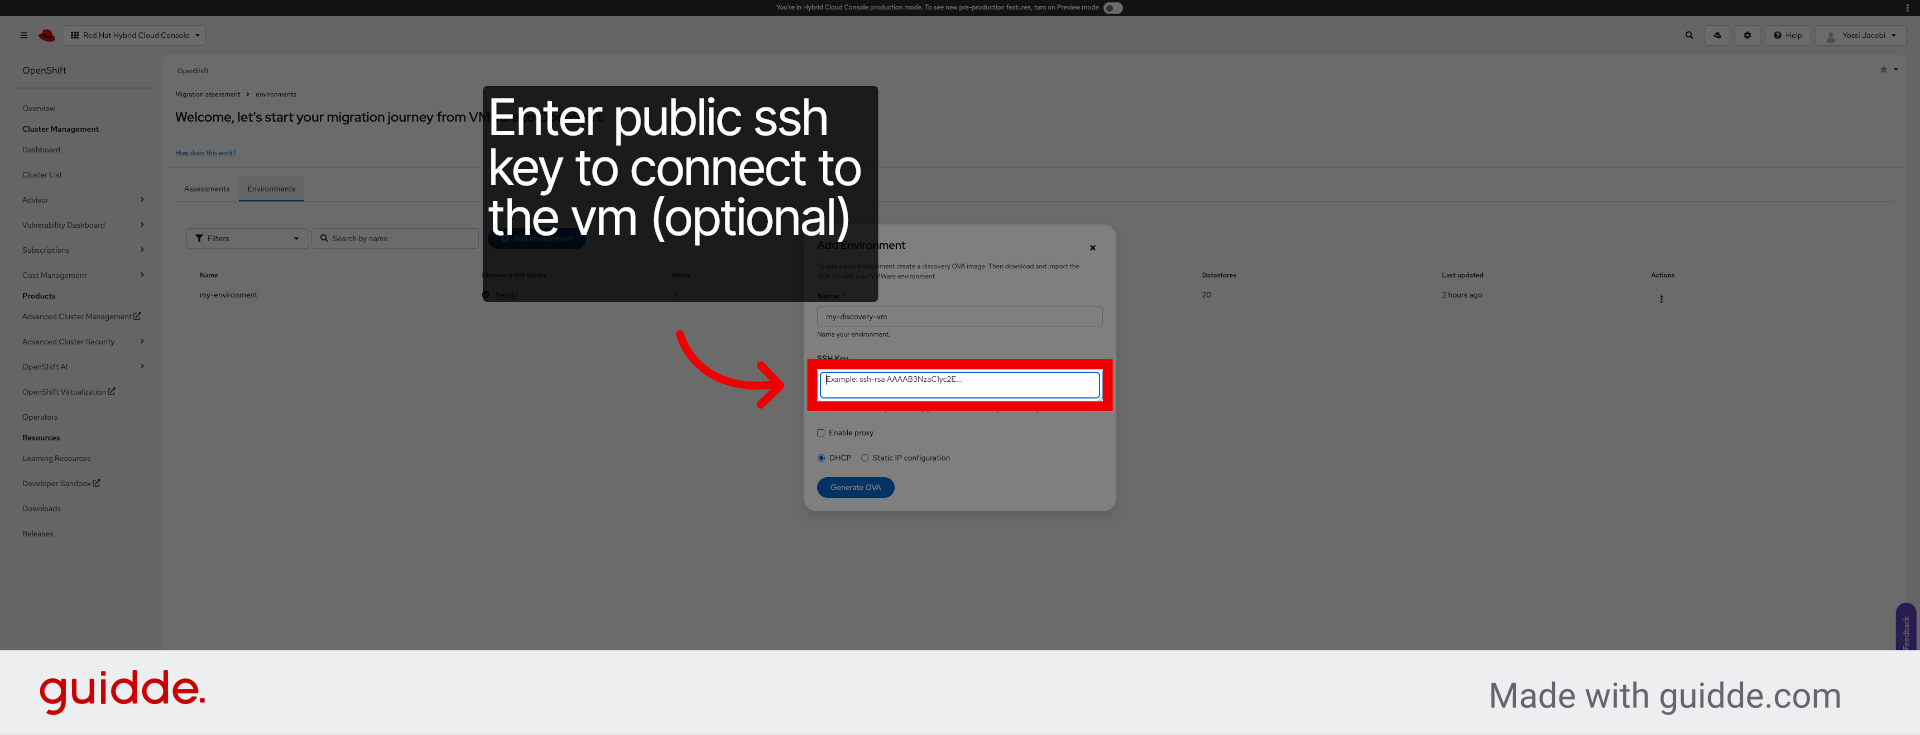
6. Select SSH Key Option
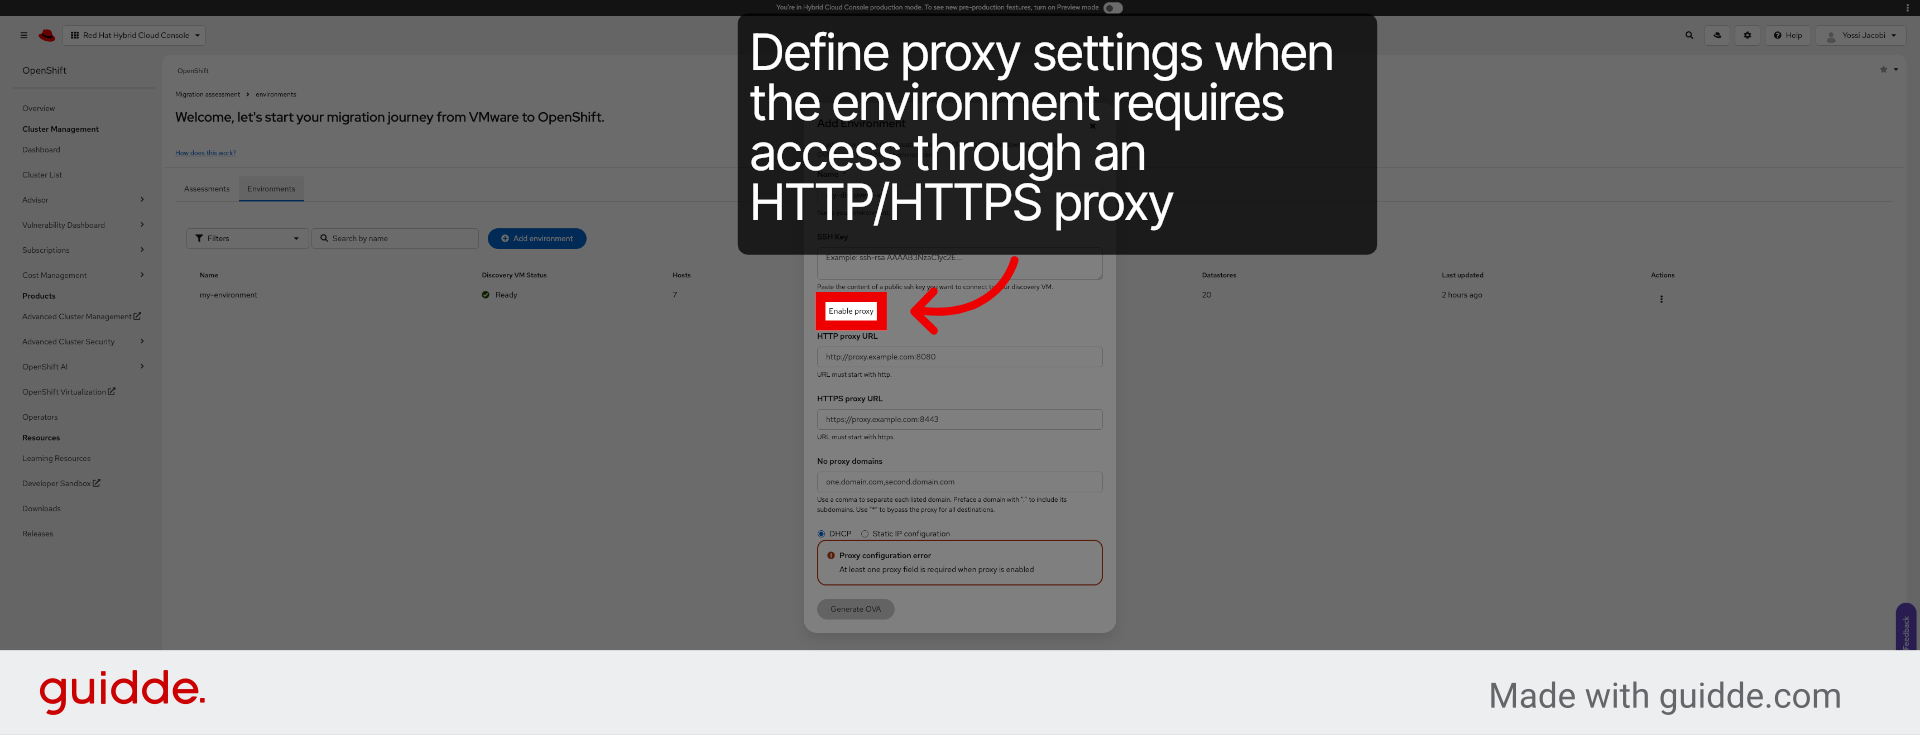
7. Confirm Proxy Enablement
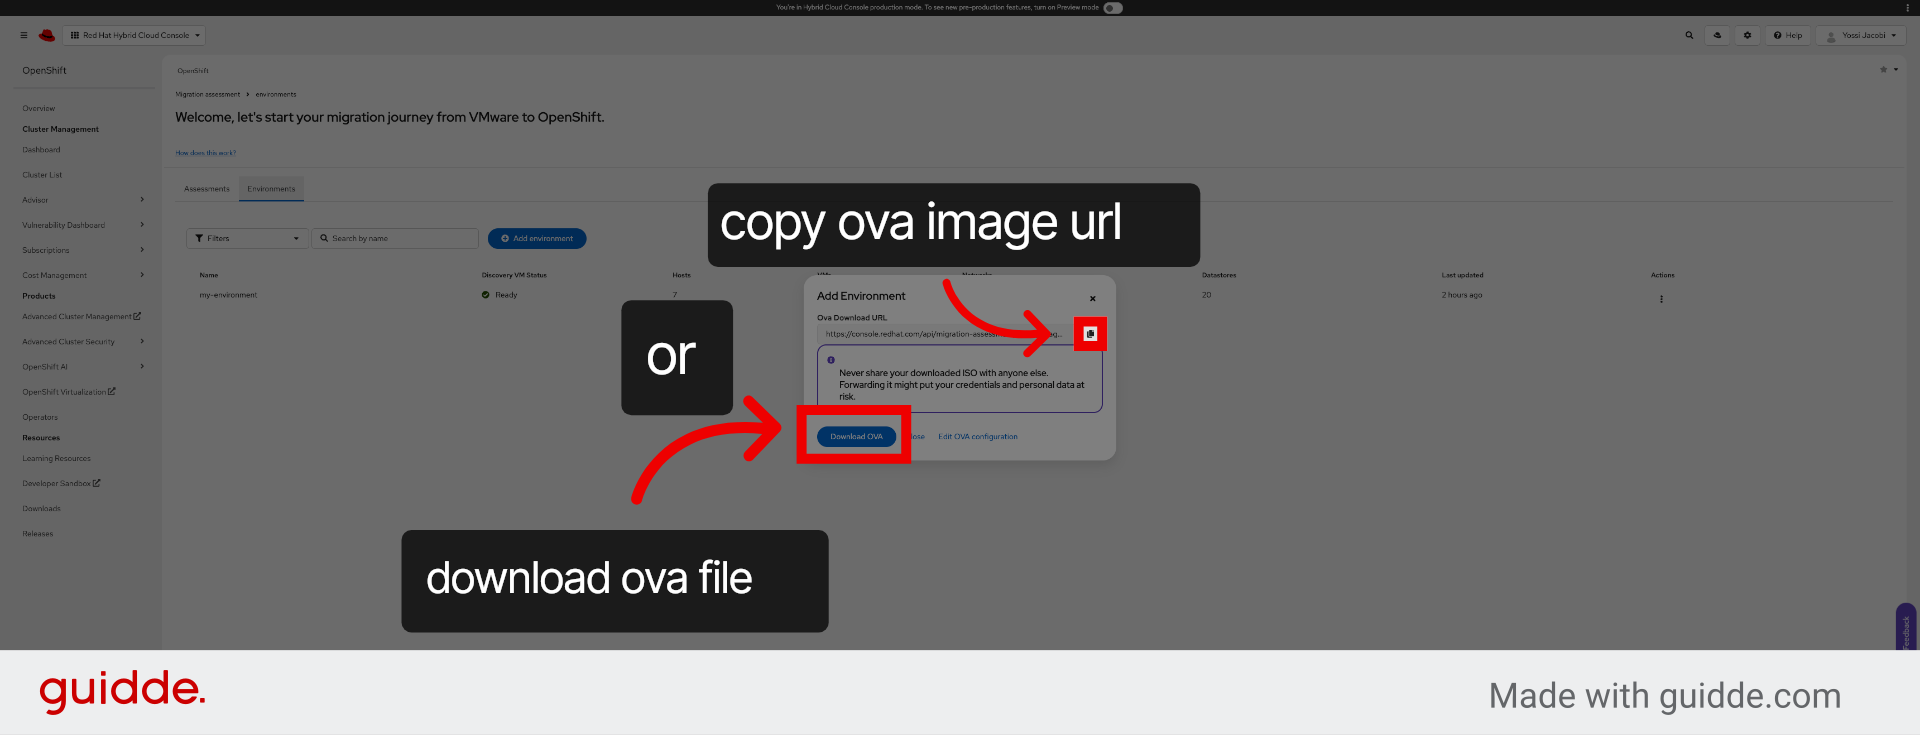
8. Generate OVA Template

9. Access Deployment Link
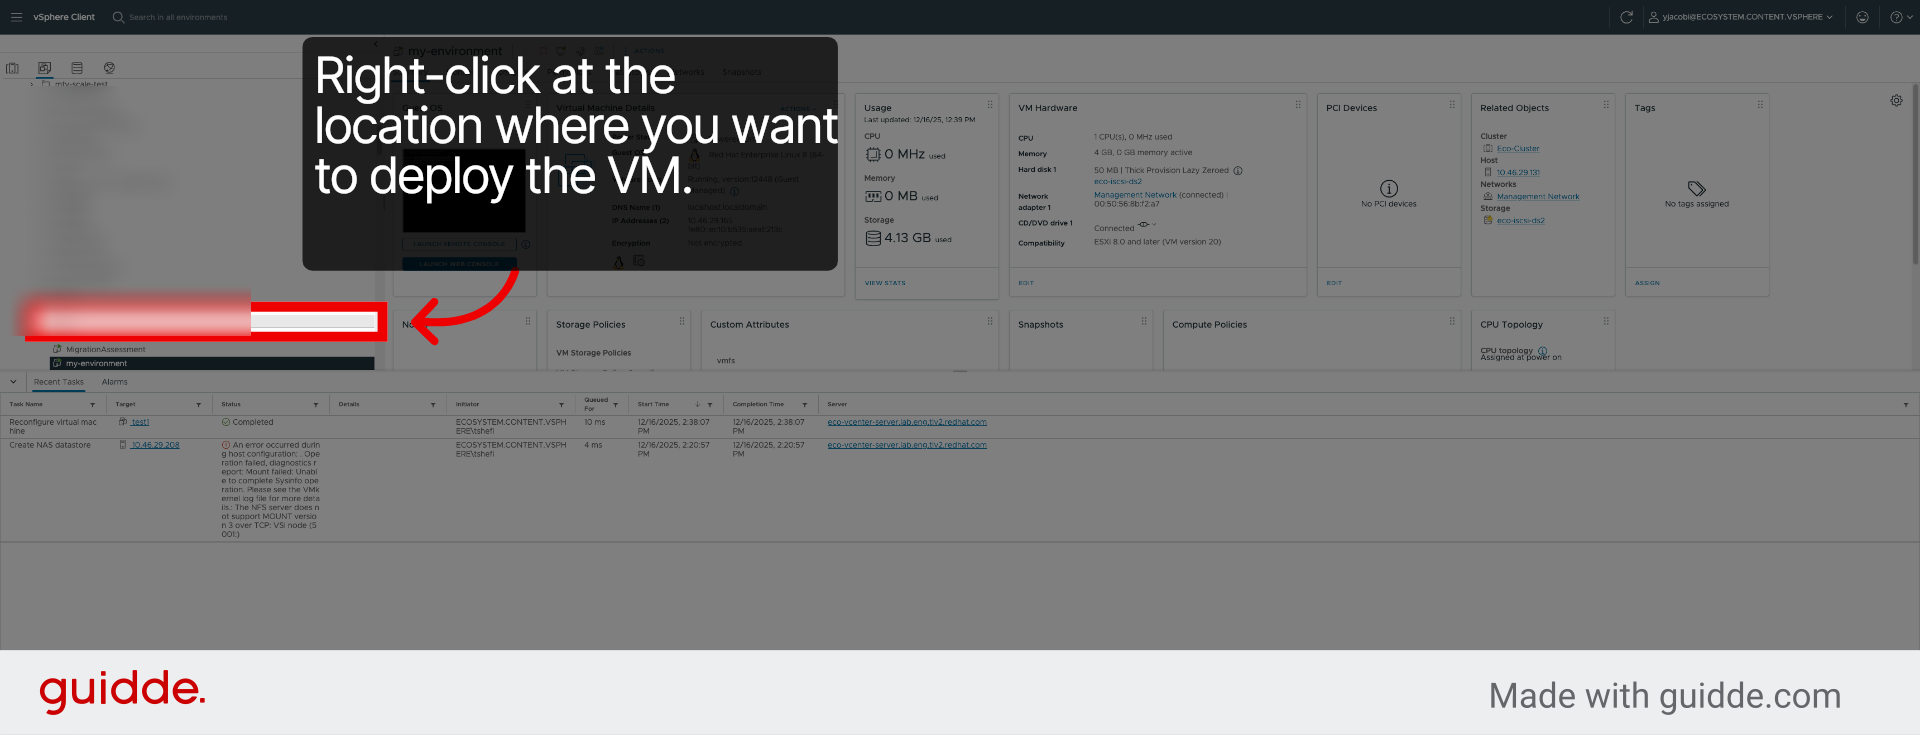
10. Switch to vCenter Server
11. Select User Account
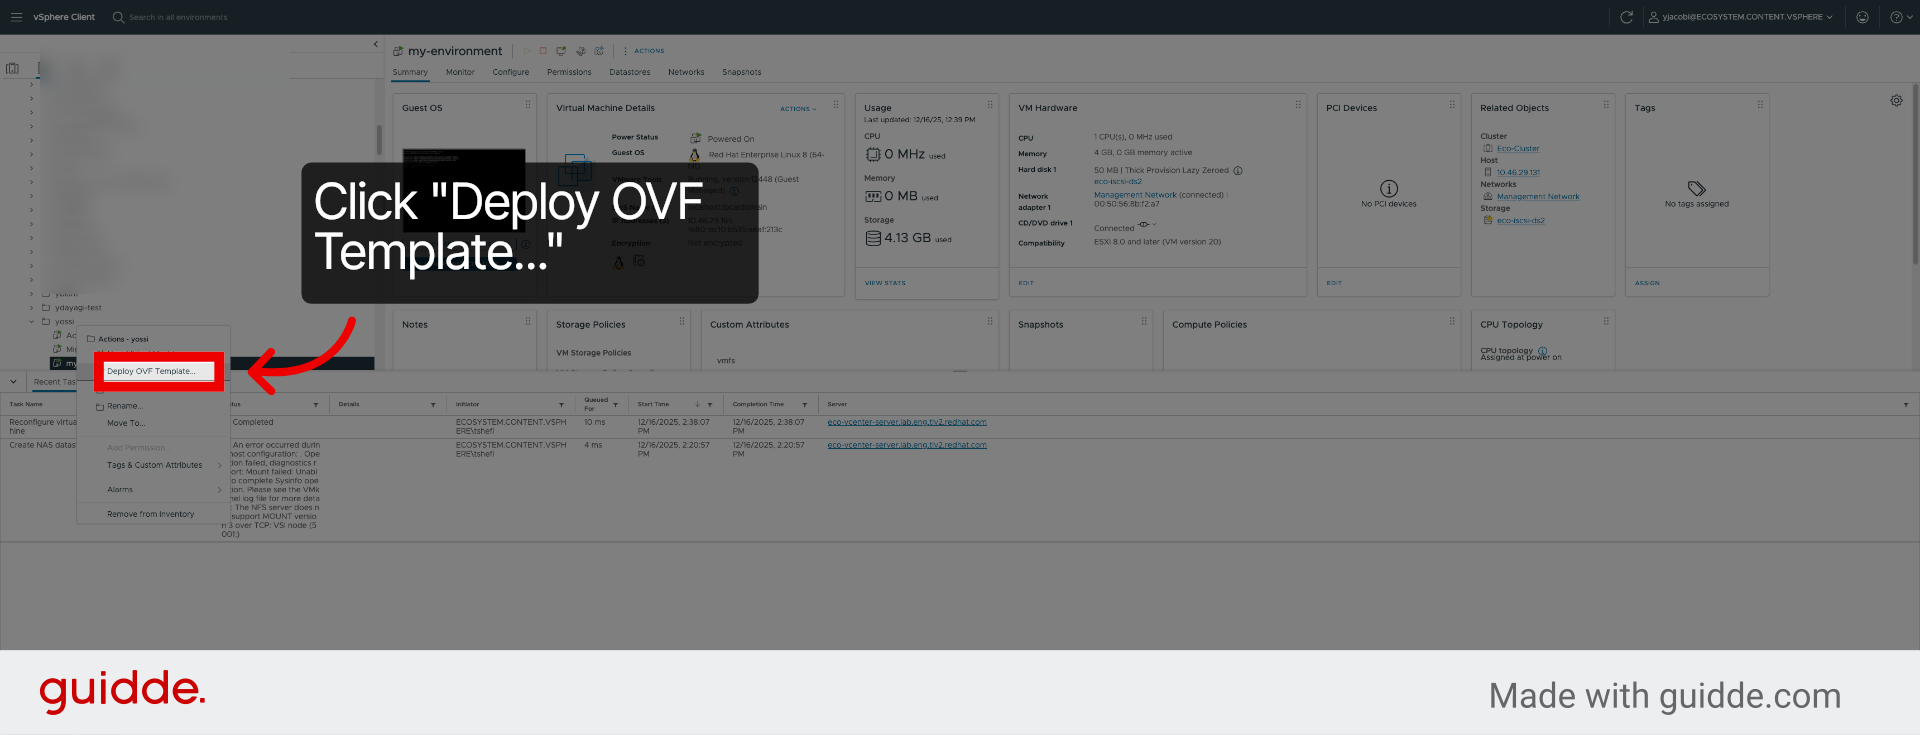
12. Start OVF Template Deployment
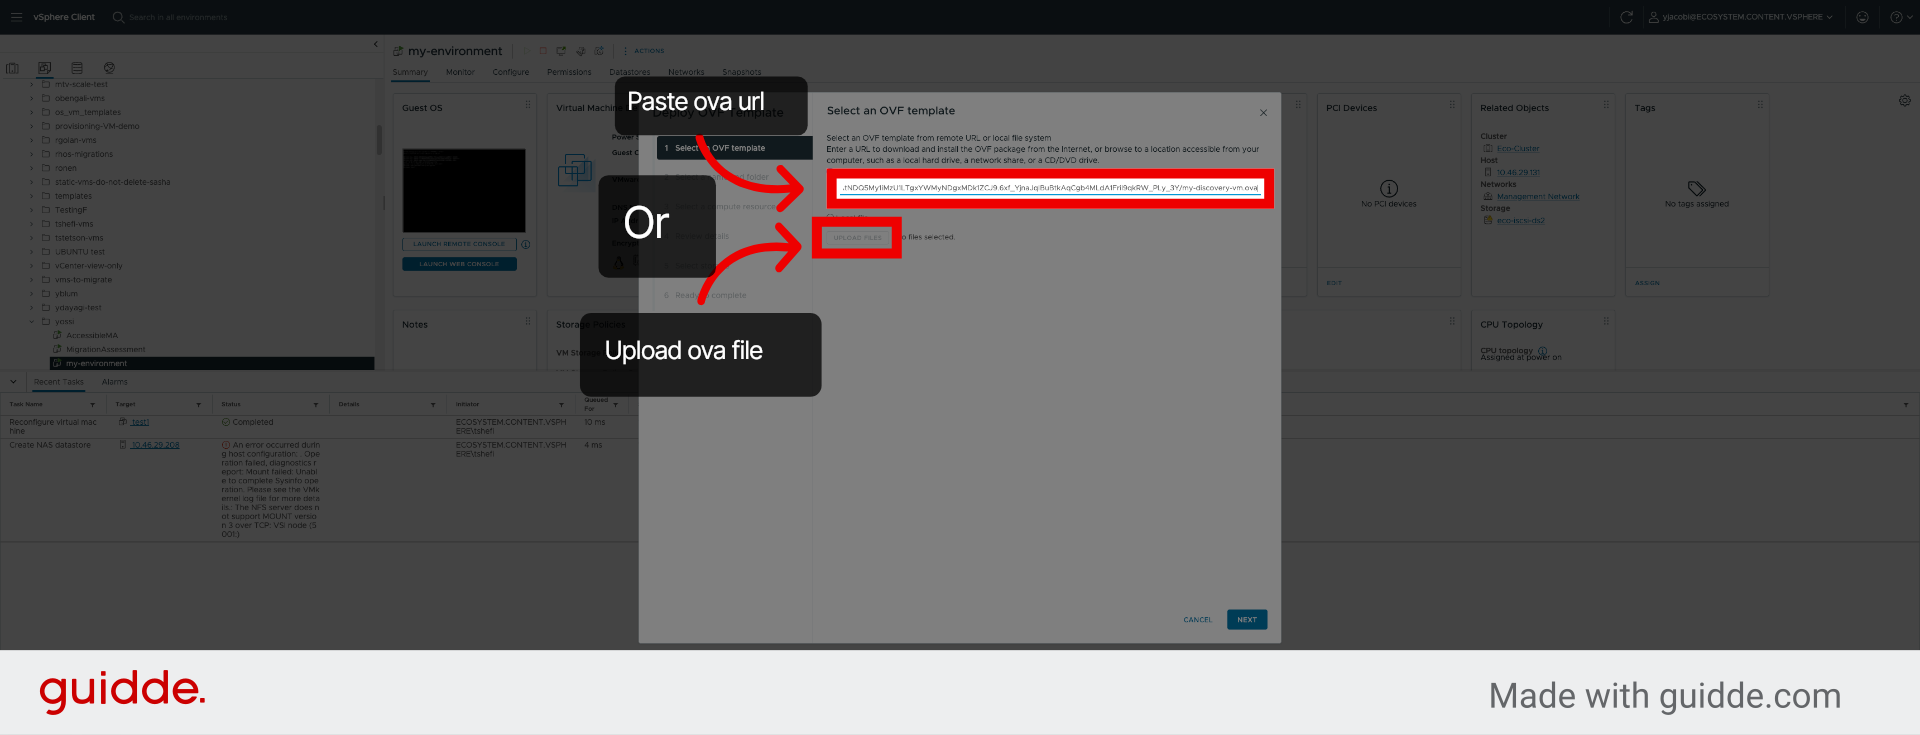
13. Enter OVF Template URL
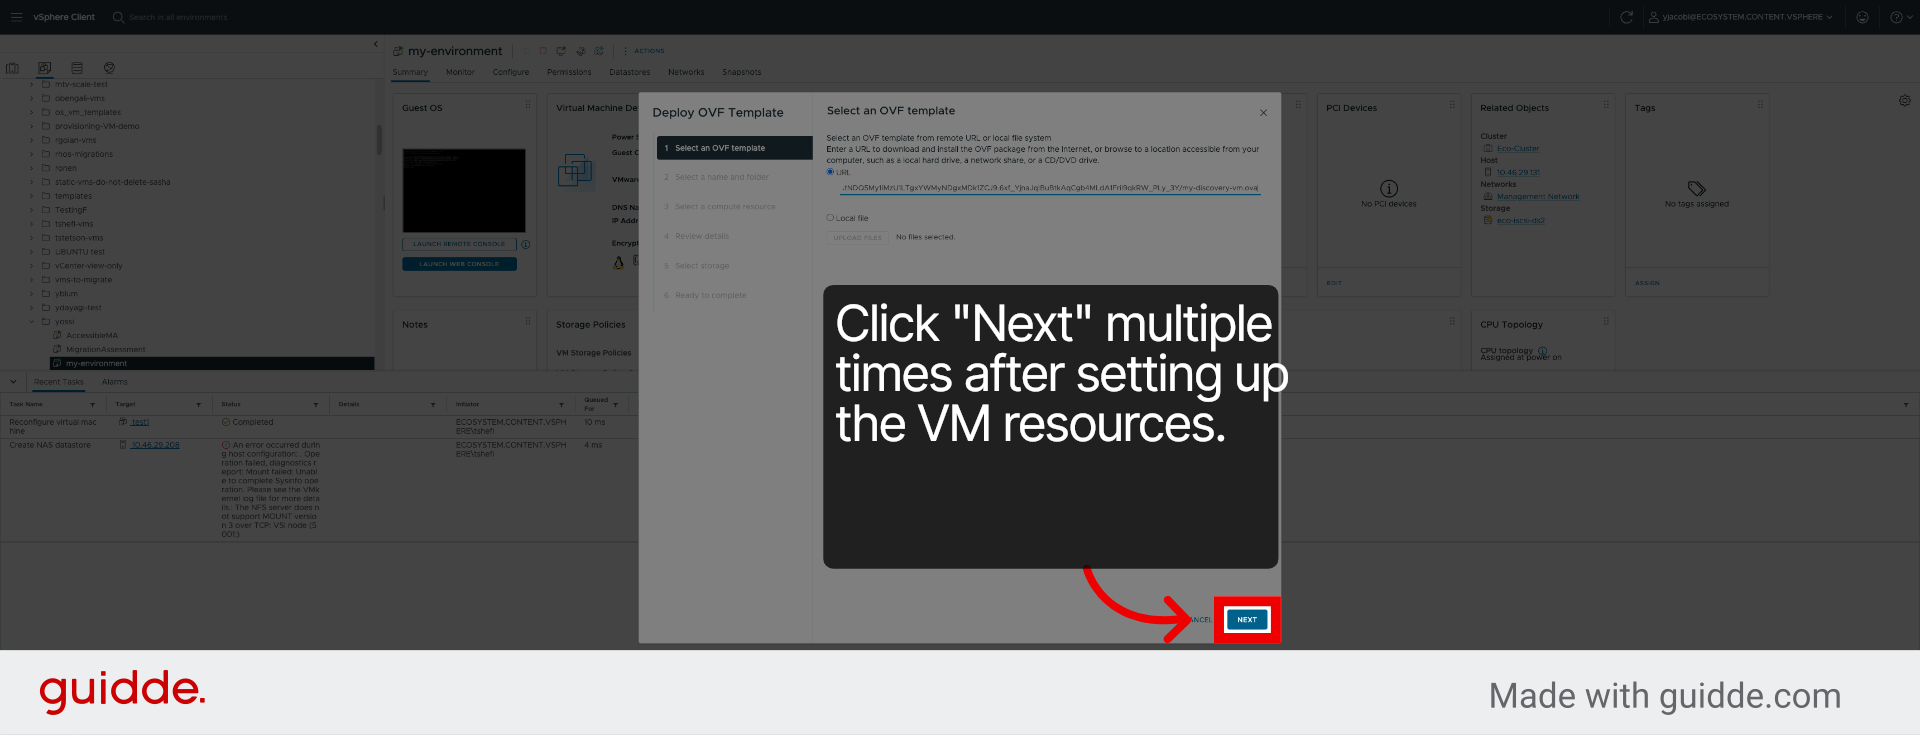
14. Proceed to Next Step
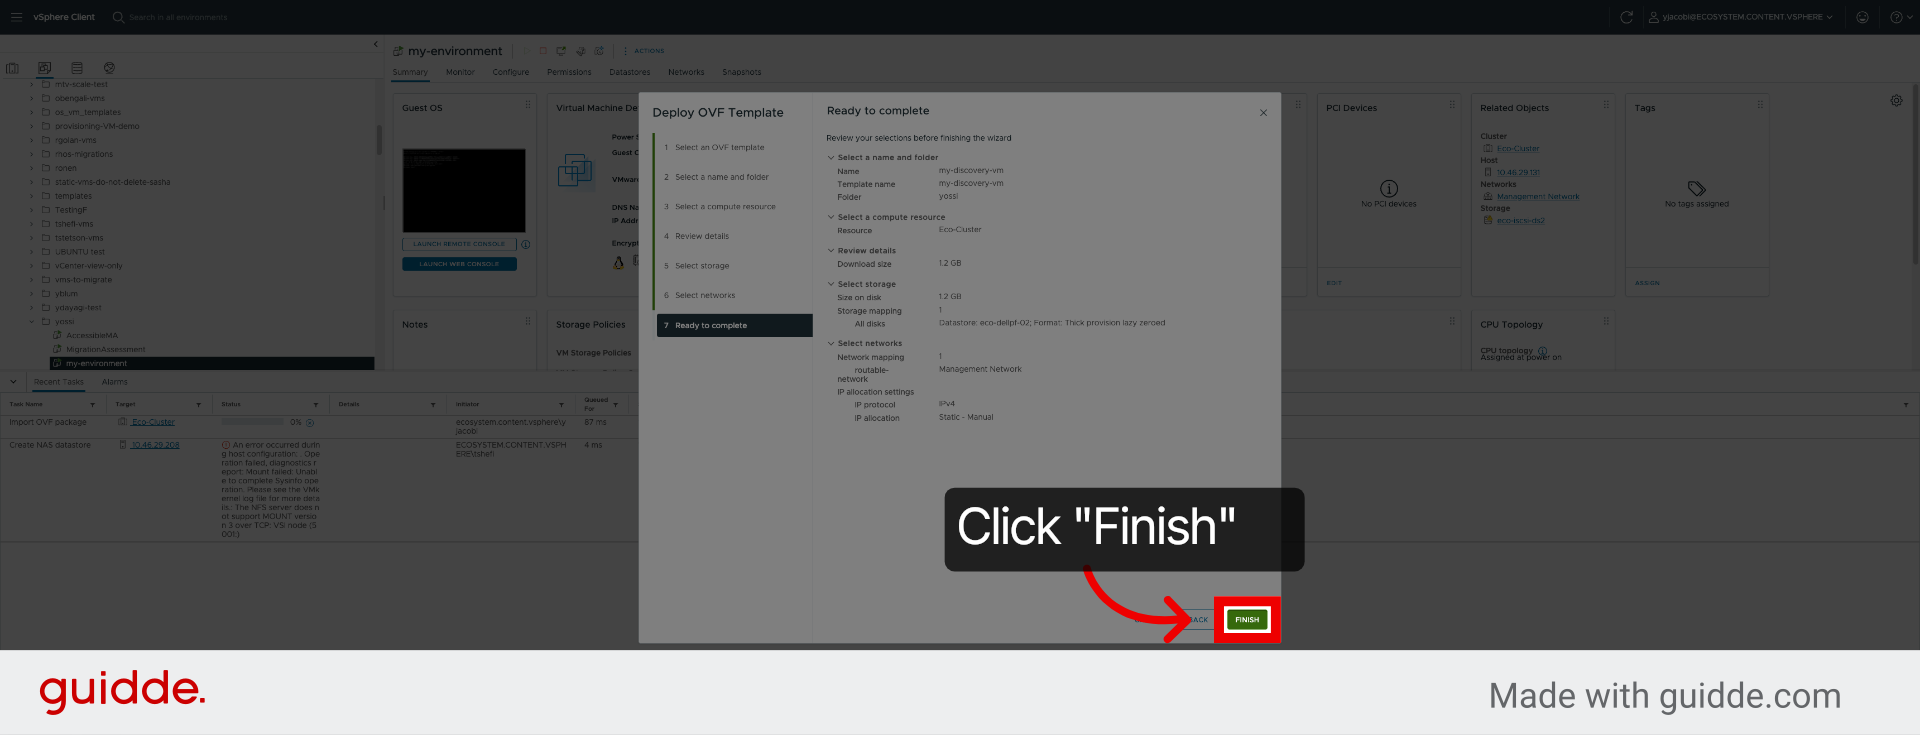
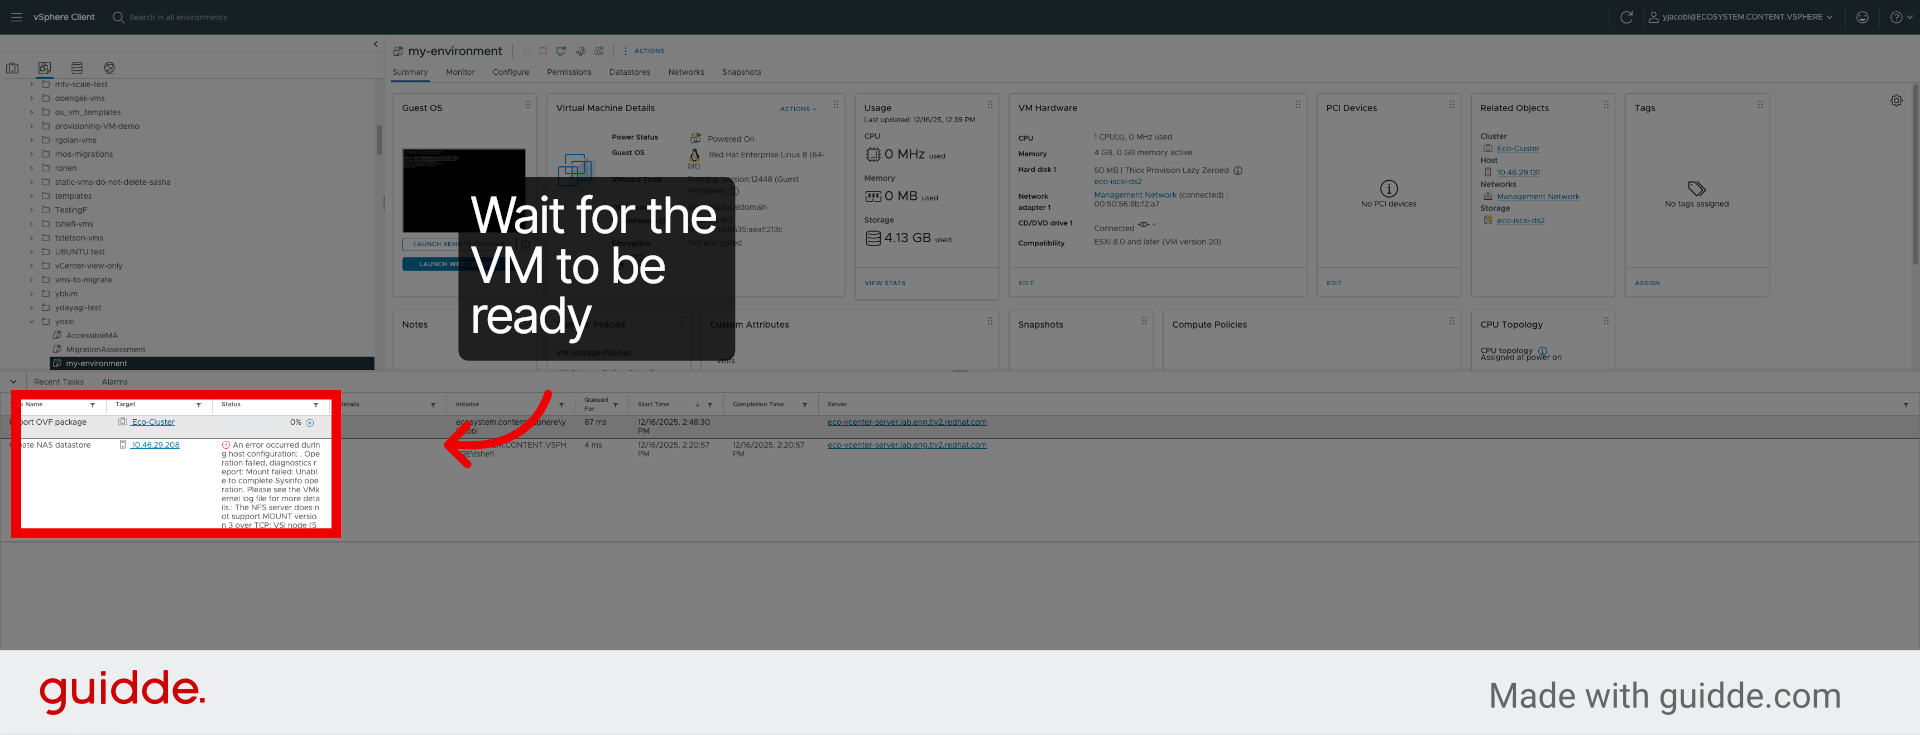
15. Complete Deployment
16. Access Deployment Details
17. Open Additional Options
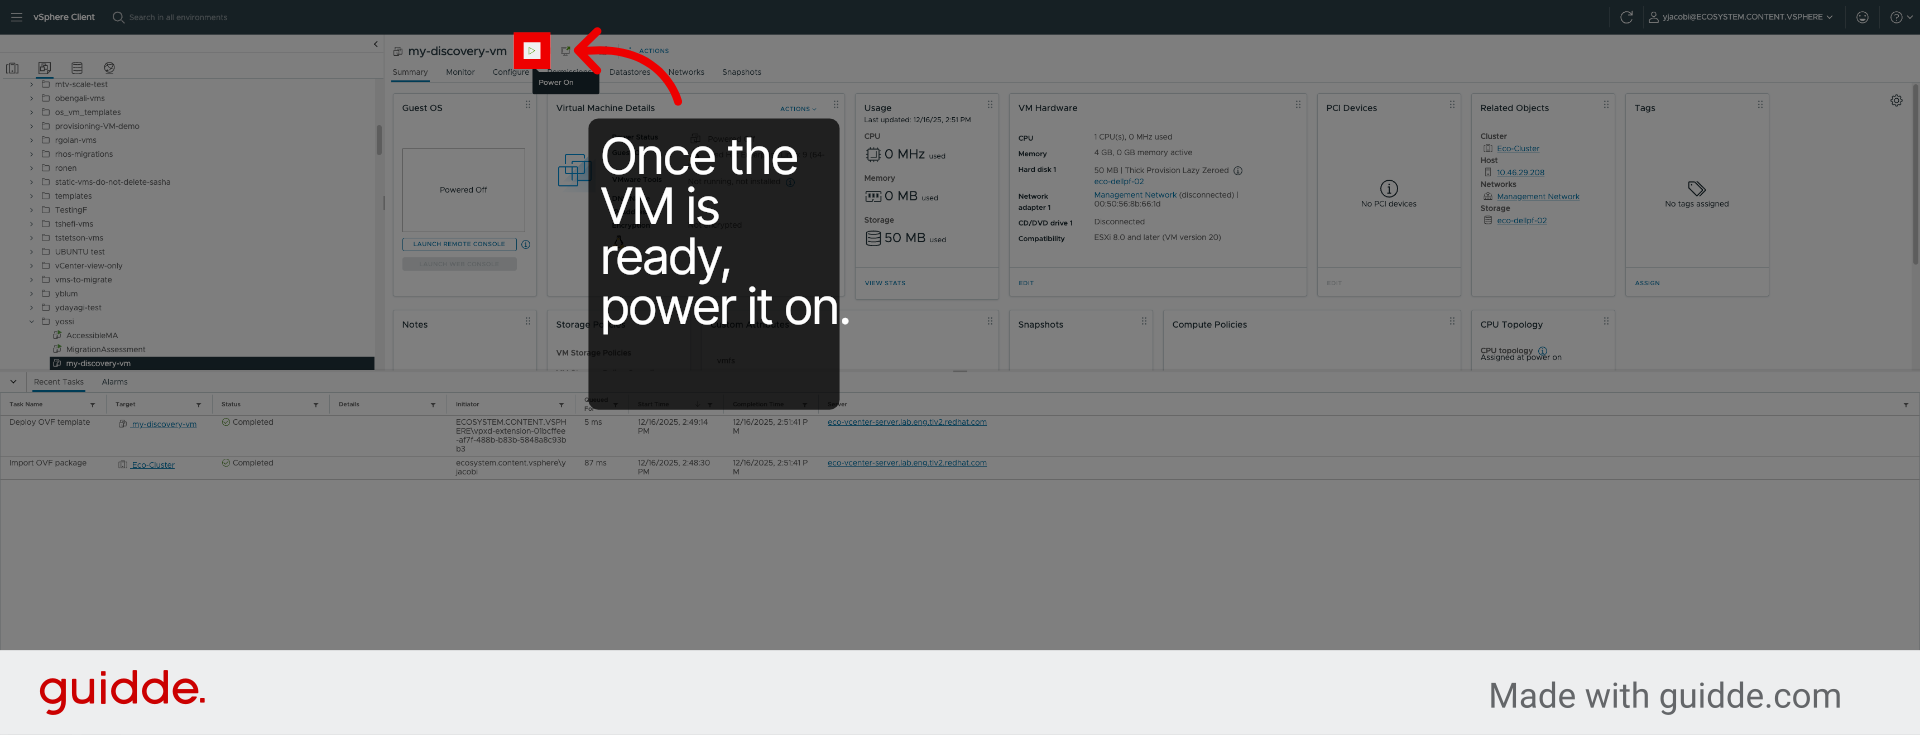
18. Switch to Migration VM Interface
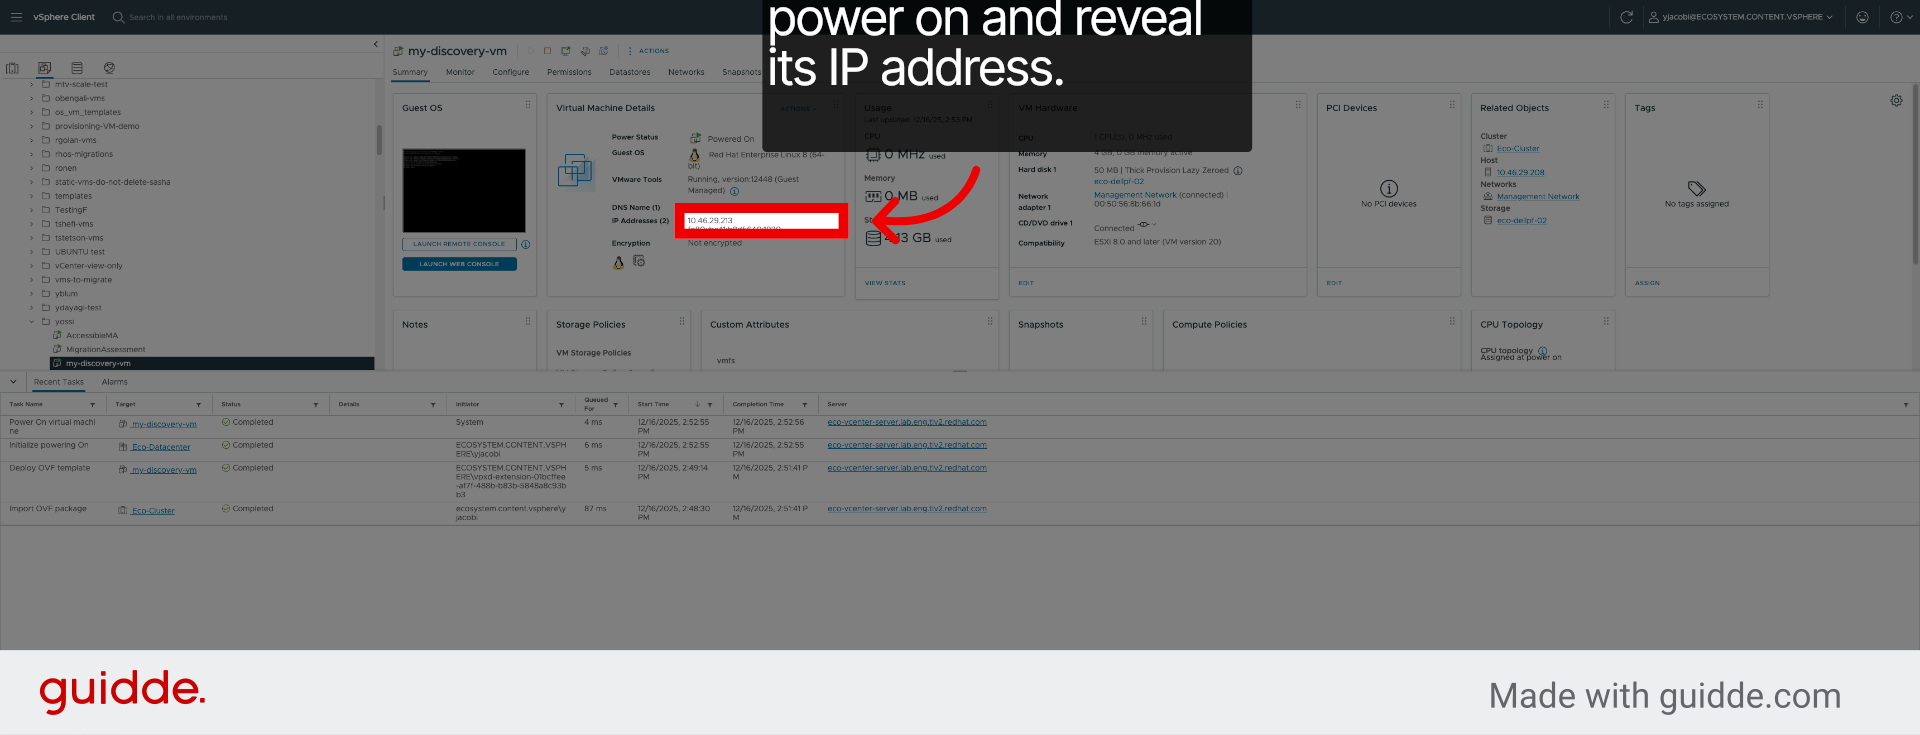
19. Switch to VM Interface
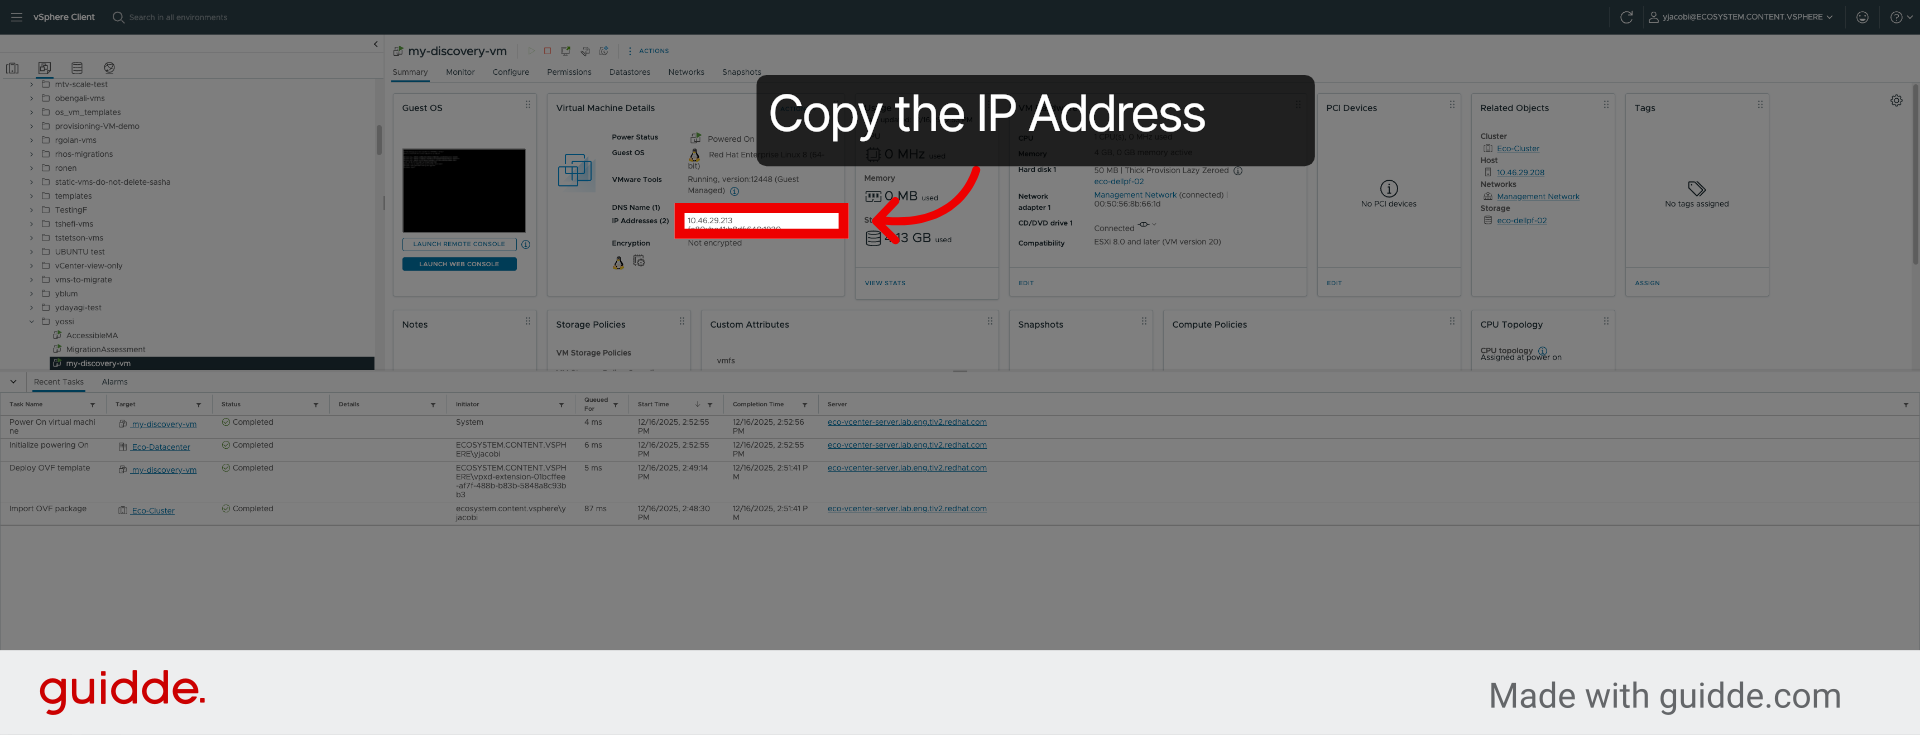
20. Select Environment URL Field

21. Enter Environment URL

22. Apply Environment Filters
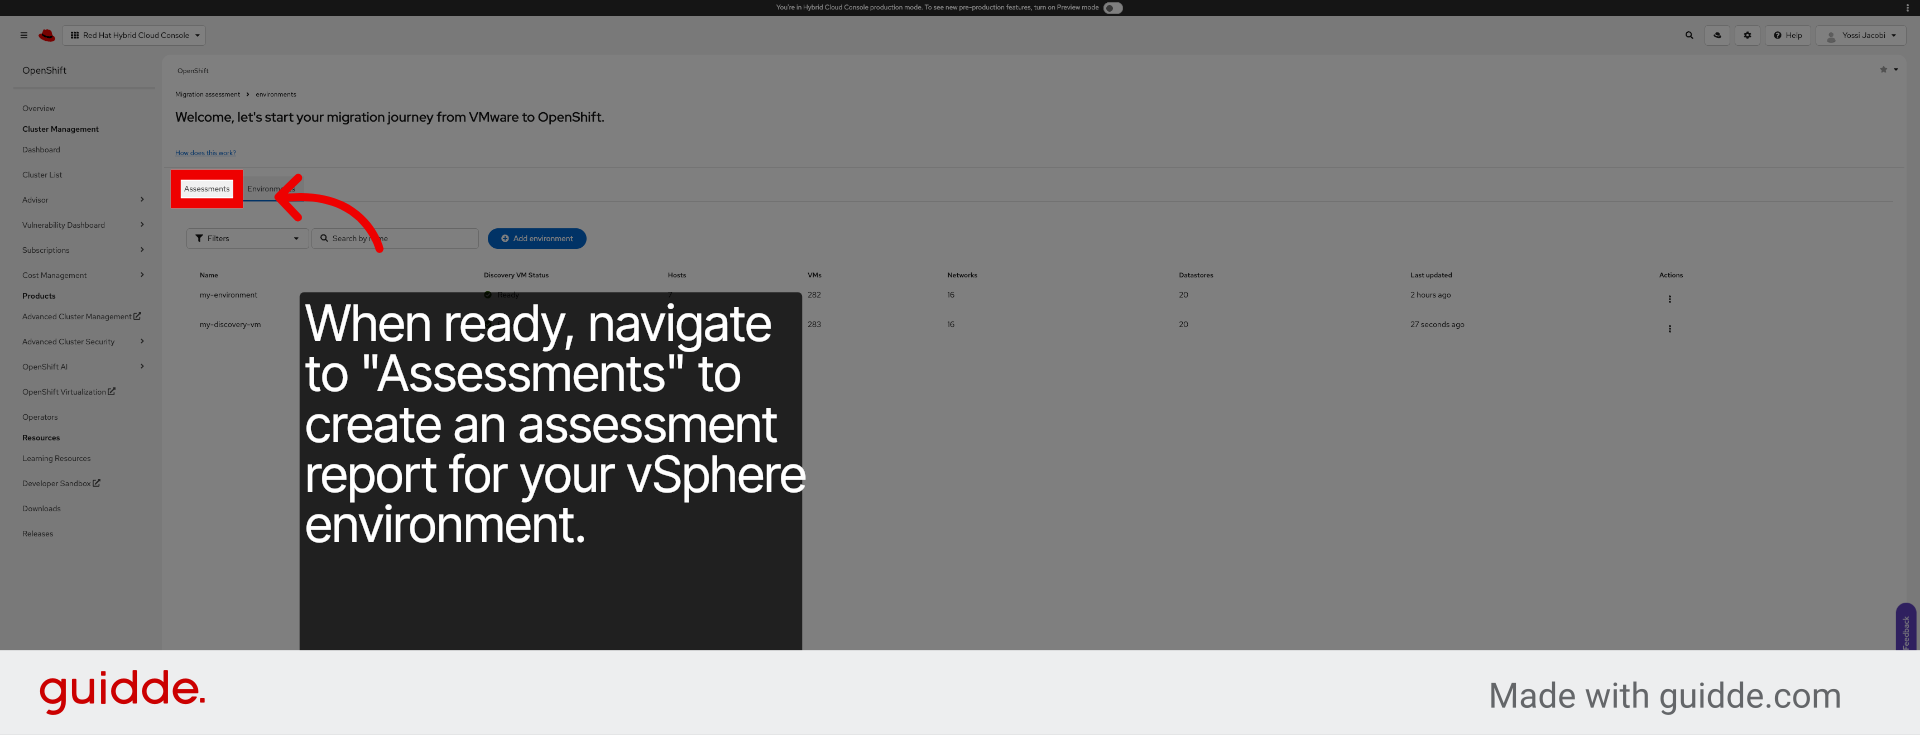
23. Create New Migration Assessment
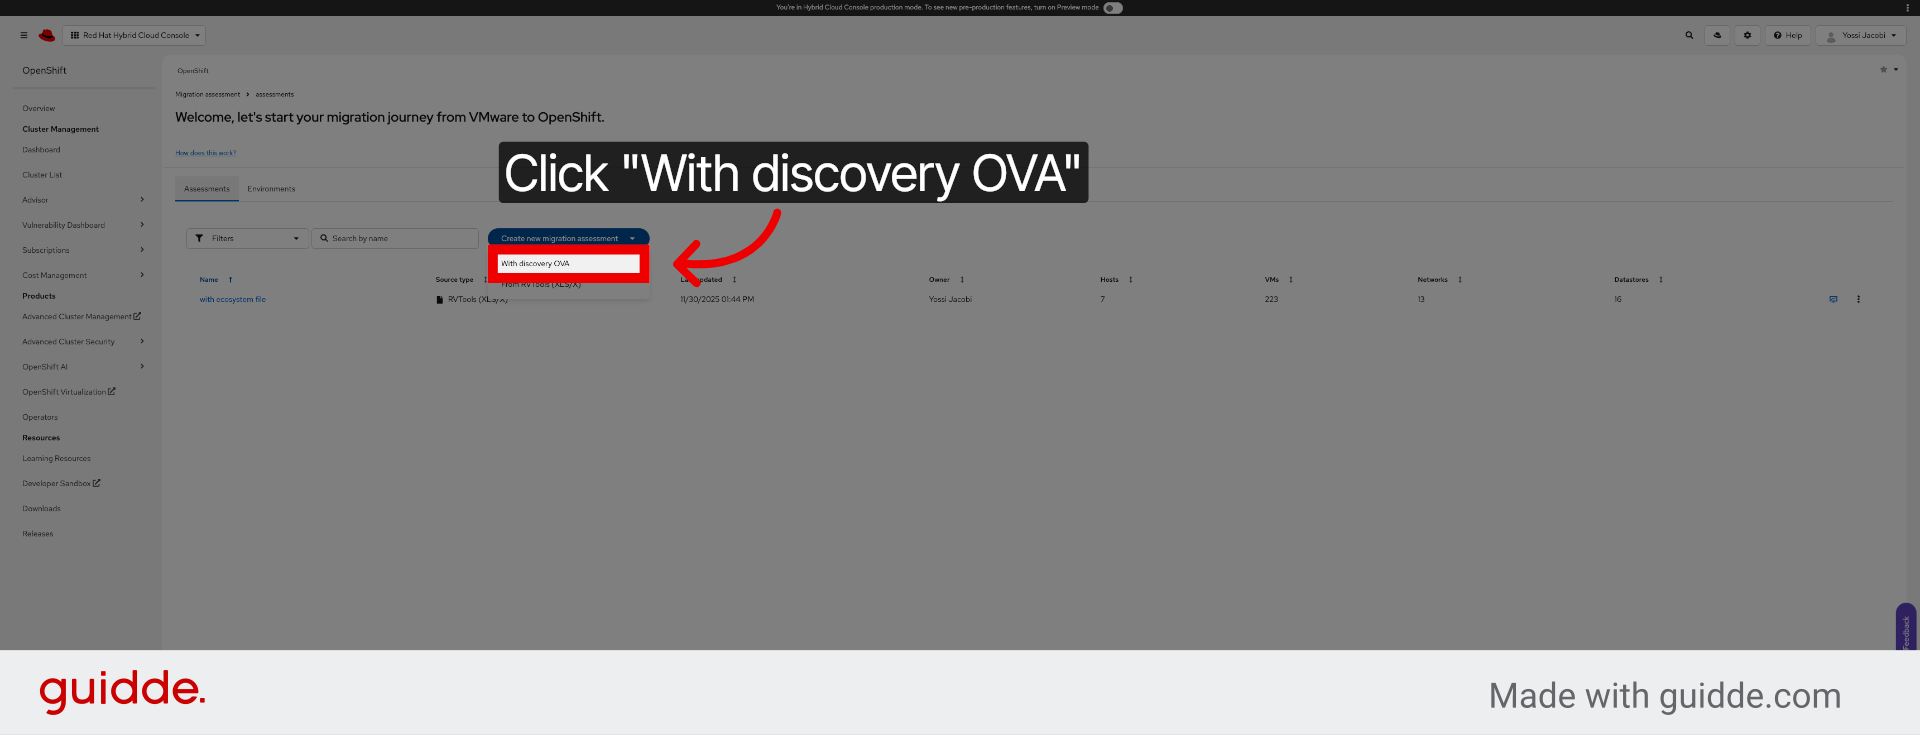
24. Choose Discovery OVA Option

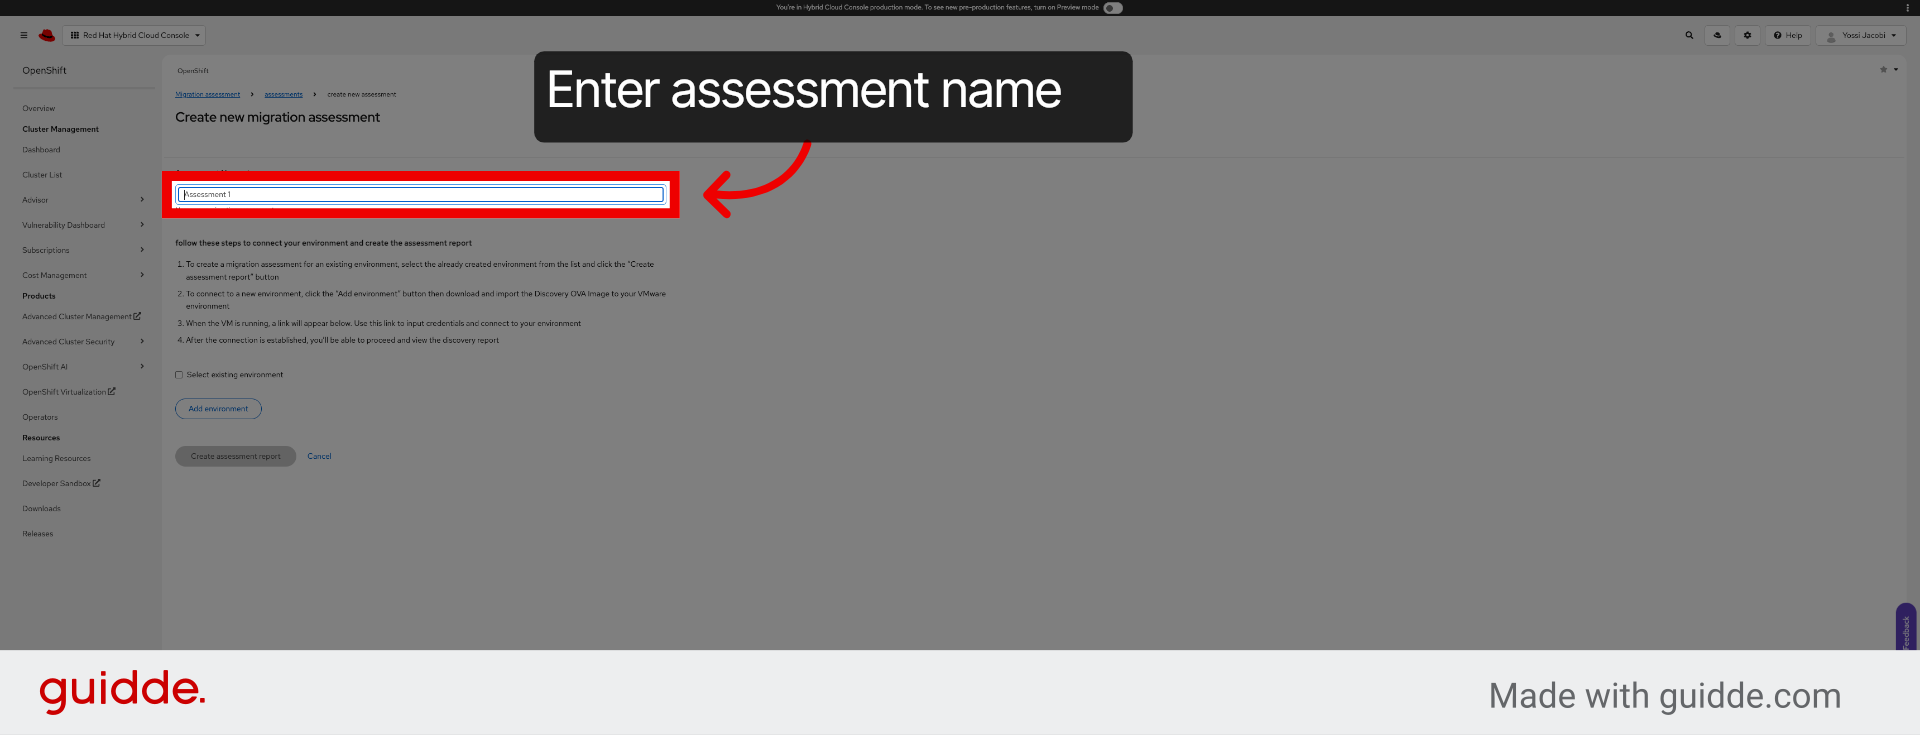
25. Select Assessment Name Field
26. Enter Assessment Name
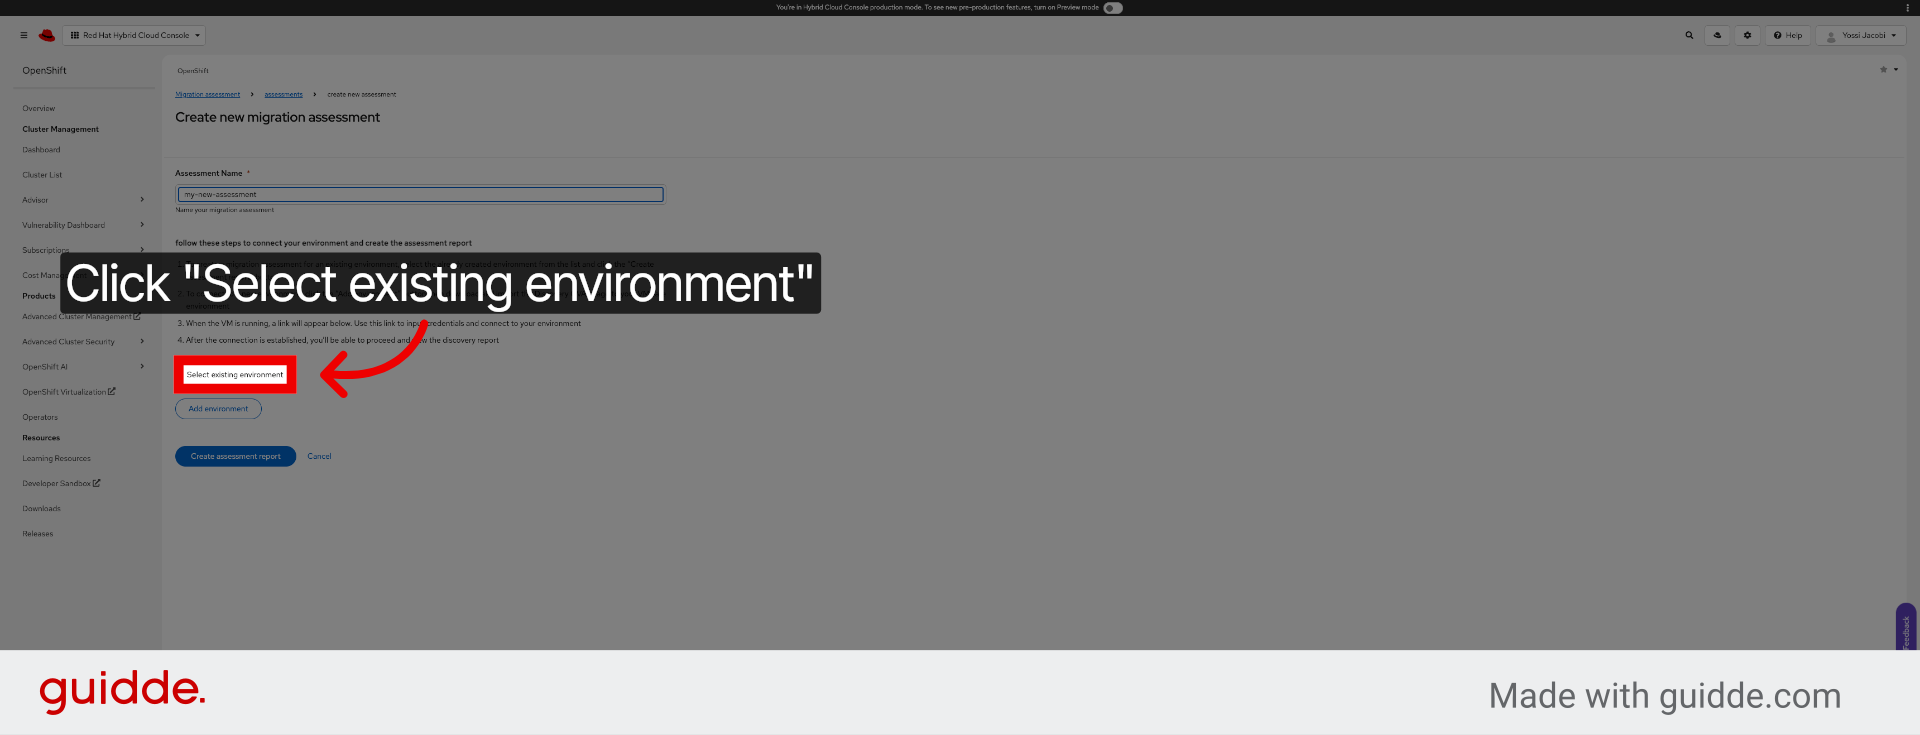
27. Select Existing Environment
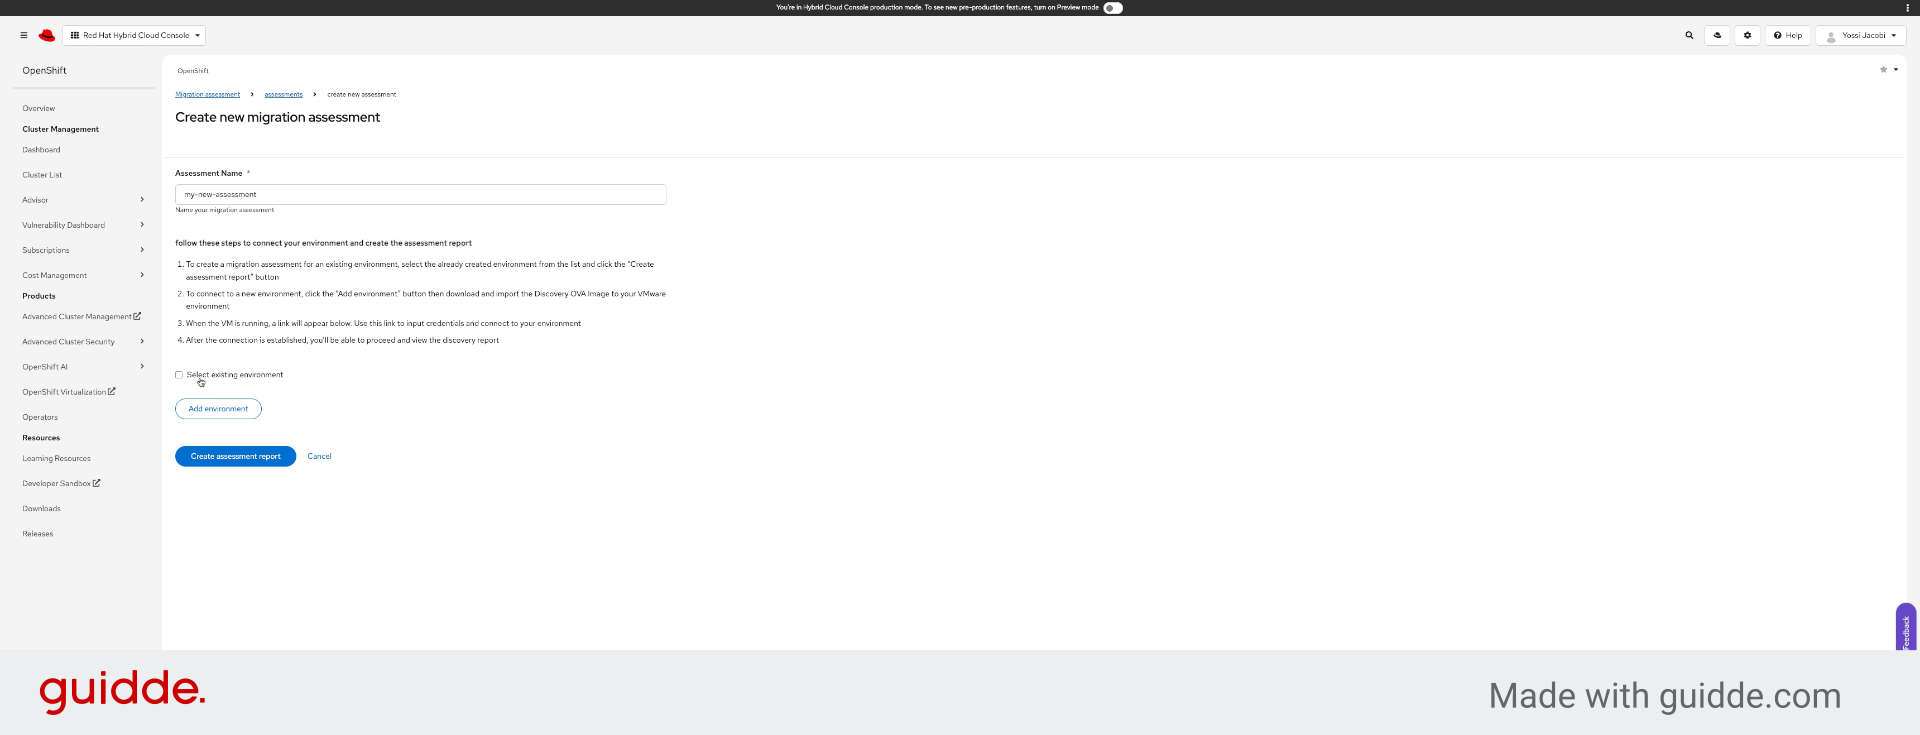
28. Confirm Environment Selection
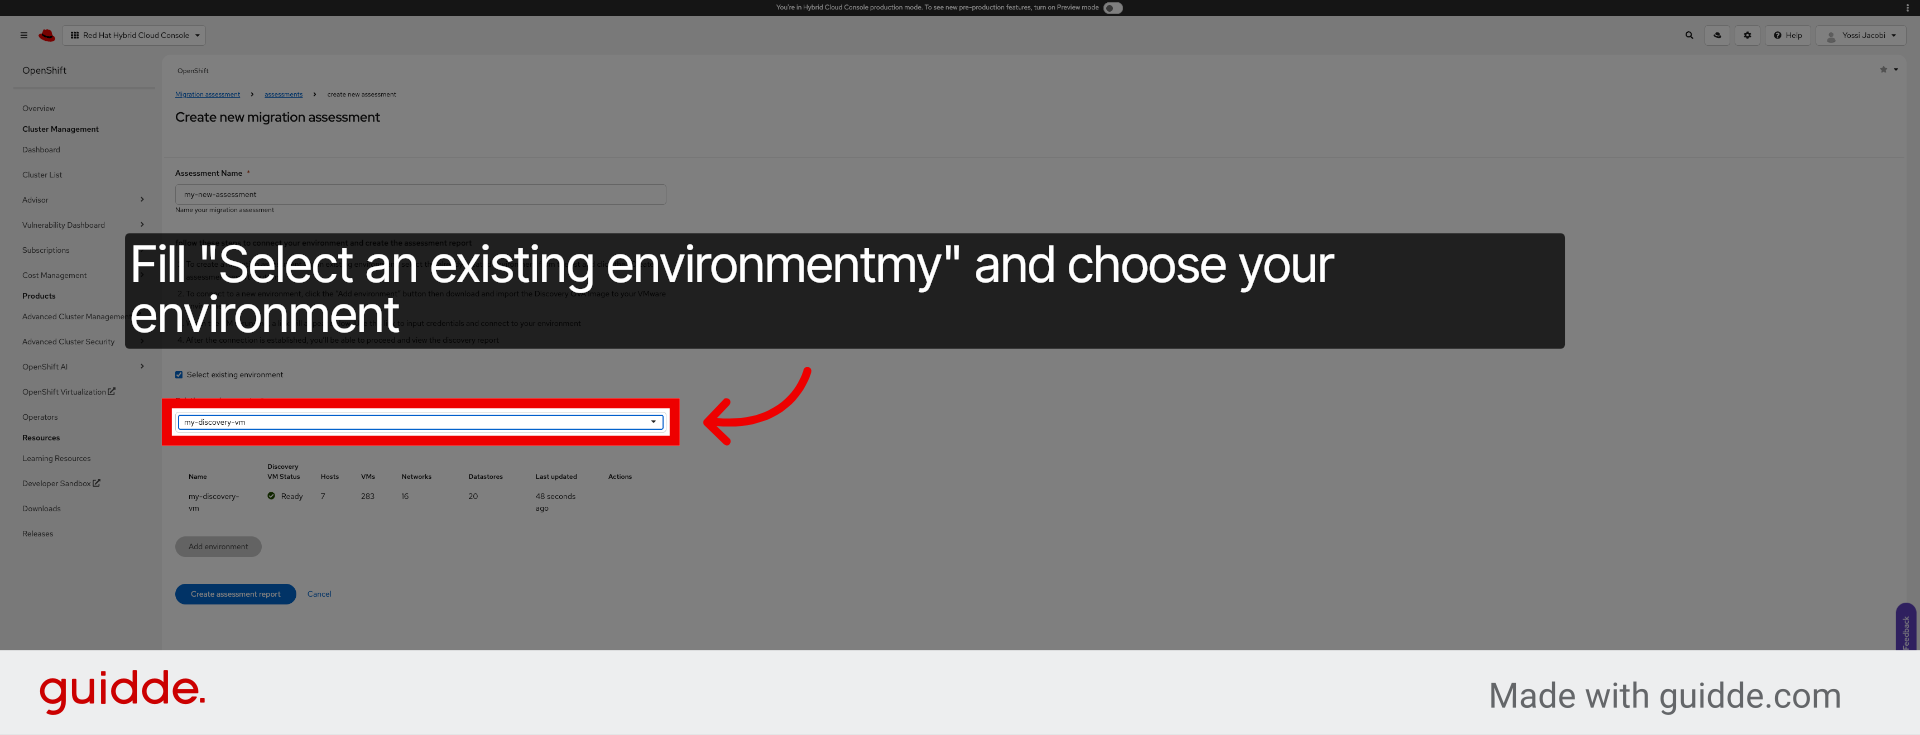
29. Choose Environment from List
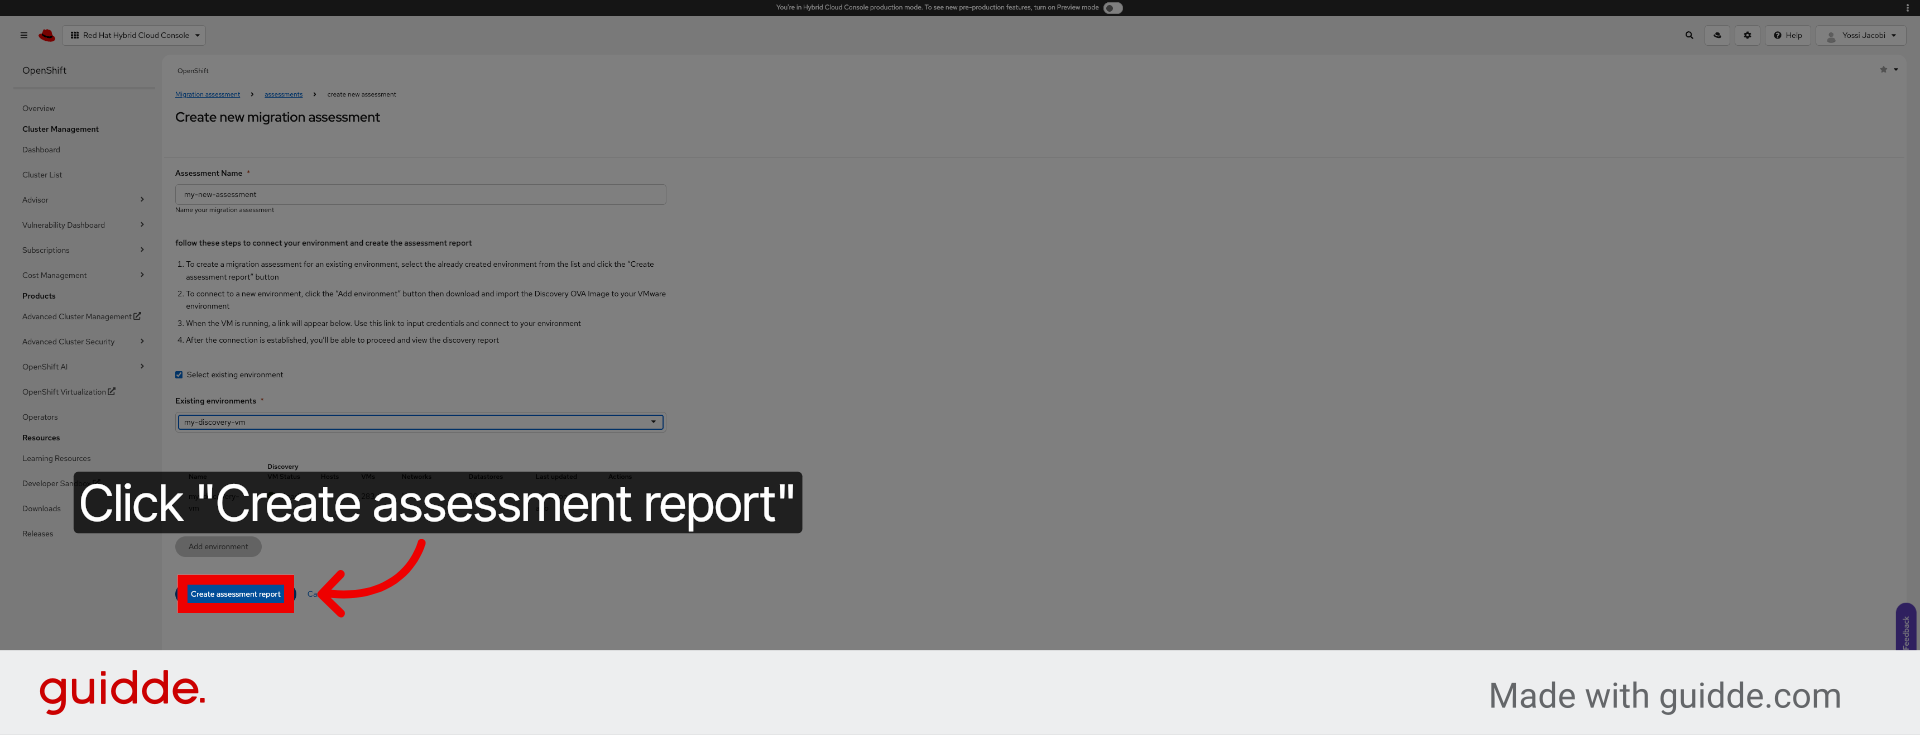
30. Create Assessment Report
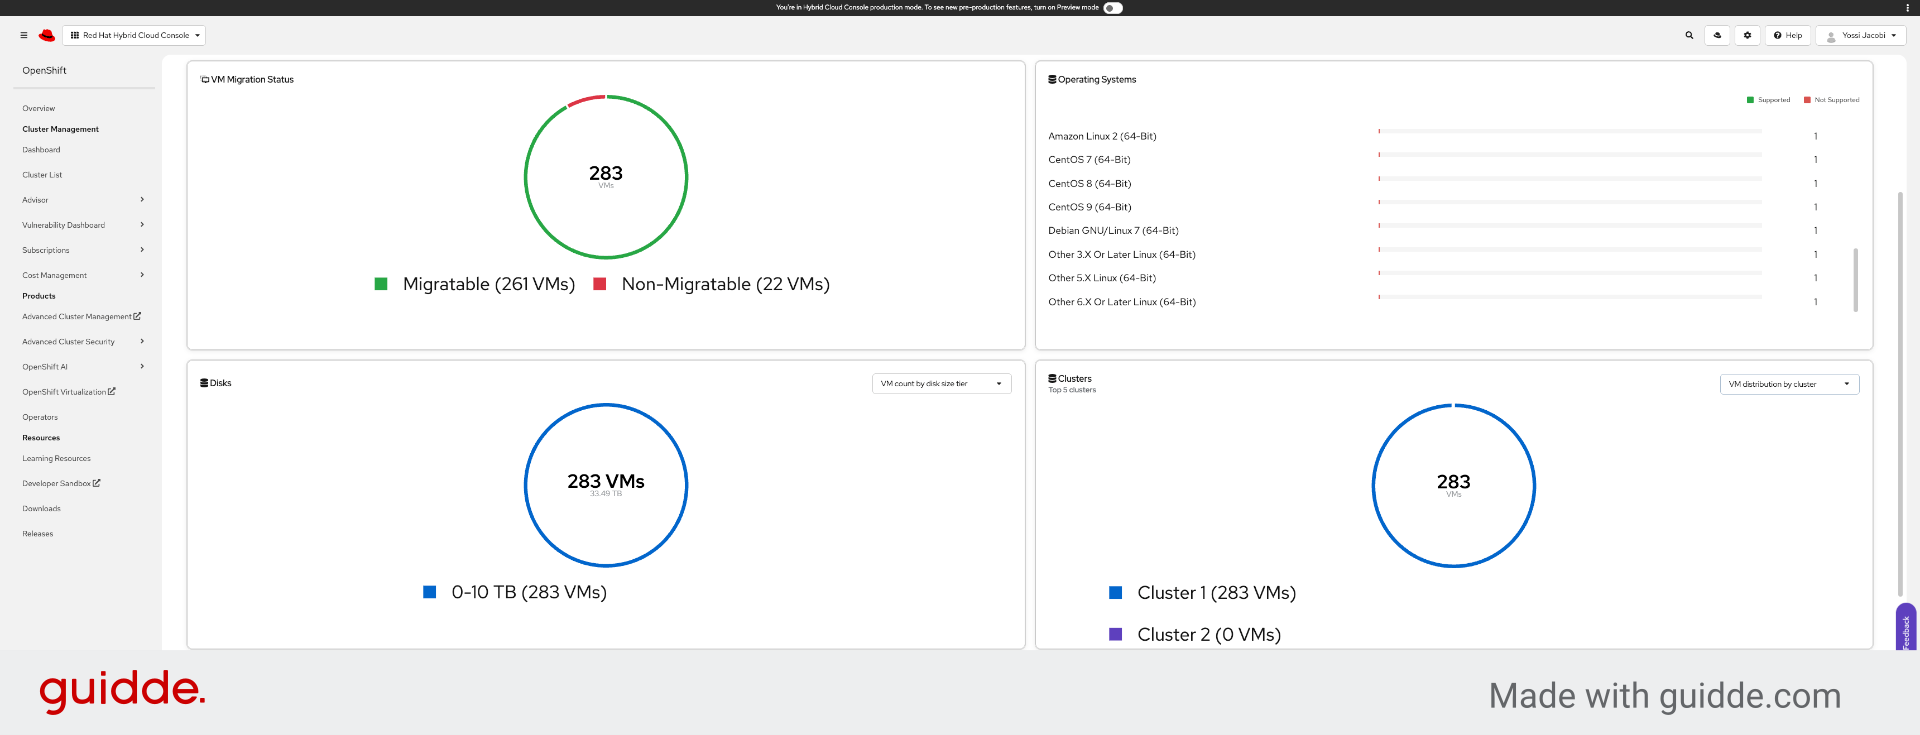
31. View Cluster Overview
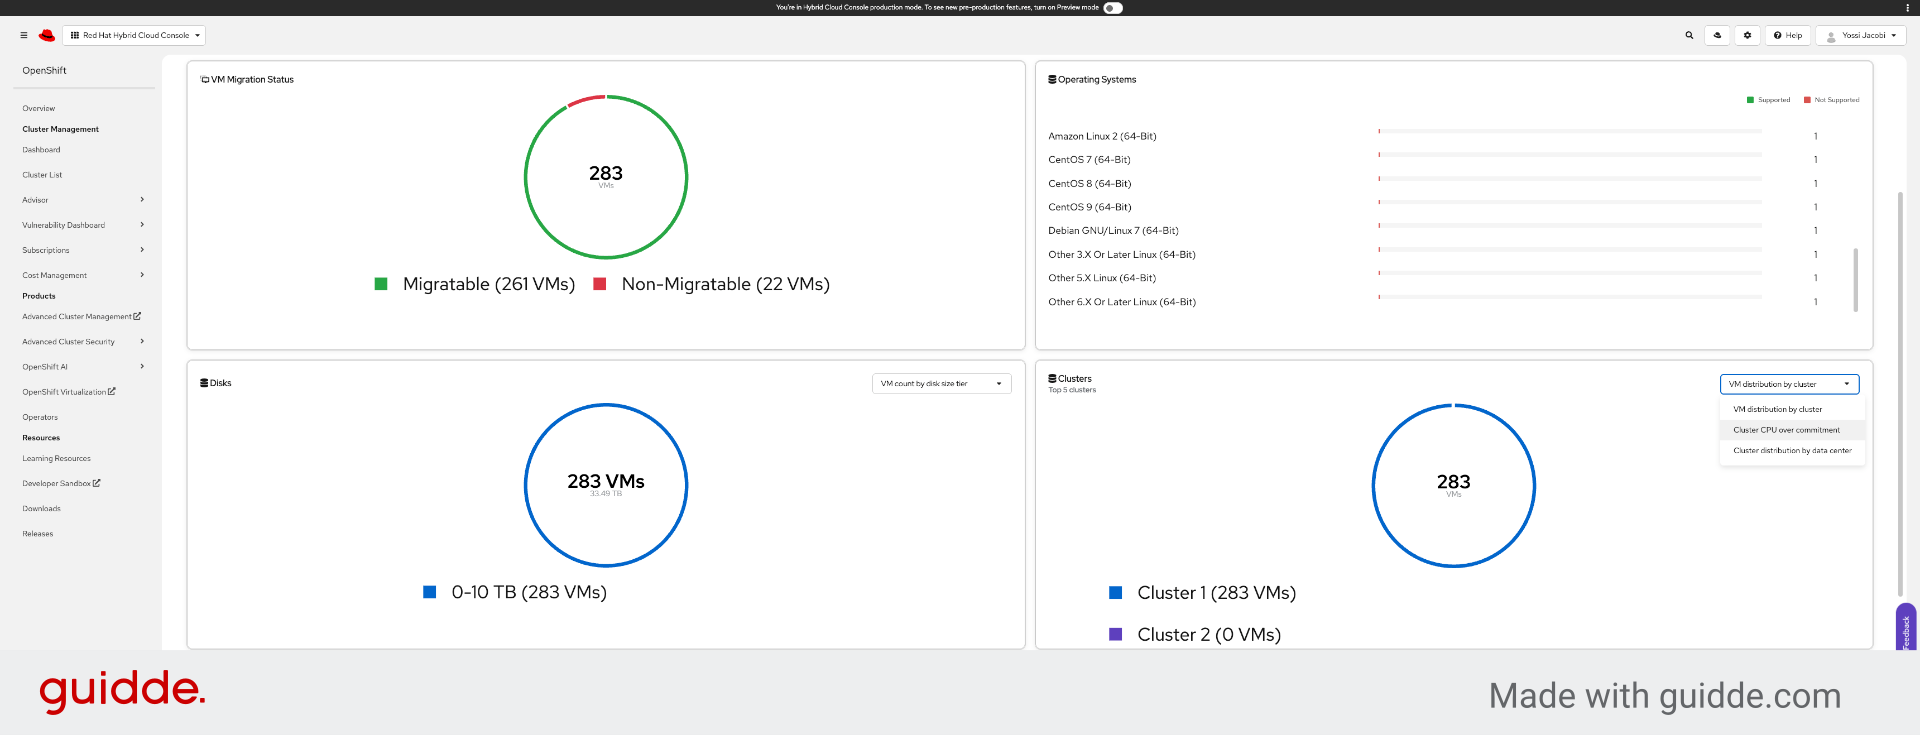
32. Access VM Distribution by Cluster
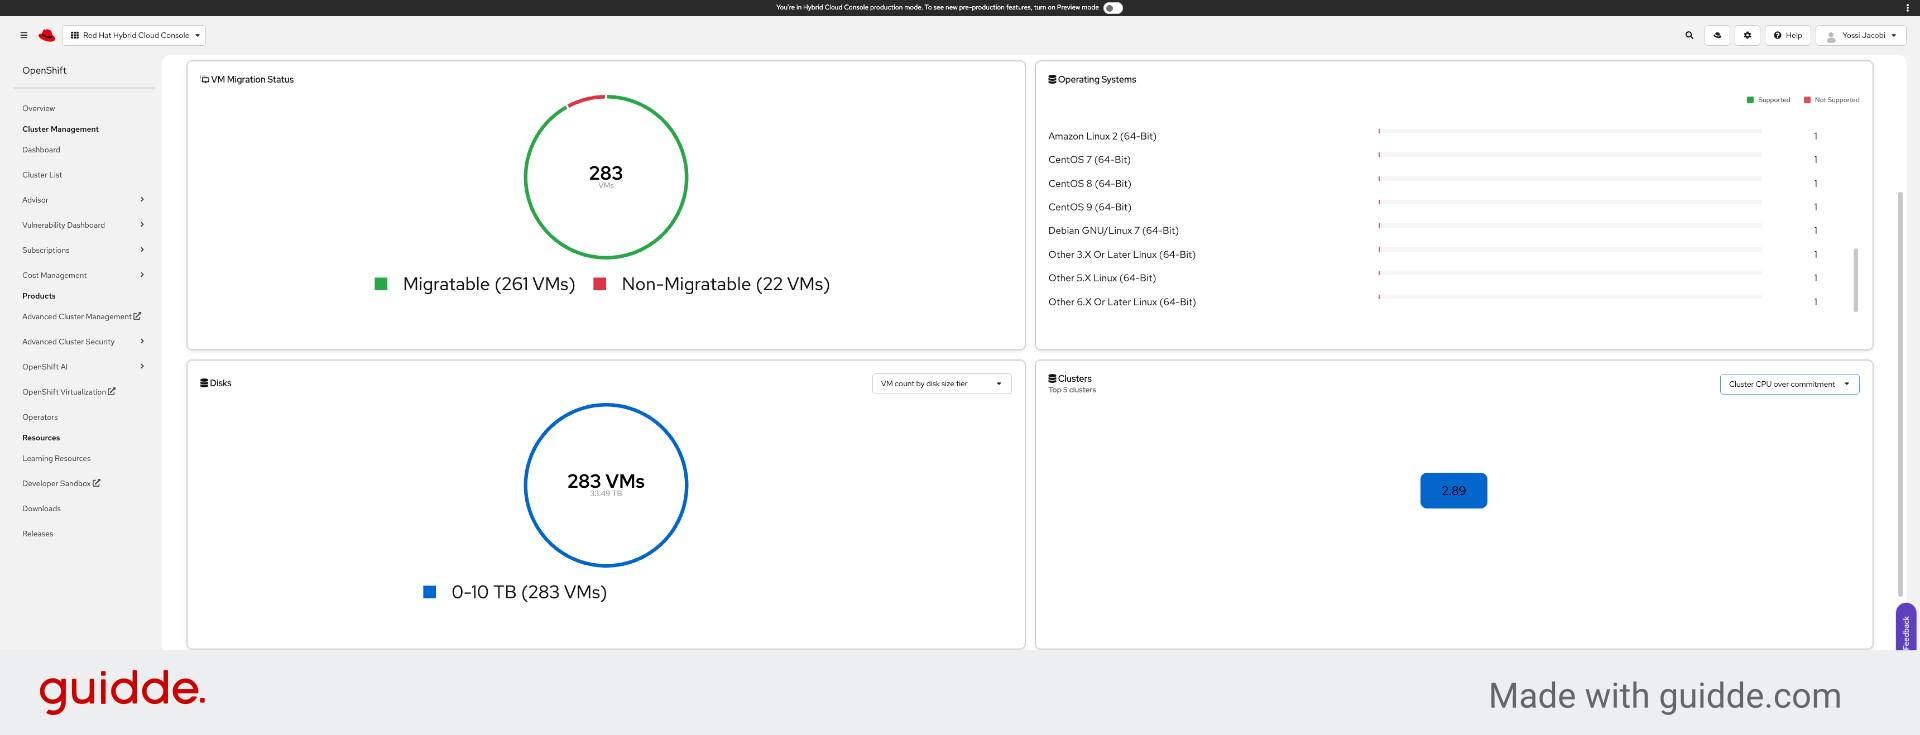
33. Review Cluster CPU Overcommitment

34. Revisit CPU Overcommitment Details
35. Analyze Cluster Distribution
36. Check VM Count by Disk Size

37. Review VM Count by Disk Type
38. Click “VM count by disk type”
